📖 B. INTRODUCTION
The holiday season is built on traditions, and there is nothing quite as special as receiving a beautifully wrapped package topped with a handmade touch. This year, trade in the disposable paper labels for something they can keep forever: crocheted Christmas gift tags. These charming little appliques transform any simple kraft paper box or gift bag into a bespoke, rustic presentation that doubles as a bonus gift. Once the presents are unwrap, your loved ones can slip a hook through the baker’s twine and hang these motifs right onto their Christmas tree!
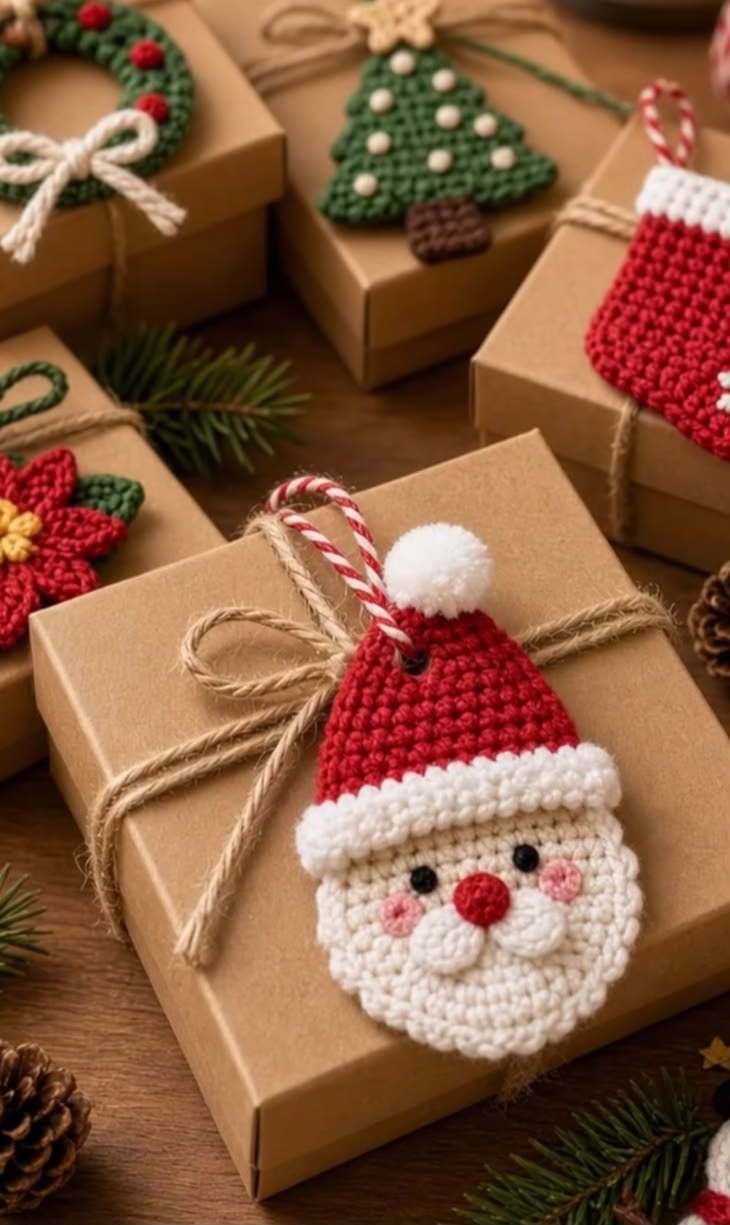
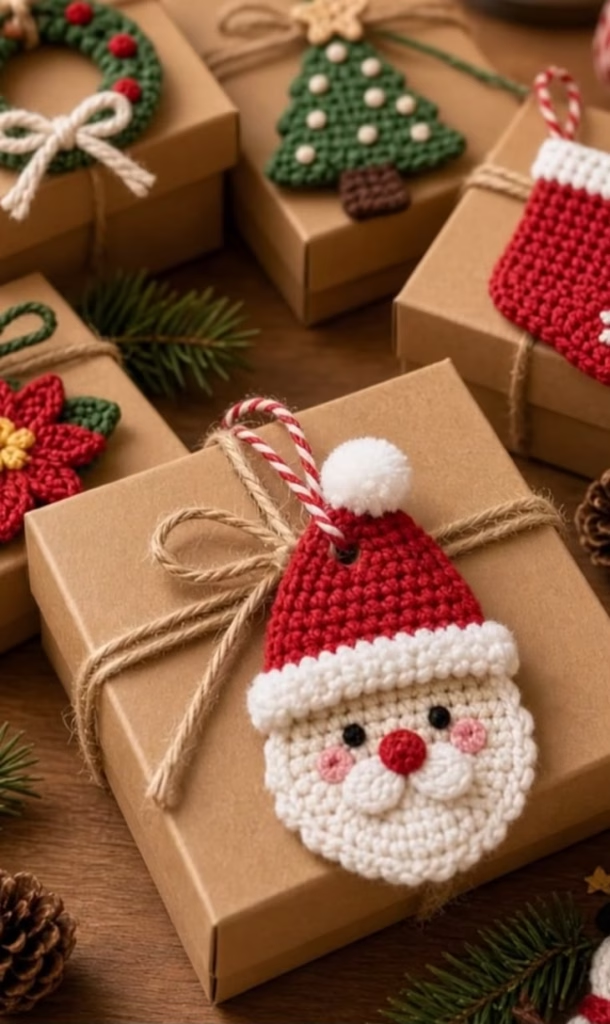
This comprehensive pattern walks you through five quintessential holiday designs: a jolly Santa Claus face, a classic winter pine tree, a festive berry wreath, a cozy holiday stocking, and a vibrant poinsettia bloom. They work up incredibly quickly, making them the ultimate stash-busting project for those leftover bits of red, green, and white cotton yarn you have lingering from larger projects.
Whether you are decorating a mountain of presents, hosting a seasonal craft fair, or looking for beautiful, photogenic makes to share with your online crafting community, this collection has you covered. By keeping the designs entirely flat, they sit perfectly flush against boxes and photograph beautifully, ensuring your holiday preparations look as joyful as they feel.
🔍 C. MAIN PATTERN OVERVIEW
This pattern collection includes five distinct, flat-lay applique designs:
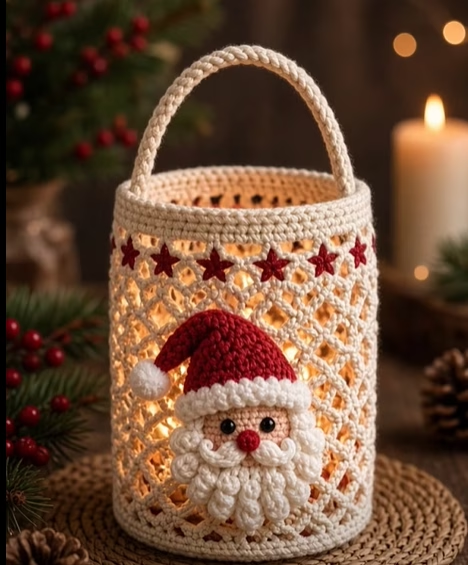
- Santa Claus: A multi-part motif featuring a cream face, textured white beard, and a red stocking cap with a built-in eyelet hole for your hanging string. Complete with rosy pink cheeks and a bright red button nose.
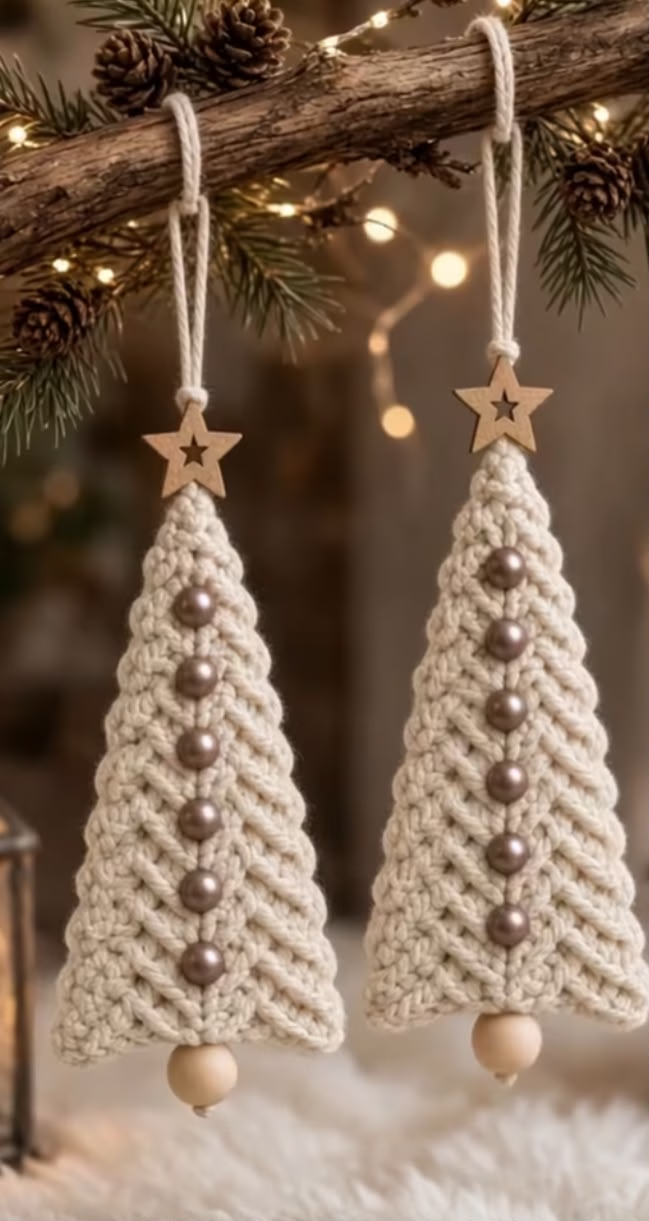
- Classic Pine Tree: A simple, bottom-up triangle adorned with contrasting French knot “ornaments” and a rustic brown trunk.
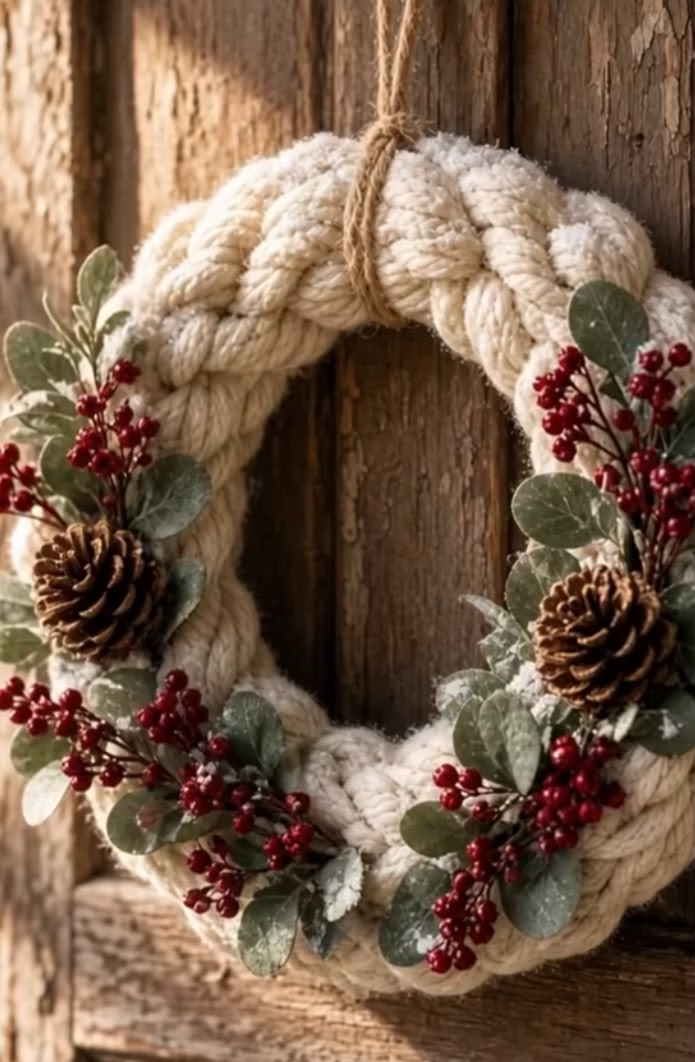
- Mini Wreath: A quick circular motif worked with a picot-style edge to mimic pine needles, dotted with red berries and topped with a simple chained bow.
- Holiday Stocking: A traditional toe-up flat stocking profile featuring a textured, snowy white cuff.
- Poinsettia Bloom: A layered floral applique radiating from a golden yellow center, featuring pointed red petals and green leaves.
All motifs are designed to be relatively uniform in size, creating a beautifully cohesive aesthetic when used together under the tree.
🎯 D. SKILL LEVEL
Advanced Beginner / Easy
These motifs are highly accessible but require comfort with working in tight spaces and manipulating small parts.
Techniques Involved:
- Working in a Magic Ring (MR)
- Working in flat rows and continuous rounds
- Basic stitches: sc, hdc, dc, tr
- Special stitches: puff stitches, simple shells
- Basic color changing
- Simple hand embroidery (French knots)
- Sewing multiple flat components together
📏 E. FINISHED SIZE
When made with the recommended DK weight cotton yarn and a 3.0mm hook, each gift tag measures approximately 3.5 to 4.5 inches (9 to 11.5 cm) at its longest point.
Size Modifiers:
You can easily adjust the scale of these tags. For miniature tags (ideal for small jewelry boxes), drop down to a Fingering weight (Super Fine #1) yarn and a 2.25mm hook. For jumbo tags that act as bold statement pieces on large gift bags, use Worsted (Medium #4) or Bulky weight yarn with a 4.5mm or 5.0mm hook.
🧮 F. GAUGE
Gauge is not critical for this project.
However, because these are appliques intended to lay flat against a box, your tension should be tight enough that the stitches look neat and do not show daylight between them, but relaxed enough that the fabric doesn’t aggressively curl inward. If your motifs are buckling or turning into bowls, increase your hook size by 0.5mm.
🧶 G. REQUIRED YARN AMOUNTS
These motifs use very little yarn, making them perfect scrap busters. The following estimates are for completing one of each of the 5 motifs in DK weight yarn:
- Red (Main): Approx. 25 yards (23 meters)
- White (Main): Approx. 20 yards (18 meters)
- Green (Main): Approx. 20 yards (18 meters)
- Cream / Beige (Accent): Approx. 10 yards (9 meters)
- Brown (Accent): Approx. 2 yards (1.8 meters)
- Pink (Accent): Approx. 2 yards (1.8 meters)
- Yellow (Accent): Approx. 1 yard (0.9 meters)
🧰 H. MATERIALS
- Yarn: DK weight cotton or cotton-blend yarn in Red, White, Green, Cream/Beige, Brown, Pink, and Yellow. (Cotton is highly recommended over acrylic as it blocks perfectly flat and eliminates fuzzy halos, giving the tags a clean, modern look).
- Hook: 3.0mm crochet hook (or size needed to achieve a tight, flat fabric).
- Eyes: 4mm or 5mm black safety eyes, OR black embroidery floss to sew French knots.
- Pom-Pom: One small (10mm) pre-made white craft pom-pom for Santa’s hat.
- Hardware: Red and white baker’s twine for tying.
- Tools: Yarn needle (tapestry needle) with an eye large enough for your yarn, sharp scissors, sewing pins.
Safety Note: If these tags will be gifted to households with children under 3 and repurposed as toys, do not use plastic safety eyes or glued craft pom-poms. Embroider the eyes and use yarn to crochet a small bobble for the hat tip instead to prevent choking hazards.
🔤 I. ABBREVIATIONS – US TERMS
- MR: Magic Ring
- ch: chain
- sl st: slip stitch
- sc: single crochet
- hdc: half double crochet
- dc: double crochet
- tr: treble crochet
- inc: single crochet increase (2 sc in the same stitch)
- dec: single crochet decrease (sc 2 together)
- Puff: Puff stitch (Yarn over, insert hook into stitch, yarn over and pull up a loop, repeat 3 more times in the same stitch. Yarn over and pull through all loops on hook, ch 1 to close).
- st(s): stitch(es)
- FO: Fasten Off
- ( … ) x #: repeat the sequence inside the parentheses the specified number of times
- [ … ]: total stitch count at the end of the round/row
📝 J. NOTES BEFORE YOU BEGIN
- Turning Chains: Unless otherwise specified, the ch 1 at the beginning of a row does not count as a stitch.
- Right Side / Wrong Side: Because these lay flat against a surface, there is a distinct “Right Side” (front) and “Wrong Side” (back). Ensure you weave all your tails entirely on the Wrong Side so the back stays relatively neat.
- Joining Rounds: Some circular components (like Santa’s face) are worked in joined rounds (sl st to the first st, ch 1) rather than continuous spirals. This keeps the edges perfectly perfectly symmetrical for a flat applique.
- Sewing: Leave long tails (about 8-10 inches) when fastening off components that need to be sewn onto a base piece.
🪡 K. COMPLETE PATTERN
🎅 Santa Claus Tag Motif
🧠 Santa’s Face
Yarn: Cream / Beige
Starting point: Center of the face, worked in joined rounds.
R1: MR, 6 sc into ring. Sl st to first sc, ch 1. [6]
R2: inc in each st around. Sl st, ch 1. [12]
R3: (1 sc, inc) x6. Sl st, ch 1. [18]
R4: (2 sc, inc) x6. Sl st, ch 1. [24]
R5: (3 sc, inc) x6. Sl st, ch 1. [30]
R6: (4 sc, inc) x6. Sl st, ch 1. [36]
FO and weave in ends.
摸 Santa’s Beard
Yarn: White
Starting point: Join yarn to any stitch on the edge of the completed Face.
R1: Working along the bottom edge of the face to create the beard texture: (ch 2, 2 hdc in same st, skip 1 st, sl st in next st) x9.
Note: This creates 9 small textured scallops along exactly half of the face.
FO and weave in ends.
🎓 Santa’s Hat
Yarn: Red
Starting point: Worked flat in rows from the bottom brim up to the tip.
Row 1: Ch 15. Starting in 2nd ch from hook, sc 14. Turn. [14]
Row 2: ch 1, dec, sc 10, dec. Turn. [12]
Row 3: ch 1, sc 12. Turn. [12]
Row 4: ch 1, dec, sc 8, dec. Turn. [10]
Row 5: ch 1, sc 10. Turn. [10]
Row 6: ch 1, dec, sc 6, dec. Turn. [8]
Row 7: ch 1, sc 8. Turn. [8]
Row 8: ch 1, dec, sc 4, dec. Turn. [6]
Row 9: ch 1, sc 6. Turn. [6]
Row 10: ch 1, dec, sc 2, dec. Turn. [4]
Row 11: ch 1, sc 4. Turn. [4]
Row 12: ch 1, dec x2. Turn. [2]
Row 13 (Eyelet Hole): ch 1, sc 1, ch 3, skip the center space, sc 1.
FO, leaving a long tail for sewing the hat to the face.
☁️ Hat Brim
Yarn: White
Starting point: Joined to the bottom right corner of the Red Hat base (Row 1).
Row 1: Ch 1. Work 1 Puff stitch into each of the 14 starting chains across the bottom of the hat. [14 Puffs]
FO and weave in ends.
🔴 Cheeks (Make 2) & Nose (Make 1)
Yarn: Pink for cheeks, Red for nose.
R1: MR, 6 sc into ring. Sl st to first st. [6]
FO, leaving a long tail for sewing. Pull the magic ring exceptionally tight so there is no center hole.
🎄 Classic Pine Tree Tag Motif
🌲 Tree Body
Yarn: Green
Starting point: Worked flat in rows, bottom up.
Row 1: Ch 15. Starting in 2nd ch from hook, sc 14. Turn. [14]
Row 2: ch 1, dec, sc 10, dec. Turn. [12]
Row 3: ch 1, sc 12. Turn. [12]
Row 4: ch 1, dec, sc 8, dec. Turn. [10]
Row 5: ch 1, sc 10. Turn. [10]
Row 6: ch 1, dec, sc 6, dec. Turn. [8]
Row 7: ch 1, sc 8. Turn. [8]
Row 8: ch 1, dec, sc 4, dec. Turn. [6]
Row 9: ch 1, sc 6. Turn. [6]
Row 10: ch 1, dec, sc 2, dec. Turn. [4]
Row 11: ch 1, sc 4. Turn. [4]
Row 12: ch 1, dec x2. Turn. [2]
Row 13: ch 1, dec. [1]
Row 14 (Eyelet Hole): ch 4, sl st back into the same st to create a loop for the twine.
FO and weave in ends.
🪵 Tree Trunk
Yarn: Brown
Starting point: Join to the center 4 stitches of Row 1 on the Tree Body.
Row 1: ch 1, sc 4 across the center. Turn. [4]
Rows 2-3: ch 1, sc 4. Turn. [4]
FO and weave in ends.
🎀 Mini Wreath Tag Motif
🌿 Wreath Base
Yarn: Green
Starting point: Worked in joined rounds over a starting chain ring.
R1: Ch 16, sl st to first ch to form a large ring.
R2: ch 1, work 24 sc directly around the ring (enclosing the chains). Sl st to first sc. [24]
R3 (Needle Texture): (sc 1, ch 3, sl st into the 1st ch to make a picot, sc in next st) x12. Sl st to finish.
FO and weave in ends.
🎗️ White Bow
Yarn: White
Row 1: Ch 25. FO.
Tie this chain string into a neat little bow, trim the ends securely, and set aside to sew onto the wreath.
🧦 Holiday Stocking Tag Motif
🧶 Stocking Body
Yarn: Red
Starting point: Worked flat in rows, from the top down to the toe.
Row 1: Ch 9. Starting in 2nd ch from hook, sc 8. Turn. [8]
Rows 2-8: ch 1, sc 8. Turn. [8]
Shape Heel:
Row 9: ch 1, sc 6. Leave last 2 sts unworked. Turn. [6]
Row 10: ch 1, sc 6. Turn. [6]
Row 11: ch 1, sc 6, ch 3. Turn. [6 sts + 3 chs]
Shape Foot:
Row 12: Starting in 2nd ch from hook, sc 2 in the chains, sc 6 across the body. Turn. [8]
Rows 13-15: ch 1, sc 8. Turn. [8]
Shape Toe:
Row 16: ch 1, dec, sc 4, dec. Turn. [6]
Row 17: ch 1, dec, sc 2, dec. [4]
FO and weave in ends.
❄️ Stocking Cuff
Yarn: White
Starting point: Join yarn to the top right corner of the stocking (Row 1).
Row 1: ch 1, sc 8 across. Turn. [8]
Row 2 (Texture): ch 2, dc in first st, (sl st in next st, dc in next st) across, ending with a sl st.
FO, leaving a tail. Fold the cuff down over the red body and sew it in place so it lays permanently flat.
🌸 Poinsettia Tag Motif
🟡 Flower Center
Yarn: Yellow
R1: MR, 6 sc into ring. Sl st to first st, ch 1. [6]
R2: inc in each st around. Sl st. [12]
FO and weave in ends.
🌺 Red Petals
Yarn: Red
Starting point: Join yarn to any stitch on the Yellow Center.
R1: (ch 6, working back down the chain: sl st in 2nd ch from hook, sc in next, hdc in next, dc in next 2, sl st into the next stitch on the yellow center) x12.
You will have 12 overlapping red petals radiating from the center.
FO and weave in ends.
🌿 Green Leaves
Yarn: Green
Starting point: Worked separately.
Row 1: ch 8. Working back down the chain: sl st in 2nd ch from hook, sc, hdc, dc 2, hdc, sc.
FO, leaving a long tail to sew behind the red petals. Make 2 to 3 leaves as desired.
🎨 L. STYLING / ASSEMBLY / STABILITY / FINAL SHAPING
Creating a recognizable, clean silhouette requires precise assembly. Take your time pinning before sewing!
🎅 Santa Assembly Protocol:
- Placement: Lay the Cream Face flat. Position the Red Hat so the bottom edge overlaps the top quarter of the face. The white Puff Brim should hide the transition line perfectly.
- Sewing: Whip stitch the hat onto the face securely.
- Facial Details: Insert 4mm/5mm safety eyes (or embroider French knots) roughly between rounds 3 and 4 of the face, spacing them about 4 stitches apart.
- Blush & Nose: Sew the Red Nose exactly centered immediately below the eyes. Sew the Pink Cheeks diagonally below the outside corners of the eyes.
- Finishing: Use hot glue or a sturdy thread to attach the white craft pom-pom to the folded tip of the red hat.
🎄 Wreath, Tree, and Floral Assembly:
- Wreath: Sew or glue the tied white chain bow to the top center of the wreath. Thread a yarn needle with red yarn and create 5 to 6 French knots scattered evenly around the green ring for berries.
- Tree: Thread a yarn needle with white yarn and scatter French knots across the green body to act as ornaments.
- Poinsettia: Arrange the green leaves behind the red petals so they peek out aesthetically, and sew them to the back of the yellow center.
📸 Styling for Aesthetics and Social Media:
Because these are inherently 2D objects, they look spectacular in flat-lay photography. If you manage social media pages dedicated to your craft projects, these appliques are perfect for batch-creating and filming. Try capturing your wrapping and styling process from a top-down angle, cropping your videos into a 9:16 vertical ratio. They make highly engaging, satisfying reels!
To attach them to a gift, simply thread an 8-inch piece of rustic red-and-white baker’s twine through the top loop (or hat eyelet) of your motif, tie a simple loop knot, and slide it onto the main ribbon of your wrapped box.
💡 M. HELPFUL CROCHET TIPS
- 💡 Block for Perfection: Cotton yarn benefits immensely from blocking. Pin your finished tags down on a blocking mat, spray lightly with water, and let them dry overnight. This stops the points of the tree and poinsettia petals from curling.
- 💡 Invisible Finishes: When finishing circular motifs (like Santa’s cheeks or the flower center), use an invisible needle join rather than a slip stitch to prevent a harsh, bumpy knot from interrupting the perfect circle.
- 💡 Tuck Your Tails Thoroughly: Because the backs of these tags will rest against wrapping paper, make sure your woven ends are trimmed completely flush so they don’t snag or cause the applique to lay crooked.
- 💡 Stiffening Option: If your tension is loose and your tags feel too floppy, you can spray the back side only with a light coat of fabric stiffener or heavily diluted craft glue and let it dry.
- 💡 Mind the Twine Hole: When crocheting the eyelet holes (like on Santa’s hat or the tree top), ensure your ch-3 spaces are large enough to easily thread your chosen ribbon or twine. Check this before fastening off!
- 💡 Consistent Cheeks: When making tiny circles like the cheeks, the magic ring can sometimes look lopsided if not pulled completely taut. Pull the tail as tight as the yarn will safely allow to eliminate the center hole.
🧼 N. CARE INSTRUCTIONS
Since these are seasonal decorative items, they rarely require heavy washing. If a tag gets smudged, spot-clean it with a damp cloth and a drop of mild detergent. Do not machine wash, especially if you have used hot glue to attach the bow or pom-pom, as the heat and agitation will destroy the applique. When the holidays are over, store them perfectly flat in a rigid envelope or small box in a cool, dry place to prevent them from becoming misshapen under heavy ornaments.
❓ R. FAQ
❓ Can I use acrylic yarn instead of cotton?
Yes! Acrylic yarn works fine and comes in brilliant holiday colors. However, acrylic tends to have a fuzzier halo and does not block flat as easily as cotton. If using acrylic, you may want to steam-block the pieces lightly (do not touch the iron to the yarn, just hover!) to kill the yarn slightly so it lays totally flat.
❓ How do I attach these if I don’t want to use twine?
If you prefer a seamless look, you can stick a square of double-sided foam tape to the back of the applique and press it directly onto the wrapping paper.
❓ My Santa’s face is doming instead of laying flat. What went wrong?
Doming in flat circles usually means your tension is too tight for the hook you are using, or you missed an increase stitch. Try dropping your tension slightly, or go up half a hook size for the circular components.
❓ Can I make these double-sided?
Absolutely. If you want them to be traditional ornaments that spin freely on a tree without showing an “ugly back,” simply crochet two identical pieces of the motif (e.g., two tree bodies), place them wrong-sides together, and single crochet around the perimeter through both thicknesses to join them.
❓ Is it safe to use these as gift tags for baby gifts?
If the gift is for a baby or toddler who might grab the tag, immediately replace any plastic safety eyes with embroidered yarn French knots, and securely sew (do not glue) a yarn bobble to Santa’s hat instead of a store-bought craft pom-pom to ensure there are zero choking hazards.