Introduction
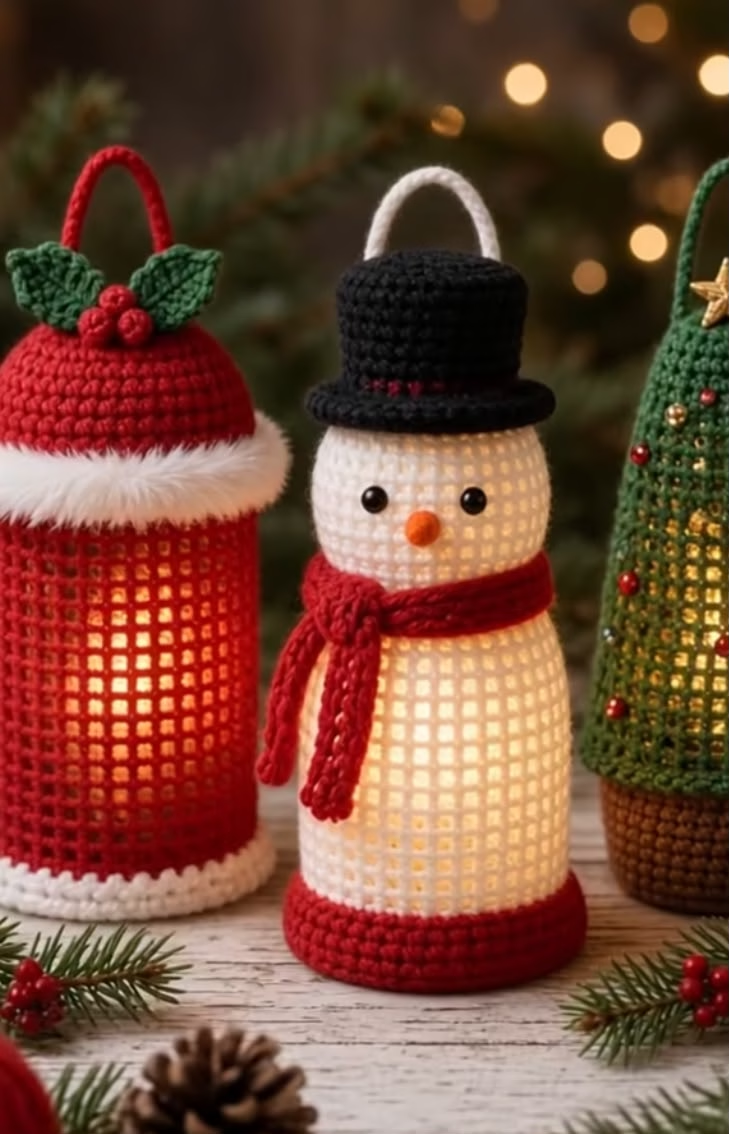
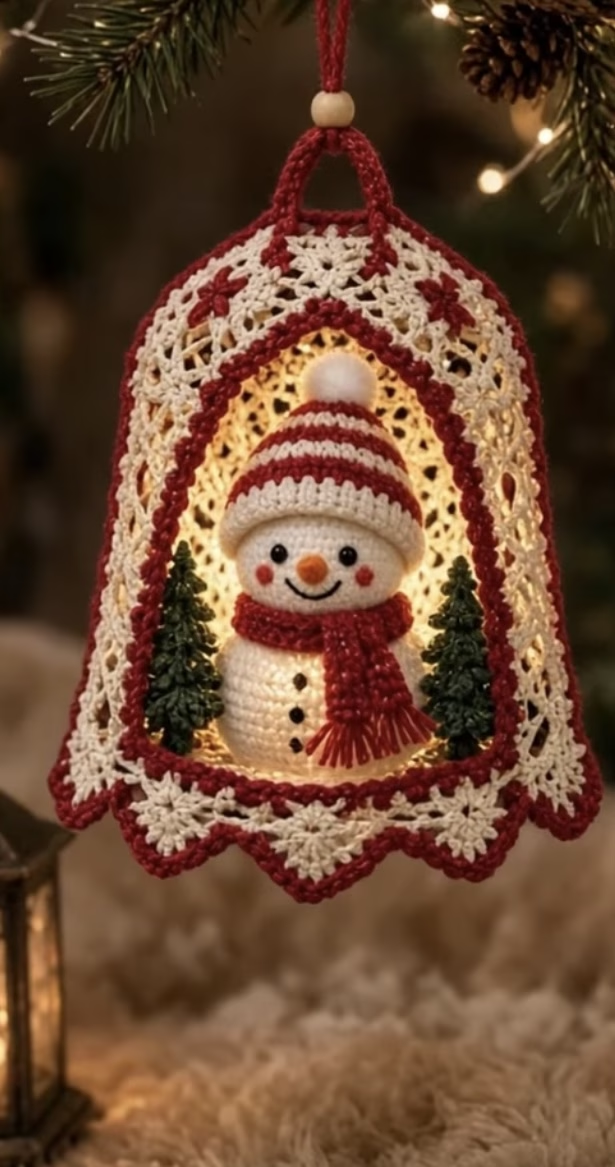
This beautiful crochet ornament captures the magic of a snowy Christmas in the most delightful way. Featuring a cheerful snowman with a striped red and white hat, a matching scarf, and rosy cheeks, this ornament sets him inside a lacy cream dome. The dome structure stands out with delicate star motifs and a bold red edging, finished off with a sturdy loop for hanging on your Christmas tree. Nestled at the snowman’s sides are two miniature dark green pine trees, adding extra festive charm. The texture combines classic amigurumi smoothness for the characters and finely worked lacy stitches for the dome. Soft twinkling lights inside the dome (optional) make it glow beautifully on your tree or mantle. Not only is this ornament a show-stopper, but it’s also a lovely project for anyone who wants to add a handcrafted, heirloom-quality touch to their holiday decorations.
This project is ideal for making a keepsake, a cherished family decoration, or a heartfelt gift. Creating the multiple elements—the lacy dome, the amigurumi snowman, and the mini trees—keeps the making process continually engaging. You’ll learn techniques from amigurumi shaping to lacy motif construction, making this a rewarding and decorative crocheted holiday scene.
Project Overview
This ornament is composed of several components: the lacy dome is crocheted in the round as a single piece, worked from the top down with open star motifs and contrasting border. The dome is joined at the base, forming an archway window at the front. The snowman and the two trees are worked separately in amigurumi style and then attached at the base inside the dome. The hanging loop is crocheted last and secured firmly at the top of the dome for display. Assembly brings all the components together for a cohesive festive display.
Skill Level
Intermediate – This project combines amigurumi shaping, simple embroidery (for the face), color changes, lacy openwork, and joining methods. Some experience working in the round and familiarity with both amigurumi and motif construction is recommended.
Materials
- Yarn: DK (light worsted, #3) weight yarn in the following amounts and colors (approximate):
- Cream/Off-white: 60g (main dome, snowman body & head)
- Red: 25g (dome outline, scarf, snowman hat stripes)
- Dark Green: 10g (mini trees)
- Orange: small amount (snowman nose)
- Black: small amount (eyes, mouth)
- Pink or Red: small amount (cheeks)
- Crochet hook: 2.75mm (C) for amigurumi, 3.25mm (D) for lace dome
- Tapestry needle (for sewing and embroidery)
- Stitch markers (especially for working in the round and motif joins)
- Polyester fiberfill stuffing
- Small wooden bead (optional, for loop decoration)
- Scissors
- Optional: battery-operated mini LED tea light for inner glow
Finished Size
- Approximate dome ornament dimensions: 15 cm tall x 11 cm wide (6″ tall x 4.25″ wide)
- Size can be adjusted by changing yarn weight and hook size. For a larger ornament, use worsted weight and larger hooks.
Gauge
- Amigurumi (snowman): 24 sc x 28 rounds = 10 cm (4″)
- Lacy dome: Each star motif (before joining) measures about 2.5 cm (1″) across.
- Small differences in gauge are fine for this decorative project, but dome and snowman proportions should be maintained.
Stitches and Abbreviations
- ch – chain
- sl st – slip stitch
- sc – single crochet
- hdc – half double crochet
- dc – double crochet
- tr – treble crochet
- inc – increase (2 sc in same st)
- dec – decrease (sc 2 together)
- MR – magic ring
- FLO – front loop only
- BLO – back loop only
Important Pattern Notes
- Amigurumi pieces (snowman and trees) are worked in a continuous spiral; use stitch marker to mark first stitch of each round.
- Lacy dome is worked in joined rounds unless otherwise indicated; chains at beginning of rounds count as first stitch unless stated otherwise.
- Color changes: Always change to new color on last yarn-over of final stitch before the new color is required.
- For neat finish, weave in ends as you work sections, especially before assembly.
- Right side should consistently face out on all pieces for uniform appearance.
- Stuff amigurumi pieces moderately, not too firmly, to keep shape but allow for some squish.
Detailed Crochet Pattern
Part 1: Snowman (Amigurumi)
Use DK yarn and 2.75mm hook. Work in a continuous spiral unless otherwise noted. Begin with cream/off-white.
Body (Work from bottom up):
- Round 1: MR, 6 sc in ring (6)
- Round 2: inc in each st (12)
- Round 3: (sc in next, inc) repeat around (18)
- Round 4: (sc in next 2, inc) repeat around (24)
- Round 5: (sc in next 3, inc) repeat around (30)
- Rounds 6-10: sc around (30 each round) (Straight sides for snowman’s belly)
- Round 11: (sc in next 3, dec) repeat around (24)
- Round 12: (sc in next 2, dec) repeat around (18) – Start stuffing
- Round 13: (sc in next, dec) repeat around (12)
- Round 14: dec around (6) – Fasten off, weave shut.
Head:
- Round 1: MR, 6 sc (6)
- Round 2: inc in each st (12)
- Round 3: (sc in next, inc) repeat (18)
- Round 4: (sc in next 2, inc) repeat (24)
- Rounds 5-8: sc around (24)
- Round 9: (sc in next 2, dec) repeat (18)
- Round 10: (sc in next, dec) repeat (12) – Stuff head firmly
- Round 11: dec around (6) – Fasten off, leaving long tail for sewing.
Assembly (body & head):
- Sew head neatly to body, positioning so face will be centered toward the dome opening.
Arms (Make 2):
- With cream, ch 6, turn, sl st in 2nd ch and each across (5 sl sts) — for simple stubby arms, or use brown and make branch-shaped with only ch and knots if desired. Sew to sides of body, lower than head join.
Snowman Face:
- Eyes: With black, embroider two French knots or sew two small black beads/buttons. Place evenly apart just above midline of head.
- Mouth: With black, backstitch a simple smile.
- Cheeks: With pink or red, embroidery floss or thin yarn, stitch 2 small dots under the eyes.
- Nose: With orange yarn, embroider or crochet a tiny carrot (ch 3, sl st back); sew securely to center.
Scarf:
- With red yarn, ch 25. Row 1: sc in 2nd ch from hook and each ch across (24 sc). Fasten off, weave ends and fringe edges. Wrap around neck and sew in place.
Hat (worked in rounds):
- With red, MR, 6 sc (6)
- Round 2: With cream, inc in each st (12)
- Round 3: With red, (sc, inc) repeat (18)
- Round 4: With cream, sc around (18)
- Rounds 5-6: alternate red and cream stripes, sc around (18)
- Round 7: With red, BLO, sc around (18) – this forms hat edge.
- Optional: add a small white pompom or crochet one (MR, 6 sc, sl st to first, fasten off, pull to close).
- Stuff hat lightly. Sew hat to top of head, securing well.
Part 2: Mini Pine Trees (Make 2)
- With dark green, MR, 5 sc (5)
- Round 2: (sc, inc) around (8)
- Round 3: sc around (8)
- Round 4: (sc, inc) around (12)
- Round 5: sc around (12)
- Round 6: (sc, inc) around (18)
- Round 7-8: sc around (18). Stuff firmly. Fasten off, close up base, shaping tree by pulling tip slightly. Optionally, embroider white “snow” tips or add beads. Flatten base for easier gluing/sewing.
Part 3: Lacy Dome Structure
Use cream for main color and red for contrasting edge. Use 3.25mm hook for more openwork effect. This part is worked from the top down in joined, open rounds, creating an arched front window by skipping motifs at the front and continuing down the sides/back.
Top Ring and Start:
- With red, ch 18, sl st to first ch to form ring. This will be the dome top/handle loop. Continue working into ring.
- Round 1: Ch 1 (does not count as st), work 30 sc around ring, sl st to join.
Dome Sides (Star Motifs):
- Switch to cream. Round 2: Ch 4 (counts as tr), (skip 1 st, tr in next, ch 1) around — 15 tr sts separated by ch 1 spaces (total 15 tr, 15 ch-1 sps). Sl st join last ch-1 to 3rd ch of starting ch-4.
- Round 3: Sl st in next ch-1 sp, (ch 3 [counts as dc], 2 dc, ch 2, 3 dc) in same sp (first “star” petal made), *skip next tr, (3 dc, ch 2, 3 dc) in next ch-1 sp; repeat from * around, sl st to 3rd ch of beg ch-3. (15 shells)
- Round 4: Sl st to ch-2 sp, (ch 3, 4 dc, ch 2, 5 dc) in same sp (first large petal made). In each remaining ch-2 sp: (5 dc, ch 2, 5 dc). Sl st join. (15 petals)
- Round 5: Switch to red. Sc in same sp, ch 4, *sc in next ch-2 sp, ch 4; repeat from * around, sl st join. (15 ch-4 lps)
Shaping the Front Opening:
- To create the open window, in following rounds work motifs across half (approx 7 petals) and then work only along the sides and back. On the next round, ch 1, (sc, hdc, dc, hdc, sc) in each ch-4 loop, working only around 10 loops (skipping 5 at the front for opening). Finish with sl st, fasten off and join with cream at edge for a smooth front arch.
Height and Size Adjustment:
- Add another round or two to extend dome if necessary, working the same scheme and maintaining front opening.
Border (Red Scalloped Edge):
- With red, attach at lower edge. Work: (sc, ch 3, sc) in each point of motifs around lower edge (including up and down each side of the archway). This forms a scalloped, star-like edge. Fasten off and weave in ends.
Part 4: Assembly and Finishing Touches
- Block the lacy dome gently, pinning the archway open and shaping the star points, using spray starch if needed for stiffness.
- With sturdy sewing thread or yarn, sew or glue the snowman body securely to the center inside base of the dome; face should be framed by the open arch.
- Sew or glue the two mini trees to either side of the snowman, angling slightly outward.
- If desired, run a loop of red yarn through the top ring and slide on a bead for embellishment.
- Weave in all loose ends carefully inside the dome and on the amigurumi pieces.
- Optional: Place a battery-operated tea light or mini string lights inside, tucked behind the snowman for a warm glow.
Customization Ideas
- Try a pastel palette for a winter wonderland look, or classic green/white/burgundy for a vintage feel.
- Use sparkle yarn for a frosted effect on the trees or dome.
- Add beads or sequins to the lacy dome for extra twinkle.
- Change the motif color order for a totally different border look.
- Instead of a hanging ornament, make a flat-bottomed base and use as a table centerpiece dome.
- Skip the trees for a simple snowman-in-dome look, or add miniature gifts or animals.
- Work the snowman as a stand-alone toy, or make the dome as a Christmas tree topper by increasing the height/width and reinforcing the dome walls with fabric stiffener.
Troubleshooting Tips
- Piece curling: Block and pin the lace dome, starch for extra stiffness.
- Uneven edges: Make sure motifs are joined cleanly and count stitches carefully; do not skip required chains at joins.
- Motif too large/small: Adjust hook size or tension, or add/remove motif rounds for correct fit.
- Loose color changes: Always finish color change on the last yarn-over of preceding stitch for crisp joins.
- Uneven tension in amigurumi: Practice consistent stuffing and even single crochets for a smooth shape.
Care Instructions
- Hand wash gently in cold water with mild soap.
- Press out moisture in a towel (do not wring), then reshape and air dry flat.
- Store away from direct sunlight to prevent color fading. Avoid crushing the dome’s shape in storage.
Final Notes
Take time to check your stitch counts after each round, and adjust your tension as needed to keep the dome and amigurumi pieces proportional. The provided image is a helpful reference for placement, color changes, and overall assembly, so keep it nearby as you work. This project is sure to become a sparkling, treasured part of your holiday collection year after year!