📖 B. INTRODUCTION
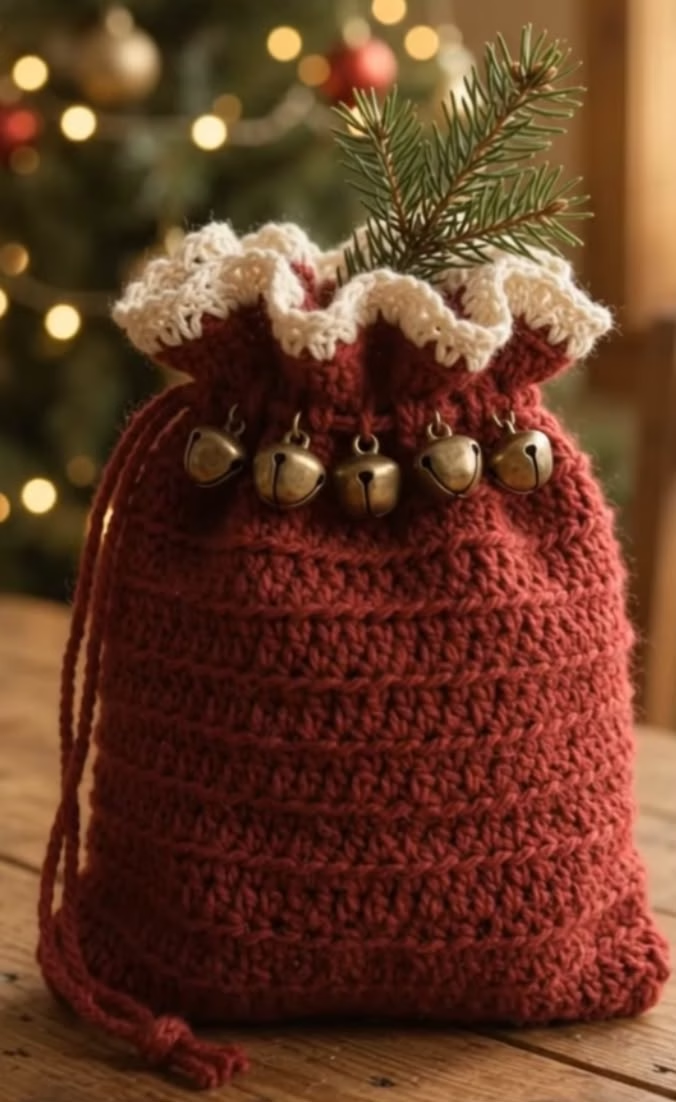
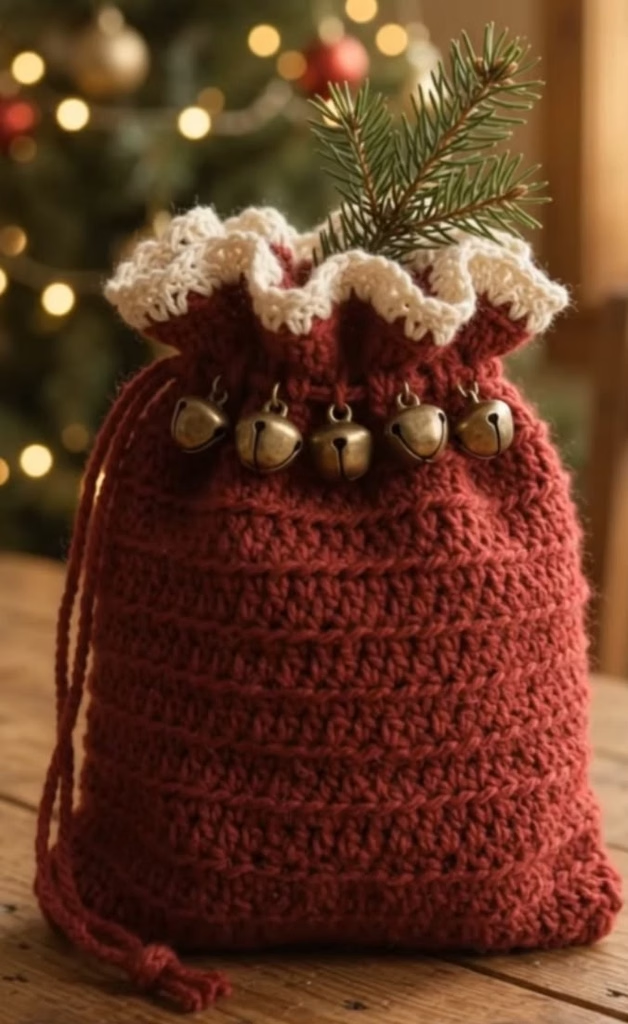
The Festive Rustic Red & Gold Jingle Bell Drawstring Pouch is an enchanting holiday keepsake designed to bring warmth and nostalgia to your Christmas celebrations. Crafted in a rich crimson red yarn with horizontal ridge detailing, this pouch features a delicate off-white ruffled collar and a functional drawstring closure finished with knotted cord ends.
The defining focal point of this design is a cluster of five antique brass jingle bells mounted across the front neck, which emit a soft, merry chime whenever the bag is handled. The bag sits on a sturdy oval base, making it spacious enough to hold sweet treats, small gifts, jewelry, or scented holiday potpourri.
Whether placed under the tree, hung from a mantel hook, or given as an artisanal gift bag, this project bridges traditional holiday warmth with timeless functionality. It also serves as a beautiful photographic prop when styled with fresh pine sprigs or cinnamon sticks.
This pattern offers versatility: you can easily adjust the height by adding extra body rounds, or customize the color palette using emerald green, icy blue, or metallic gold trim for different seasonal themes.
🔍 C. MAIN PATTERN OVERVIEW
This pouch is constructed from the bottom up in continuous and joined rounds, transitioning seamlessly into functional hardware details:
- 🔴 Textured Oval Base & Bag Body: Worked in deep crimson red using a combination of back-loop double crochet and ridge stitches to create structured horizontal rings across the pouch body.
- 🎟️ Integrated Eyelet Neck: A dedicated chain-space round that allows the drawstring cord to weave smoothly through the bag fabric.
- 🍦 Cream Scalloped Ruffle Collar: A contrasting off-white trim worked along the top opening to create a soft, wave-draped crown.
- 🧵 Braided Red Drawstring Cord: A durable crocheted chain cord with knotted ends that cinches the pouch neck securely closed.
- 🔔 Jingle Bell Accent Array: Five vintage brass jingle bells attached beneath the eyelet row across the front face.
🎯 D. SKILL LEVEL
Level: Easy / Adventurous Beginner
This pattern is well-suited for crocheters comfortable with foundational stitches who want to practice working in rounds, eyelet placement, and decorative assembly.
- ➰ Oval Base Construction: Working around both sides of a central foundation chain to build a seamless flat base.
- 🧶 Back Loop Only (BLO) Ridges: Utilizing loop placement to produce horizontal structural lines across the bag body.
- 🎟️ Eyelet Rows: Creating evenly spaced mesh openings for drawstring insertion.
- 🌸 Scallop Shell Edging: Executing multi-dc shells to build a ruffled collar.
- 🔔 Hardware Attachment: Sewing functional metal bells securely onto crochet fabric.
📏 E. FINISHED SIZE
| Dimension | Imperial | Metric |
| Total Height (Base to Ruffle Top) | 8.5 inches | 21.5 cm |
| Flat Width at Middle | 6.5 inches | 16.5 cm |
| Oval Base Dimensions | 5.5 in x 2.5 in | 14.0 cm x 6.5 cm |
| Drawstring Length | 20.0 inches | 51.0 cm |
🧮 F. GAUGE
- Textured Body Gauge: 16 sts x 10 rnds = 4 inches x 4 inches (10 cm x 10 cm) in textured double crochet using a 4.0 mm hook.
- Base Gauge: Rounds 1–3 of the oval base measure 5.5 inches long x 2.5 inches wide (14 cm x 6.5 cm).
Tension Note: Work with firm, consistent tension so the pouch fabric remains dense enough to hide contents without stretching open.
🧶 G. REQUIRED YARN AMOUNTS
Yarn Weight: Worsted Weight / Medium (#4), 100% Cotton or Soft Acrylic-Cotton Blend.
| Colorway | Role / Component | Skeins Needed | Estimated Yardage | Estimated Grams |
| 🔴 Rustic Crimson Red | Main Body, Oval Base, Drawstring | 1 Skein | ~135 Yards (123 m) | 70 g |
| 🍦 Cream Ivory | Ruffled Collar Rim | 1 Skein | ~30 Yards (27 m) | 15 g |
| 📊 Project Total | Combined Pouch Materials | 2 Skeins | ~165 Yards (150 m) | 85 g |
🧰 H. MATERIALS
- 🪡 Crochet Hook: 4.0 mm (US G-6) ergonomic hook.
- 🧶 Yarn: Worsted weight yarn in Rustic Crimson Red and Cream Ivory.
- 🔔 Hardware: 5 Antique Brass / Bronze Jingle Bells (15 mm diameter with top hanging loop).
- ✂️ Scissors: Precision yarn snips.
- 🪡 Tapestry Needle: Blunt-ended steel yarn needle.
- 🏷️ Stitch Markers: 2 locking stitch markers for marking eyelet boundaries.
🔤 I. ABBREVIATIONS – US TERMS
| Abbreviation | Stitch / Technique |
| ch | Chain |
| sl st | Slip stitch |
| sc | Single crochet |
| hdc | Half double crochet |
| dc | Double crochet |
| inc | Increase (2 sts in same st) |
| BLO | Back Loop Only |
| FLO | Front Loop Only |
| sp(s) | Space(s) |
| st(s) | Stitch(es) |
| MR | Magic Ring / Circle |
| [ ] / ( ) | Repeat instructions within brackets as directed |
📝 J. NOTES BEFORE YOU BEGIN
- 🔄 Joined Rounds: The pouch body is worked in joined rounds. Always join with a slip stitch to the first stitch of the round (not the turning chain) unless directed otherwise.
- 🧵 Tight Base Stitching: Work the base rounds firmly so the bottom does not bow outward when filled.
- 📍 Front-Face Symmetry: Identify the “front side” of your pouch before adding the eyelet row so the 5 jingle bells are centered neatly opposite the back join seam.
🪡 K. COMPLETE PATTERN
🔴 Component 1: Oval Base & Pouch Body
Worked from bottom to top using Rustic Crimson Red yarn and 4.0 mm hook.
FOUNDATION: Ch 16.

RND 1 (Base): 2 hdc in 2nd ch from hook, hdc in next 13 ch, 4 hdc in last ch.
Rotate to work along opposite side of foundation chain: hdc in next 13 ch, 2 hdc in starting ch sp. Sl st to 1st hdc. (34 hdc)

RND 2 (Base): Ch 2 (does not count as st), 2 hdc in next 2 sts, hdc in next 13 sts, 2 hdc in next 4 sts, hdc in next 13 sts, 2 hdc in last 2 sts. Sl st to 1st hdc. (42 hdc)

RND 3 (Base): Ch 2, [1 hdc in next st, 2 hdc in next st] x2, hdc in next 13 sts, [1 hdc in next st, 2 hdc in next st] x4, hdc in next 13 sts, [1 hdc in next st, 2 hdc in next st] x2. Sl st to 1st hdc. (50 hdc)

RND 4 (Wall Transition): Ch 2, dc in BLO of each st around. Sl st to 1st dc. (50 dc)

RNDS 5–18 (Textured Main Body):
  [Alternate BLO dc and standard dc rounds to create horizontal ridge texture]
  Rnd 5: Ch 2, dc in both loops of each st around. Sl st. (50 dc)
  Rnd 6: Ch 2, dc in BLO of each st around. Sl st. (50 dc)
  Rnds 7–18: Repeat Rnds 5–6 six more times. (50 dc per round)

RND 19 (Eyelet Round for Drawstring):
  Ch 4 (counts as dc + ch 1), skip 1 st, *dc in next st, ch 1, skip 1 st*; repeat from * around. Sl st to 3rd ch of starting ch-4. (25 dc, 25 ch-1 sps = 50 st positions)

RND 20 (Upper Neck):
  Ch 2, dc in each dc and 1 dc in each ch-1 sp around. Sl st to 1st dc. Fasten off Rustic Crimson Red. (50 dc)
🍦 Component 2: Cream Scalloped Ruffle Collar
Worked into the top rim of Round 20 using Cream Ivory yarn and 4.0 mm hook.
RND 21 (Ruffle Collar):
  Join Cream Ivory yarn in any st at the back seam.
  Ch 1, *(1 sc, ch 1, 3 dc, ch 1, 1 sc) in same st, skip 1 st, sl st in next st, skip 1 st*;
  repeat from * around to form a continuous ruffled scalloped border.
  Sl st to starting sc.
- 🧶 Finishing: Fasten off Cream Ivory yarn. Weave in all loose ends inside the upper rim.
🧵 Component 3: Crocheted Drawstring Cord
Worked in Rustic Crimson Red yarn and 4.0 mm hook.
Foundation: Ch 110.
Row 1: Sl st in 2nd ch from hook and in each ch across.
Fasten off, pulling yarn tight at both ends. Tie a firm double knot at each cord tip and trim excess tail to 0.5 inches to create decorative fringe ends.
🔔 Component 4: Jingle Bell Array Attachment
Attach 5 Antique Brass Jingle Bells to the front face of the pouch using a tapestry needle and red yarn.
PLACEMENT INSTRUCTIONS:
1. Lay pouch flat with back seam positioned at the center back.
2. Locate Round 18 (the solid red round directly beneath the Round 19 eyelets) on the front face.
3. Mark 5 evenly spaced stitch positions across the front center, approximately 1 inch apart.
4. Using red yarn and a tapestry needle, stitch through the top hanging loop of each brass bell, securing it tightly to the fabric stitches of Round 18.
5. Knot yarn firmly on the interior of the pouch and weave in tails.
🎨 L. STYLING / ASSEMBLY / STABILITY / FINAL SHAPING
🪡 Step-by-Step Assembly Sequence
       [🍦 Cream Ruffled Collar]
                 |
       [🎟️ Round 19 Eyelet Row]  <--- (Thread 🧵 Drawstring Cord)
                 |
     [🔔 5 Brass Bells on Rnd 18]
                 |
       [🔴 Textured Body Base]
- Thread Drawstring: Starting at the center front eyelet, weave the Crocheted Drawstring Cord in and out of the 25 eyelet spaces of Round 19 until both cord ends emerge from adjacent front eyelets.
- Cinch Check: Pull both cord ends to test the gather mechanism. The top cream ruffle should bow outward into an accordion crown.
- Align Bells: Ensure the 5 brass jingle bells hang straight below the eyelets without catching on the cord.
- Final Steam Shape: Lightly steam the red pouch body to accentuate the horizontal ridges.
✅ Final Shaping Checklist
- ✅ Oval base lies completely flat when uncinched.
- ✅ 14 horizontal ridge rounds create distinct texture down the body.
- ✅ Drawstring glides smoothly through all 25 eyelet spaces.
- ✅ Cream ruffled collar flares symmetrically around the top opening.
- ✅ All 5 brass bells are securely fastened and chime freely.
💡 M. HELPFUL CROCHET TIPS
- 💡 Firm Base Stitches: Use a slightly tighter grip when working the oval base (Rnds 1–3) so the bottom holds its form when stuffed with heavy items.
- 💡 Accentuating Body Ridges: Working the BLO rounds cleanly into the back loop leaves the front loop visible as a bold horizontal line.
- 💡 Smooth Cord Weaving: Thread a small safety pin onto one end of the drawstring cord to easily guide it through the eyelet round.
- 💡 Securing Metal Bells: Double-stitch through the bell loops with matching red yarn so the metal hardware doesn’t sag or wobble.
- 💡 Preventing Ruffle Curving: If your cream ruffle flips downward, steam block the scalloped stitches gently with your fingers to train them upward.
- 💡 Styling Accent: Place a fresh pine twig or wooden gift tag inside the cinched top for a rustic holiday display.
🧼 N. CARE INSTRUCTIONS
- 🧼 Washing: Hand wash gently in cold water with mild liquid detergent. Avoid harsh rubbing near the metal bells.
- 🧽 Drying: Gently press out excess water with a clean towel. Reshape the pouch body and lay flat to dry completely.
- 📦 Hardware Protection: Ensure metal jingle bells are thoroughly dry before storing to prevent tarnish or oxidation.
❓ R. FAQ
❓ Can I use ribbon instead of a crocheted drawstring?
Yes! A 0.5-inch wide velvet or satin ribbon in gold, cream, or dark green works beautifully as an alternative drawstring cord.
❓ How do I make the pouch larger for bigger gifts?
To increase size, add extra foundation chains in increments of 2 (e.g., start with Ch 20), and add additional main body rounds before working the eyelet row.
❓ Will worsted acrylic yarn work as well as cotton?
Worsted acrylic works great and provides a softer feel, while cotton offers a slightly stiffer, more rustic texture that holds its shape firmly.
❓ Where can I find antique brass bells like the ones pictured?
Small 15 mm vintage-style brass or bronze craft bells are widely available at local craft stores or online specialty trim shops.
❓ How do I keep the drawstring from pulling out accidentally?
Tie small decorative knots or add wooden beads to the ends of the drawstring cord so the tips cannot slip back through the eyelet holes.
❓ Can I make this pouch without the jingle bells?
Crucially, yes! You can leave the front plain, or replace the bells with crocheted berries, holly leaves, or embroidered snowflakes.