📖 B. INTRODUCTION
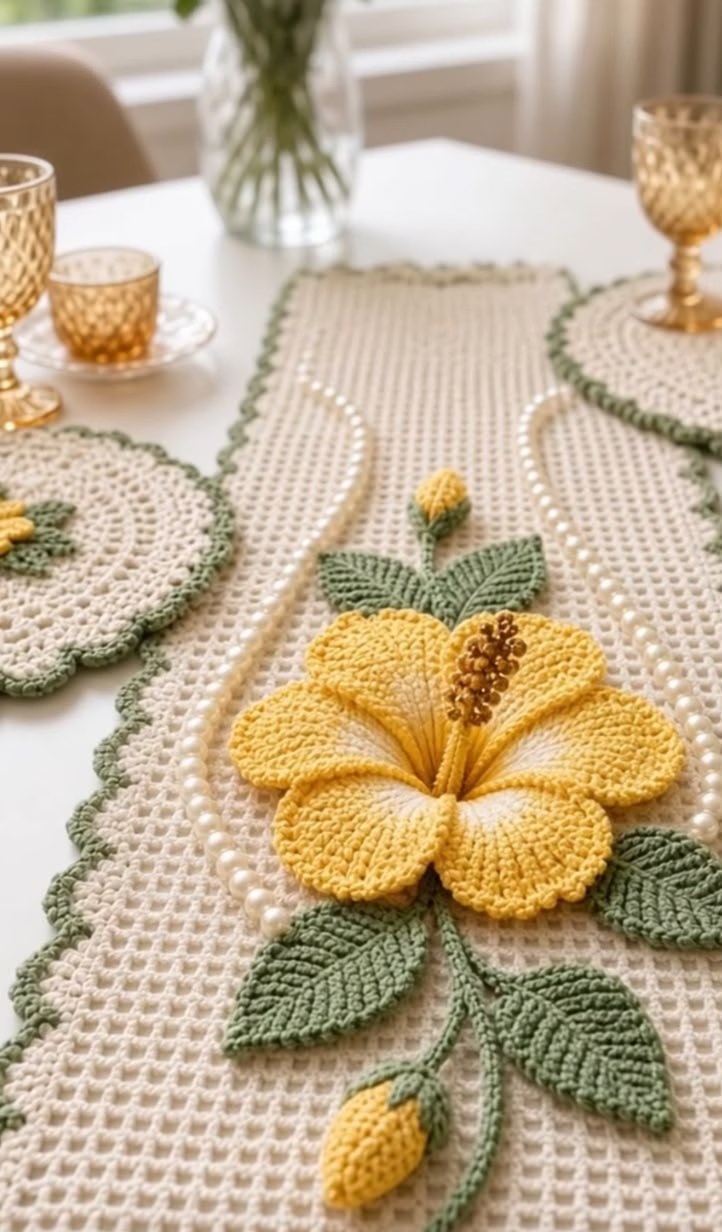
Crocheting your own table linens is an incredibly rewarding experience. Not only does it allow you to customize the exact length of your runner to fit your specific dining table, but it also creates a durable, washable keepsake that can be passed down through generations. Whether you are dressing up your table for a holiday feast, preparing for a bridal shower, or simply adding a touch of romance to your everyday meals, this runner and doily set sets the perfect scene. The accompanying round doilies serve beautifully as matching placemats or accent pieces for side tables, echoing the same grid-and-scallop design as the main runner.
While this design looks intricate, it is fundamentally built on a soothing rhythm of double crochets and chain spaces. The visual identity of this set relies on its crisp, structural columns and the beautifully flared, semi-circular ends of the runner. Because the pattern uses simple stitches, you can easily personalize it by swapping the traditional ivory for a deep burgundy for autumn, a soft sage green for spring, or a bold mustard yellow for a modern pop of color.
Grab your favorite cup of tea, settle into a comfortable chair, and let’s bring this beautiful, nostalgic table setting to life stitch by stitch.
🔍 C. MAIN PATTERN OVERVIEW
This home decor crochet pattern is divided into two beautifully coordinated pieces that can be displayed together or used separately around your home:
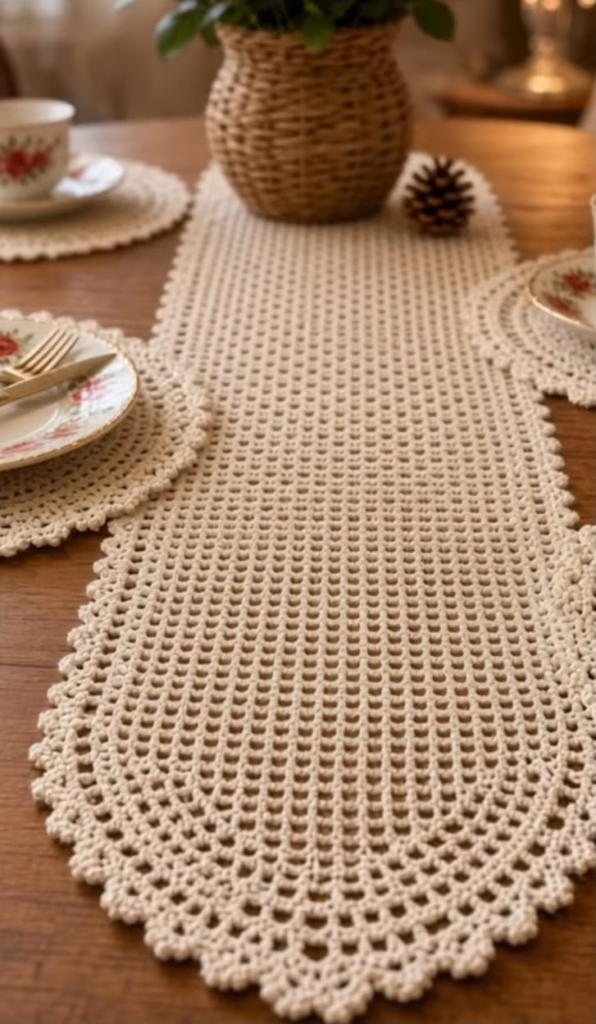
- The Heirloom Table Runner: The centerpiece of the design is a long, elegant runner featuring an oval silhouette with perfectly rounded ends. It is constructed from the center outwards in joined, continuous rounds, building a structured mesh of double crochets and chain spaces. It is finished with a wide, textured scalloped border featuring delicate picots.
- The Matching Round Doilies (Placemats): Designed to perfectly match the runner, these circular pieces start from a central magic ring and radiate outward using the exact same mesh stitch pattern and scalloped border. They are sized to work ideally as individual table placemats or decorative doilies for plant pots and centerpieces.
🎯 D. SKILL LEVEL
Intermediate
While the individual stitches used in this pattern are quite basic, achieving the correct structure and shape requires a comfortable understanding of crochet mathematics and tension.
Techniques you will use:
- 🧶 Working into a long foundation chain (both sides)
- 🧶 Crocheting in the round (joined rounds)
- 🧶 Maintaining consistent tension in open mesh (filet-style) crochet
- 🧶 Executing increases around curved edges to maintain a flat shape
- 🧶 Creating cluster/shell borders with top picots
- 🧶 Wet blocking for final shaping
📏 E. FINISHED SIZE
Because every crocheter’s tension is slightly different, your final dimensions may vary. When worked with the recommended worsted weight cotton and hook size, and after wet blocking, the pieces will measure approximately:
- Table Runner: 16 inches (40.5 cm) wide by 42 inches (106.5 cm) long.
- Matching Doilies: 13 inches (33 cm) in diameter.
Note on sizing: The length of the table runner is highly customizable. Instructions are provided in the Notes Before You Begin section on how to easily adjust the starting chain to create a shorter or longer runner to perfectly fit your specific table length. Changing the yarn weight (for example, dropping to a Size 10 crochet thread) will drastically reduce the size and create a much finer, delicate lace product.
🧮 F. GAUGE
- Gauge Swatch: 14 dc and 14 ch-1 spaces (measured across the straight mesh section) = 4 inches (10 cm). 7 rows of the mesh pattern = 4 inches (10 cm).
For amigurumi, tight gauge is crucial to hide stuffing, but for flat lace and table linens, consistent tension and beautiful drape are much more important. It is highly recommended that you crochet the first 3 rounds of the doily to check how your fabric behaves. If your circle begins to ruffle significantly, your tension is too loose; switch to a smaller hook. If it curls into a bowl, your tension is too tight; switch to a larger hook.
🧶 G. REQUIRED YARN AMOUNTS
This project relies on the crisp, clean definition of cotton yarn. Mercerized cotton provides a beautiful sheen, while unmercerized kitchen cotton provides a rustic, matte farmhouse finish as seen in the reference photo. The estimates below are for Worsted Weight (Category 4) 100% Cotton yarn.
- Main Color (Ivory/Ecru):
- Table Runner: Approximately 600 – 650 yards (550 – 595 meters).
- Doilies (Per Doily): Approximately 150 – 170 yards (137 – 155 meters).
- Total for Set (1 Runner + 4 Doilies): Approximately 1,200 – 1,330 yards (1,100 – 1,215 meters).
Tip: Always purchase 10% more yarn than you think you need, ensuring all skeins come from the same dye lot to prevent subtle color shifts in your flat fabric.
🧰 H. MATERIALS
- 🪝 Crochet Hook: 4.5 mm (US size 7) hook, or size needed to obtain a flat fabric.
- 🧶 Yarn: Worsted weight (Category 4) 100% cotton yarn in Ivory.
- ✂️ Scissors: For clean cuts.
- 🪡 Yarn Needle: A blunt tapestry needle for weaving in ends.
- 📍 Stitch Markers: Minimum of 4 markers to mark the corners/curves where increases happen.
- 📏 Measuring Tape: To check your dimensions as you work.
- 💧 Blocking Materials: Rust-proof T-pins, blocking mats (or thick towels), and a spray bottle for wet blocking your final pieces.
🔤 I. ABBREVIATIONS – US TERMS
- ch: chain
- sc: single crochet
- dc: double crochet
- sl st: slip stitch
- st(s): stitch(es)
- sp(s): space(s)
- sk: skip
- inc: increase (work 2 sts into the same stitch or space)
- MR: magic ring
- picot: chain 3, then slip stitch into the back bump and front loop of the first ch to form a small point.
- […] x: repeat the sequence inside the brackets the indicated number of times.
- …: repeat the instructions following the asterisk as directed.
📝 J. NOTES BEFORE YOU BEGIN
- Turning: This pattern is worked in joined, continuous rounds. You will not turn your work at the end of a round; the “right side” (RS) will always face you.
- Chain 4 Starts: The beginning of most rounds starts with a Chain 4. This always counts as your first double crochet (ch 3) PLUS your first chain-1 space (ch 1).
- Anatomy of the Oval: The table runner is an oval. Think of an oval as a rectangle with half-circles attached to each end. The straight sides will always maintain a 1-to-1 ratio (1 dc, ch 1, 1 dc). All increases are worked only on the curved ends to allow the fabric to lay flat as the perimeter expands.
- Using Stitch Markers: Place a stitch marker in the first and last stitch of the curved sections at both ends of the runner. Moving these markers up row by row will save you from constantly counting straight-edge stitches and ensure your increases fall only where they belong.
- Customizing Runner Length: To make your runner longer or shorter, simply adjust the length of your starting foundation chain. Your starting chain must be an even number. For every 2 chains you add or subtract, your runner will change by approximately 0.5 inches in length.
🪡 K. COMPLETE PATTERN
🧶 Table Runner Base
The runner begins in the center and is worked outward in a continuous oval. The visual grid pattern is created by working double crochets separated by chain-1 spaces.
Foundation: Ch 90. (To adjust length, chain any even number).
Round 1:
- Dc in 6th ch from hook. (This counts as 1 dc, ch 1, sk 1, and 1 dc).
- *Ch 1, sk 1 ch, dc in next ch. Repeat from * 40 more times across the straight edge.
- You should have 1 chain remaining. In this final chain, work the curved end: (ch 1, dc) 6 times into the very same chain.
- Rotate your work to crochet down the opposite side of the foundation chain.
- Ch 1, sk 1 ch, dc in the next ch (which is the base of the dc from the opposite side). Repeat from * 40 times across the straight edge.
- In the very first starting chain (the base of your starting ch-5), complete the second curve by working: (ch 1, dc) 5 times, ch 1.
- Sl st into the 3rd chain of the starting ch-5 to join.
- Stitch Count Check: You should have 42 dc along each straight side, and 6 dc around each curved end, separated entirely by ch-1 spaces.
Round 2:
- Ch 4 (counts as dc + ch 1 here and throughout).
- Straight Edge: *Sk the ch-1 sp, dc in the next dc, ch 1. Repeat from * across the straight edge until you reach the 6 dc that form the curve.
- Curve 1: In each of the next 6 dc, work an increase to expand the curve: (dc, ch 1, dc) in the first st, ch 1. Repeat this increase in the next 5 sts.
- Straight Edge: *Sk the ch-1 sp, dc in the next dc, ch 1. Repeat from * across the straight edge until you reach the opposite curve.
- Curve 2: Work the increase (dc, ch 1, dc, ch 1) into each of the 5 dc of this curve. Work one final dc into the base of the starting ch-4, ch 1.
- Join with a sl st to the 3rd ch of the starting ch-4.
Round 3:
- Ch 4.
- Straight Edge: (Dc in next dc, ch 1) across the straight side.
- Curve 1: The curve now has 12 dc. You will increase in every other dc, just like a standard flat circle. *(Dc, ch 1, dc) in the first dc, ch 1, dc in the next dc, ch 1. Repeat from * 5 more times.
- Straight Edge: (Dc in next dc, ch 1) across the straight side.
- Curve 2: *(Dc, ch 1, dc) in the next dc, ch 1, dc in the next dc, ch 1. Repeat from * 5 more times.
- Join with a sl st to the 3rd ch of the starting ch-4.
Rounds 4 – 14:
- Continue in this established pattern. The straight edges always remain (dc in next dc, ch 1).
- The curves will continue to increase mathematically to remain flat:
- Round 4 Curves: (Inc, 2 dc) x 6.
- Round 5 Curves: (Inc, 3 dc) x 6.
- Round 6 Curves: (Inc, 4 dc) x 6.
- Round 7 Curves: (Inc, 5 dc) x 6.
- Round 8 Curves: (Inc, 6 dc) x 6.
- Round 9 Curves: (Inc, 7 dc) x 6.
- Round 10 Curves: (Inc, 8 dc) x 6.
- Round 11 Curves: (Inc, 9 dc) x 6.
- Round 12 Curves: (Inc, 10 dc) x 6.
- Round 13 Curves: (Inc, 11 dc) x 6.
- Round 14 Curves: (Inc, 12 dc) x 6.
- Note: If you want a wider runner, you can continue this pattern up to Round 20. If you want a narrower runner, stop at Round 10. Do not fasten off.
🌸 Scalloped Border (For Table Runner)
The beautifully textured border frames the rigid mesh with soft, romantic curves and delicate picot points.
Border Round 1 (Preparation):
- Ch 1. Sc in the same st.
- Work 1 sc in every ch-1 space and 1 sc in every dc around the entire perimeter of the runner.
- Join with a sl st to the first sc.
Border Round 2 (The Scallops):
- Ch 1. Sc in the same st.
- *Sk 2 sts.
- In the next st, work the shell: (3 dc, picot, 3 dc) all into the same stitch.
- Sk 2 sts.
- Sc in the next st.
- Repeat from * around the entire perimeter.
- Crucial Border Note: As you approach the end of the round, you may find you have 1 or 3 stitches left instead of the perfect 2. This is completely normal! Simply skip 1 st (or 3 sts) to fit the final scallop in evenly. Because the border is so deeply textured, this slight adjustment will be entirely invisible.
- Join with a sl st to the first sc. Fasten off and weave in ends.
🍽️ Matching Doilies (Make as many as desired)
The doilies use the identical mesh stitch and border to coordinate perfectly with the runner. They are worked as flat circles.
Round 1: Make a MR. Ch 4 (counts as dc + ch 1). Work (dc, ch 1) 11 times into the ring. Pull the magic ring tight. Join with a sl st to the 3rd ch of the starting ch-4. (12 dc, 12 ch-1 sps).
Round 2: Ch 4. Work 1 dc into the exact same base stitch, ch 1. *In the next dc work (dc, ch 1, dc), ch 1. Repeat from * 10 more times around. Join with a sl st to the 3rd ch of the starting ch-4. (24 dc).
Round 3: Ch 4. *(Dc, ch 1, dc) in the next dc, ch 1. Dc in the next dc, ch 1. Repeat from * around. Join with a sl st to the 3rd ch. (36 dc).
Round 4: Ch 4. Dc in the next dc, ch 1. *(Dc, ch 1, dc) in the next dc, ch 1. Dc in the next dc, ch 1. Dc in the next dc, ch 1. Repeat from * around. Join. (48 dc).
Round 5: Ch 4. Dc in the next 2 dc (with ch-1 spaces between). *Increase in the next dc, dc in the next 3 dc (with ch-1 sps between). Repeat from * around. Join. (60 dc).
Rounds 6 – 9: Continue the flat circle increase pattern (increasing by 12 dc each round) until the doily reaches your desired diameter.
Doily Border:
- Round 1: Ch 1. Sc in every dc and every ch-1 space around. Join.
- Round 2: Ch 1. Sc in same st. *Sk 2 sts, (3 dc, picot, 3 dc) in next st, sk 2 sts, sc in next st. Repeat from * around. Join, fasten off, and weave in ends.
🎨 L. STYLING / ASSEMBLY / STABILITY / FINAL SHAPING
With lace and mesh crochet, the moment you fasten off your yarn, the project is only 80% complete. The final 20% of the magic comes from proper finishing! When raw off the hook, mesh crochet often looks crumpled, the scallops may fold inward, and the oval might appear slightly warped. Blocking is mandatory for this project.
How to Wet Block your Runner and Doilies:
- Soak: Fill a clean basin with lukewarm water and a drop of gentle wool/cotton wash. Submerge your completed pieces and gently squeeze them so the fibers absorb the water. Let them soak for 15 minutes.
- Squeeze: Remove the pieces and gently squeeze out excess water. Do not wring or twist the fabric, as this will distort your stitches. Roll them in a dry, clean bath towel and press firmly to remove as much moisture as possible.
- Pin: Lay your blocking mats out. Place the damp runner flat on the mats. Starting from the center straight edges and working outward, pin the fabric down using rust-proof T-pins.
- Shape the Details: Pay special attention to the border. Pin each individual picot point outward so the scallops dry in their wide, fully fanned open shape.
- Dry: Leave the pieces pinned in a well-ventilated area until they are 100% bone dry (usually 24 to 48 hours depending on humidity).
✅ Final Shaping Checklist:
- ✅ Ensure the straight edges of the runner are parallel and not bowing inward.
- ✅ Verify the semi-circle ends are laying perfectly flat without rippling.
- ✅ Check that all picots on the border are pulled sharply to a point.
- ✅ Ensure all yarn tails are securely woven into the solid double crochet posts, not across the open chain spaces.
Once styled on your table with beautiful dinnerware and a rustic centerpiece, the blocked lace will drape beautifully, achieving the exact elegance shown in the reference photo.
💡 M. HELPFUL CROCHET TIPS
- 💡 Count Your Stitches: Especially in the first 5 rounds of the runner. A missed skipped stitch on Round 1 will throw off the alignment of your straight mesh columns for the rest of the project.
- 💡 Mind Your Tension: When chaining 1 between the double crochets, try to keep that chain slightly tight. A loose chain-1 space will make your mesh look sloppy and asymmetrical.
- 💡 Seamless Joins: When slip stitching to the 3rd chain of the starting ch-4, insert your hook under both top loops of the chain. This prevents the joining chain from stretching out and leaving a noticeable gap.
- 💡 Weaving Tails: Cotton yarn is notorious for unweaving over time because it lacks the “grip” of animal fibers. When weaving in your ends, weave back and forth in three different directions through the dense base of the double crochets to lock the tail in permanently.
- 💡 Starching: If you prefer your doilies to be completely rigid (like traditional vintage pieces), you can use a spray starch during the blocking process.
- 💡 Check the Curves: If your curved ends start to “ruffle” or wave, you have too many stitches; consider skipping an increase. If they “bowl” upward, you have too few stitches and need to loosen your tension or add an extra increase.
🧼 N. CARE INSTRUCTIONS
Because this table set is likely to encounter food and drinks, practicality is key!
- Washing: 100% cotton is highly durable. For light dust, simply shake outside. For spills, spot clean immediately with a damp cloth. For a full wash, hand wash in cold or lukewarm water with a mild detergent. Avoid bleach, even on ivory yarn, as it can weaken the fibers over time.
- Drying: Never put crochet lace in the dryer. The heat and tumbling will distort the stitches and cause the border to fold over. Always reshape and lay flat to dry (re-blocking as necessary).
- Storage: When not in use, roll the runner gently around a cardboard tube (like a wrapping paper tube) instead of folding it. This prevents hard creases from forming in the middle of your mesh work.
❓ R. FAQ
❓ Can I use acrylic yarn instead of cotton?
While you can use acrylic, it is not recommended for table linens. Acrylic yarn can melt if a hot dish or fresh-from-the-oven pan is placed on it. Cotton is naturally heat resistant, highly absorbent, and offers superior stitch definition for lace patterns.
❓ How do I make the runner wider without making it longer?
The width of the runner is determined by how many rounds you crochet. To make it wider, simply continue the increase pattern past Round 14. Note that adding rounds will also add a small amount of length to the piece simultaneously.
❓ My scalloped border is rippling heavily. What went wrong?
If your border is ruffling, it means there are too many stitches in the perimeter. Try skipping 3 stitches instead of 2 between your single crochets and your 7-dc shells. This will stretch the scallops out slightly and force them to lay flat.
❓ Can I change the size of the doilies?
Absolutely! The doilies are constructed as flat circles. You can stop at Round 5 for a small coaster, or continue the increase pattern to Round 15 for a massive centerpiece mat. Just apply the border instructions to whatever your final round is.
❓ Is this pattern suitable for a beginner?
This is an intermediate pattern because working an oval around a foundation chain can be tricky for absolute beginners. However, if you are comfortable identifying your stitches and counting increases, the actual stitches (dc and ch) are very beginner-friendly!
❓ Can I iron my finished pieces?
Yes, cotton can be ironed. If you need to quickly flatten your runner before guests arrive, place a thin cotton cloth (like a pillowcase or tea towel) over the crochet work and use an iron on the steam setting. Never place the hot iron directly onto the yarn, as it can flatten the beautiful texture of the double crochets.