📖 B. INTRODUCTION
Add a touch of handmade magic to your holiday gifting with this adorable Crochet Christmas Treat Bags pattern! These cylindrical hanging baskets are perfect for holding candy canes, small wrapped gifts, gift cards, or even acting as a reusable advent calendar. Hang them on the tree, along the fireplace mantel, or on a child’s bedroom door for a sweet, festive surprise.
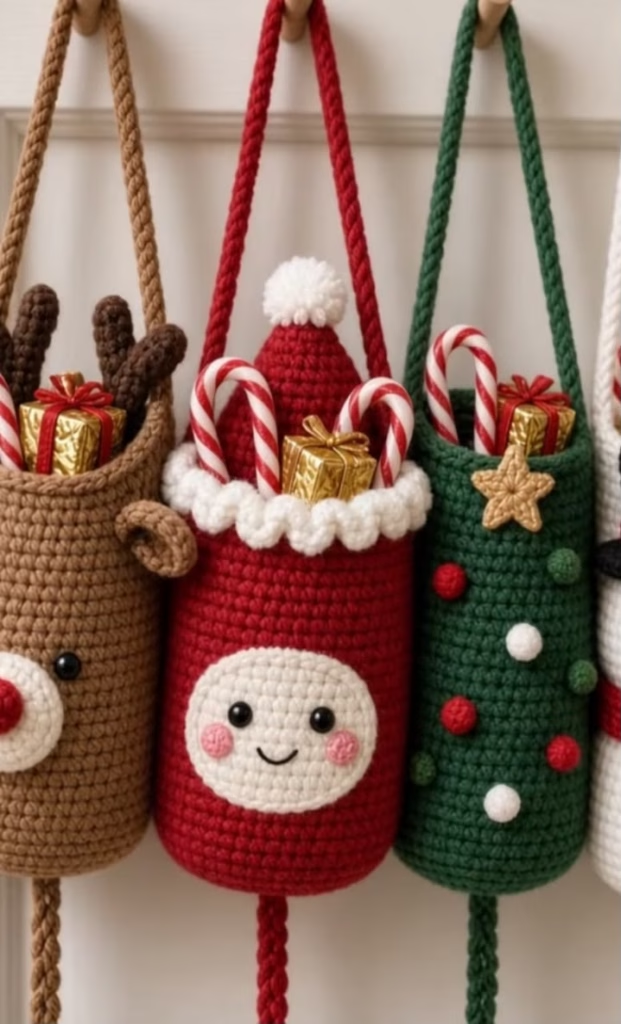
This original pattern gives you the foundation to make three distinct, highly recognizable holiday characters: a rustic Reindeer, a jolly Santa face, and a classic decorated Christmas Tree. Crocheting these festive bags is a delightful way to create lasting holiday keepsakes. The sturdy, flat-bottomed construction ensures they hold their shape beautifully, while the long cord handles make them effortless to hang on hooks or doorknobs.
Personalize your trio by swapping out ornament colors on the tree, adjusting the strap lengths, or embroidering unique expressions on the faces. Whether you make just one as a teacher appreciation gift or crochet the entire set for your family, these treat bags are sure to become a beloved part of your holiday traditions.
🔍 C. MAIN PATTERN OVERVIEW
This pattern is designed using a modular, “mix-and-match” approach. You will start by crocheting the universal Base Cylinder Bag and Hanging Strap, which form the core structure for all three designs.
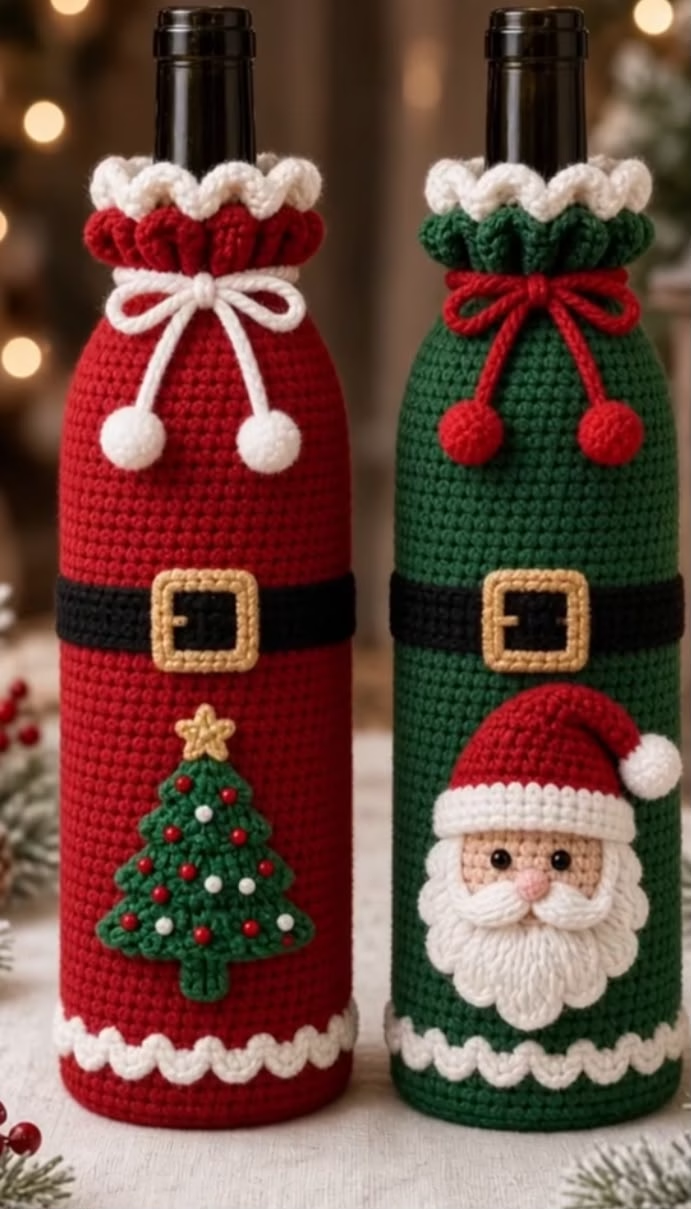
Once you have your base (in brown, red, or dark green), you will follow the specific character instructions to bring them to life. The Reindeer features a prominent 3D snout, tiny ears, and branched antlers. The Santa design utilizes a flat face applique, a fluffy white rim at the bag’s opening, and a whimsical red cone hat that rests inside the top. Finally, the Christmas Tree bag is adorned with a golden star applique and colorful bobble “ornaments” scattered across the green surface.
🎯 D. SKILL LEVEL
Easy to Intermediate
This pattern is accessible for confident beginners who have mastered basic amigurumi shapes, but it includes intermediate assembly and detailing techniques.
- Working in continuous spiral rounds
- Crocheting in the Back Loops Only (BLO) to create sharp structural bases
- Creating simple appliques (stars, flat circles)
- Sewing multiple 3D components securely
- Basic facial embroidery
📏 E. FINISHED SIZE
When made with worsted weight yarn and a 4.0 mm hook, the finished project measures approximately:
- Bag Height: 5 inches (12.5 cm) from the flat base to the top rim.
- Bag Diameter: 3.25 inches (8 cm) across the base.
- Strap Drop: 6 inches (15 cm) from the hanging peak to the bag rim.
Note: Yarn thickness, hook size, and your personal tension will slightly alter the final dimensions. Using a stiffer cotton yarn will yield a more rigid basket, while acrylic will be slightly softer.
🧮 F. GAUGE
5 sc stitches x 5 rounds = 1 inch (2.5 cm)
Exact gauge is not strictly necessary for this project as it is not a fitted garment. However, you must maintain a tight, consistent tension so the bags are stiff enough to hold their cylindrical shape and support the weight of treats without stretching out. If your stitches look loose or airy, size down your hook.
🧶 G. REQUIRED YARN AMOUNTS
This pattern uses medium worsted weight yarn (Category 4). Acrylic, cotton, or a blend will all work beautifully.
- Main Bag Colors:
- Brown (Reindeer): Approx. 60 yards.
- Red (Santa): Approx. 60 yards.
- Dark Green (Tree): Approx. 60 yards.
- Accent Colors (Scraps / Less than 20 yards each):
- Cream/White (Santa face, rim, tree ornaments).
- Beige/Tan (Reindeer snout).
- Dark Brown (Reindeer antlers).
- Gold/Mustard (Tree star).
- Light Pink (Santa cheeks).
🧰 H. MATERIALS
- 🧶 4.0 mm (US G/6) crochet hook
- 👀 6mm or 8mm safety eyes (2 pairs needed for Reindeer and Santa)
- 🔴 8mm red safety nose (or red yarn for embroidery)
- ☁️ Small amount of polyester fiberfill (for stuffing the snout and Santa hat)
- 🪡 Yarn needle (tapestry needle)
- ✂️ Sharp scissors
- 📍 Stitch markers and sewing pins
- 🧵 Black embroidery floss (for Santa’s smile)
⚠️ Safety Note: If you are making these bags for children under 3 years old, do not use plastic safety eyes or small glued-on beads. Instead, embroider all eyes, noses, and ornaments directly onto the yarn to eliminate choking hazards.
🔤 I. ABBREVIATIONS – US TERMS
- MR: Magic Ring
- ch: chain
- sc: single crochet
- hdc: half double crochet
- dc: double crochet
- sl st: slip stitch
- inc: single crochet increase (2 sc in one stitch)
- dec: single crochet decrease (sc 2 together)
- BLO: Back Loops Only
- FLO: Front Loops Only
- st(s): stitch(es)
- FO: Fasten Off
- ( … ) x N: Repeat instructions in parentheses N times
📝 J. NOTES BEFORE YOU BEGIN
- Continuous Rounds: The main bag body and most 3D pieces are worked in continuous rounds. Do not join or turn at the end of a round unless specified. Use a stitch marker to track the first stitch.
- Firm Bases: To ensure the bags sit flat when placed on a table, the transition from the base to the walls is worked in the Back Loops Only (BLO). Make sure these stitches are exceptionally tight.
- Straps: The straps shown have a sturdy, corded look. Our pattern creates this via a tightly crocheted narrow strip, but you can also substitute a crocheted I-cord if you prefer that technique.
🪡 K. COMPLETE PATTERN
🧶 The Universal Base Bag
Make 1 in your chosen character color (Brown, Red, or Dark Green) Notes: We begin at the bottom center and work outwards to form the flat base, then work upwards to form the cylindrical walls.
R1: MR 6. (6)
R2: inc in each st around. (12)
R3: (1 sc, inc) x6. (18)
R4: (2 sc, inc) x6. (24)
R5: (3 sc, inc) x6. (30)
R6: (4 sc, inc) x6. (36)
R7: (5 sc, inc) x6. (42)
R8: (6 sc, inc) x6. (48)
R9: Working in the BLO, sc in each st around. (48) This creates the sharp folded edge for the bottom of the bag.
R10-32: sc in each st around for 23 rounds. (48) Your cylinder should now be approximately 5 inches tall.
R33: sl st in each st around. (48)
FO, weave in the end seamlessly.
🎗️ The Hanging Strap
Make 1 per bag in the matching main color
Row 1: Ch 61.
Row 2: Working into the back bumps of the chain for a cleaner edge, sc in the 2nd ch from the hook and in each ch across. (60)
FO, leaving a very long tail on both ends (approx. 10 inches) for securely sewing the strap to the inside walls of the bag.
🦌 CHARACTER 1: THE REINDEER DETAILS
👃 Reindeer Snout Yarn: Beige R1: MR 6. (6) R2: inc in each st around. (12) R3: (1 sc, inc) x6. (18) R4: (2 sc, inc) x6. (24) R5: sc in each st around. (24) FO, leave a long tail for sewing. Insert safety eyes (if using them for the Reindeer) just above where the snout will sit, or wait to attach the snout and embroider the face. Attach the red safety nose to the upper center of this snout piece.
👂 Ears (Make 2)
Yarn: Brown
R1: MR 4. (4)
R2: (1 sc, inc) x2. (6)
R3: (2 sc, inc) x2. (8)
R4: sc in each st around. (8)
FO, leave a tail. Flatten the ear; do not stuff.
🌿 Antlers (Make 2) Yarn: Dark Brown Main Stem: R1: MR 5. (5) R2-7: sc in each st around for 6 rounds. (5). FO. Side Branch: R1: MR 5. (5) R2-3: sc in each st around for 2 rounds. (5). FO, leaving a tail. Sew the side branch to round 4 of the main stem.
🎅 CHARACTER 2: THE SANTA DETAILS
🧑 Santa Face Applique Yarn: White/Cream R1: MR 6. (6) R2: inc in each st around. (12) R3: (1 sc, inc) x6. (18) R4: (2 sc, inc) x6. (24) R5: (3 sc, inc) x6. (30) R6: (4 sc, inc) x6. (36) FO, leave a long tail for sewing. Face Details: Insert black safety eyes between R3 and R4, spaced about 4 stitches apart. Use pink yarn to embroider small blush lines under the eyes, and black thread to embroider a small “U” shaped smile directly between the cheeks.
☁️ Fluffy Top Rim Yarn: White Notes: This is worked directly onto the top edge of your completed Red Base Bag. Attach White yarn to the front loop of any stitch in R32 (just below the final slip stitch round). R1: (sc in next st, ch 3, sl st in the 3rd ch from hook to form a picot, sc in next st) repeat this sequence all the way around the rim of the bag to create a textured, fluffy appearance. FO, weave in ends.
🎩 Santa Hat Insert Yarn: Red and White Notes: This acts as a decorative “lid” resting inside the back rim of the bag. R1: In Red, MR 4. (4) R2: (1 sc, inc) x2. (6) R3: sc in each st around. (6) R4: (2 sc, inc) x2. (8) R5: sc in each st around. (8) R6: (3 sc, inc) x2. (10) R7: (4 sc, inc) x2. (12) R8: (1 sc, inc) x6. (18) R9: (2 sc, inc) x6. (24) R10: (3 sc, inc) x6. (30) R11-13: sc in each st around. (30) FO, leave a long tail. Lightly stuff the cone so it holds its shape. Pom-Pom: With White, make a small yarn pom-pom and sew it to the top tip (R1) of the red hat.
🎄 CHARACTER 3: THE CHRISTMAS TREE DETAILS
⭐ Golden Star
Yarn: Gold/Yellow
R1: MR. Ch 1, (sc into MR, ch 3, sl st into 2nd ch from hook, hdc into 3rd ch) x5. Sl st into the first sc to join. (Produces 5 star points).
FO, pull MR tight, leave a tail for sewing.
🔴⚪ Ornament Bobbles (Make 8-10 in Red, White, and Light Green) Alternatively, you can embroider French knots directly onto the bag. R1: MR 4. (4) FO, leaving a tail. Pull the magic ring exceptionally tight so it forms a tiny 3D bead. Tie the starting and ending tails together in a knot behind the bobble to secure its round shape.
🎨 L. STYLING / ASSEMBLY / STABILITY / FINAL SHAPING
Correct placement is the key to making these characters recognizable. Follow this order for each respective bag:
1. Attach the Straps (All Bags):
Pin the two ends of the Hanging Strap to the inside of the bag, opposite each other (at the “9 o’clock” and “3 o’clock” positions). Overlap the strap about 1 inch (2.5 cm) down the inside wall. Use the long tails to sew a secure square with a cross (an “X” inside a box) to ensure the strap can hold the weight of treats without tearing.
2. Assembling the Reindeer:
- Snout: Pin the Beige Snout to the bottom-front of the brown bag. Stuff it lightly before sewing the final stitches closed.
- Eyes: If using safety eyes, they should be placed on the brown bag directly above the snout.
- Antlers & Ears: Sew the dark brown antlers to the inside front rim of the bag, spaced about 2 inches apart. Sew the brown ears directly to the outside rim, just below the antlers, pointing slightly outward.
3. Assembling the Santa:
- Face: Pin the White Face Applique to the bottom-center of the red bag, ensuring the smile is straight. Sew flat around the perimeter.
- Hat: Place the stuffed Red Hat Insert just inside the top back rim of the bag. Sew it to the inside wall so it peaks out over the fluffy white rim, leaving the front of the bag completely open for treats.
4. Assembling the Christmas Tree:
- Star: Sew the Golden Star securely near the top center of the green bag, just below the rim.
- Ornaments: Randomly scatter your small Red, White, and Green bobbles (or embroider French knots) across the rest of the green bag. Use the tails to tie them securely on the inside of the bag.
✅ Finishing Checklist:
- ✅ Straps are sewn securely to the inside walls, not the top edge.
- ✅ Bag bases are completely flat.
- ✅ Reindeer snout is slightly stuffed and 3D.
- ✅ Santa face is sewn flat without warping the bag.
- ✅ Tree ornaments are evenly distributed.
- ✅ All internal yarn ends are knotted and trimmed securely.
💡 M. HELPFUL CROCHET TIPS
- 💡 Stiffening the Bag: If your bag feels too floppy, you can line the inside with a small cylinder of plastic canvas. Cut a circle for the bottom and a rectangle for the walls, and slip them inside.
- 💡 Perfect Flat Bottoms: The BLO round (R9) is crucial. Make sure you pull your yarn tight on this specific round to create a 90-degree fold for the base.
- 💡 Symmetrical Straps: Before sewing the straps, hang the bag by the pinned strap on a doorknob. Check if the face/applique hangs straight forward. Adjust the pins until the bag balances perfectly.
- 💡 Clean Color Changes: For the Santa bag, when transitioning to the fluffy white rim, finish your final red slip stitch by pulling the white yarn through to maintain a seamless color transition.
- 💡 Treat Weight: Remember that heavy items will stretch the bag over time. Opt for lightweight treats like marshmallows, small wrapped chocolates, or candy canes.
🧼 N. CARE INSTRUCTIONS
Because these are structured, 3D items, spot cleaning is highly recommended. Use a damp cloth with mild soap to gently dab away any stains, particularly on the white Santa face. Do not machine wash, as the agitation can cause the cylindrical bags to lose their shape, and the Reindeer antlers or tree bobbles may snag. Store them flat or stuffed with tissue paper during the off-season to maintain their round shape.
❓ R. FAQ
❓ Can I make these bags bigger or smaller?
Yes! To make them wider, continue increasing your base circle (e.g., to 54 or 60 stitches) before doing your BLO round, and crochet more height rounds. To make them smaller, stop increasing earlier (e.g., at 36 stitches).
❓ What if I don’t have safety eyes?
Embroidery is a perfect and safe substitute! Use black medium-weight yarn to stitch small upside-down “U” shapes for sleepy eyes, or simple French knots for round eyes.
❓ The top of my bag is curling inward. How do I fix it?
Curling at the rim usually indicates that your tension tightened as you worked up the walls. The final slip stitch round (R33) acts as a stabilizer. Make sure you work this slip stitch round loosely. If it still curls, you can lightly steam block the acrylic yarn (do not touch the iron to the yarn!).
❓ Can I use bulky yarn for this pattern?
Absolutely. Using a Category 5 (Bulky) or Category 6 (Super Bulky) yarn will naturally scale the entire project up, resulting in a much larger basket suitable for holding bigger gifts, without needing to change the stitch counts. Just ensure you use the correspondingly larger hook size!