🧸 A. TITLE + category/tag line
Vintage Cream & Holly Bell Christmas Ornament Crochet Pattern
Category: Holiday Home Decor / Christmas Tree Ornaments — Technique: Amigurumi Bell Construction & Surface Botanical Accents
📖 B. INTRODUCTION
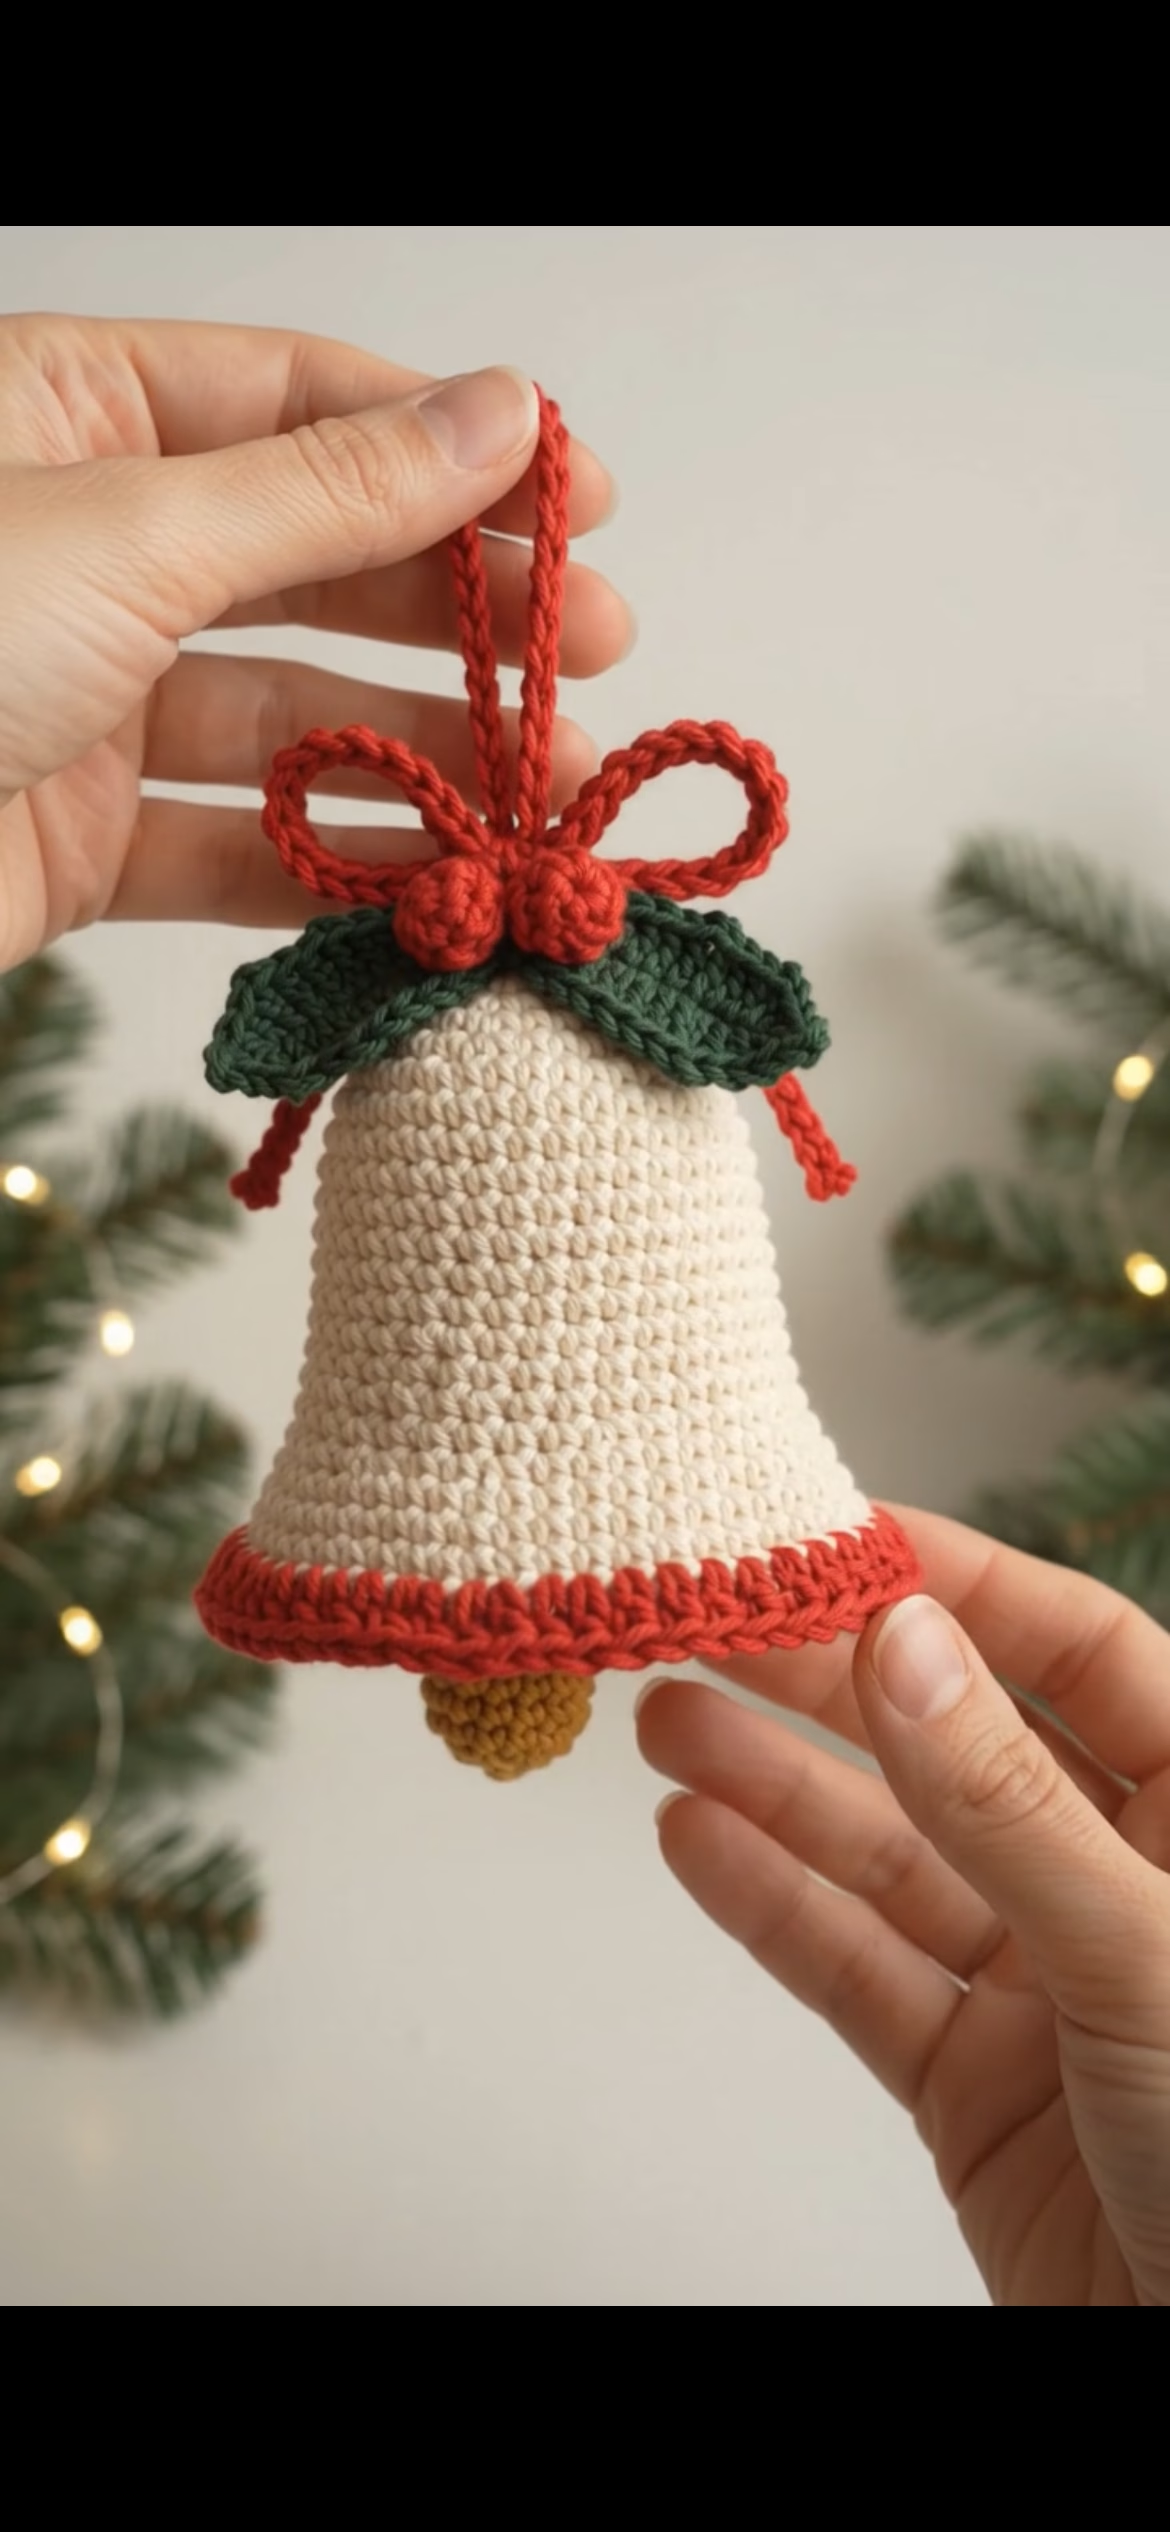
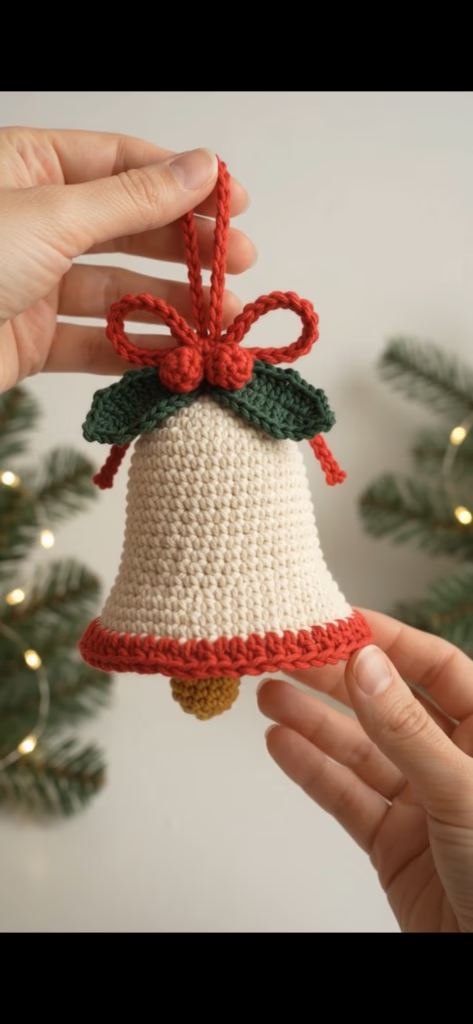
The Vintage Cream & Holly Bell Christmas Ornament is an elegant holiday piece that brings rustic charm and nostalgia to your Christmas decor. Styled with a soft ivory-cream bell silhouette and highlighted by a festive red flared rim, this ornament is topped with sculpted dark green holly leaves, twin crimson berries, and a tied red cord bow with an integrated hanging loop. Peek underneath, and you will find a golden-mustard amigurumi clapper suspended inside.
Designed to hang effortlessly on evergreen branches, holiday garlands, door handles, or mantel displays, this bell holds a clean, structured shape without feeling heavy. The seamless single-crochet construction builds a firm, self-supporting wall, while the picot-edged holly leaves and 3D berries add tactile contrast.
This project makes a thoughtful heirloom gift, secret Santa present, or festive craft fair item. Because it requires only small amounts of yarn, it is also an ideal scrap-busting project for your holiday crafting lineup.
You can easily customize this pattern: try making a matching set in deep emerald and gold, or swap the cream body for a sparkling metallic silver to suit your holiday color scheme.
🔍 C. MAIN PATTERN OVERVIEW
This ornament is created by crafting five individual components and assembling them into a balanced hanging piece:
- 🔔 Cream Bell Body: A dense, continuous-round amigurumi bell worked from top crown to flared bottom in soft cream yarn, finished with a contrasting red border.
- 💛 Golden Clapper: A mini 3D amigurumi sphere in mustard yellow, suspended from a central chain cord inside the bell cavity.
- 🍃 Sculpted Holly Leaves (Make 2): Pointed botanical leaves in dark forest green with picot edge details, attached flat across the bell crown.
- 🍒 Twin Holly Berries (Make 2): Compact red amigurumi spheres nested at the base of the holly leaves.
- 🎀 Red Bow & Hanging Loop: A bright red crocheted chain cord tied into a bow with a long top loop for hanging.
🎯 D. SKILL LEVEL
Level: Easy / Adventurous Beginner
This pattern is great for beginners looking to expand their skills into amigurumi shaping, small 3D motifs, and clean assembly techniques.
- ➰ Magic Ring & Continuous Rounds: Working seamless spiral rounds for amigurumi shaping.
- 📐 Gradual & Rapid Increases: Transitioning from a gentle cone to a flared bell lip.
- 🍃 Picot Stitch Edging: Creating crisp, pointed leaf tips on flat motifs.
- 🧵 Internal Cord Suspension: Securing an internal suspended element (clapper) inside a hollow crochet piece.
📏 E. FINISHED SIZE
| Dimension | Imperial | Metric |
| Total Height (Crown to Red Rim) | 3.5 inches | 9.0 cm |
| Bottom Rim Diameter | 3.25 inches | 8.3 cm |
| Clapper Diameter | 0.75 inches | 2.0 cm |
| Holly Leaf Length | 1.75 inches | 4.5 cm |
| Hanging Loop Drop Length | 3.0 inches | 7.5 cm |
🧮 F. GAUGE
- Amigurumi Bell Gauge: 20 sc x 22 rnds = 4 inches x 4 inches (10 cm x 10 cm) worked in continuous spiral rounds using a 2.75 mm hook.
- Crown Gauge: Rounds 1–6 of the Bell Body measure 1.0 inch (2.5 cm) in diameter.
Tension Note: Work tight, even stitches so the bell wall remains rigid and holds its flared shape without collapsing.
🧶 G. REQUIRED YARN AMOUNTS
Yarn Weight: Sport / Fine (#2) or Light DK Yarn (100% Mercerized Cotton or Cotton-Acrylic Blend).
| Colorway | Role / Component | Skeins Needed | Estimated Yardage | Estimated Grams |
| 🍦 Vintage Cream | Main Bell Body | 1 Skein | ~45 Yards (41 m) | 20 g |
| 🔴 Festive Red | Flared Rim, Berries, Bow, Loop | 1 Skein | ~25 Yards (23 m) | 12 g |
| 🌲 Forest Green | Holly Leaves (2) | 1 Skein | ~15 Yards (14 m) | 7 g |
| 🟡 Mustard Gold | Internal Bell Clapper | 1 Skein | ~8 Yards (7 m) | 4 g |
| 📊 Project Total | Combined Ornament Materials | 4 Skeins | ~93 Yards (85 m) | 43 g |
🧰 H. MATERIALS
- 🪡 Crochet Hook: 2.75 mm (US C-2) ergonomic aluminum hook.
- 🧶 Yarn: Sport weight mercerized cotton in Cream, Red, Forest Green, and Mustard Gold.
- ☁️ Stuffing: A small pinch of polyester fiberfill (for the clapper and berries only; the bell body remains hollow).
- ✂️ Scissors: Precision embroidery snips.
- 🪡 Tapestry Needle: Size 18 steel blunt yarn needle.
- 🏷️ Stitch Marker: 1 locking stitch marker for tracking spiral rounds.
- 📍 Blocking Spray: Optional fabric stiffener or water spray bottle for blocking leaf tips.
🔤 I. ABBREVIATIONS – US TERMS
| Abbreviation | Stitch / Technique |
| ch | Chain |
| sl st | Slip stitch |
| sc | Single crochet |
| hdc | Half double crochet |
| dc | Double crochet |
| inc | Increase (work 2 sc in same st) |
| dec | Invisible decrease (sc 2 sts together) |
| picot | Ch 2, sl st in 1st ch |
| MR | Magic Ring / Magic Circle |
| BLO | Back Loop Only |
| FLO | Front Loop Only |
| st(s) | Stitch(es) |
| rnd(s) | Round(s) |
| [ ] / ( ) | Repeat instructions within brackets as directed |
📝 J. NOTES BEFORE YOU BEGIN
- 🔄 Spiral Rounds: The Bell Body, Clapper, and Berries are worked in continuous spiral rounds without joining. Use a stitch marker in the first stitch of each round.
- 🧵 Hollow Bell Construction: The main cream bell body is not stuffed. Its conical shape and tight gauge give it structural integrity.
- 📍 Color Changes: When switching to Festive Red for the flared rim, complete the final yarn-over of the last cream stitch with red yarn for a clean transition.
- 🪡 Long Sewing Tails: Leave 8-inch tails on the leaves, berries, clapper cord, and bow for easy assembly.
🪡 K. COMPLETE PATTERN
🔔 Component 1: Main Bell Body
Worked from top crown to bottom flared lip using Vintage Cream and Festive Red yarn with a 2.75 mm hook.
Using Vintage Cream:
Rnd 1: MR, 6 sc into ring. (6 sc)
Rnd 2: [1 sc, inc] x3. (9 sc)
Rnd 3: Sc in each st around. (9 sc)
Rnd 4: [2 sc, inc] x3. (12 sc)
Rnd 5: Sc in each st around. (12 sc)
Rnd 6: [3 sc, inc] x3. (15 sc)
Rnd 7: Sc in each st around. (15 sc)
Rnd 8: [4 sc, inc] x3. (18 sc)
Rnd 9: Sc in each st around. (18 sc)
Rnd 10: [5 sc, inc] x3. (21 sc)
Rnd 11: Sc in each st around. (21 sc)
Rnd 12: [6 sc, inc] x3. (24 sc)
Rnd 13: Sc in each st around. (24 sc)
Rnd 14: [7 sc, inc] x3. (27 sc)
Rnd 15: Sc in each st around. (27 sc)
Rnd 16: [8 sc, inc] x3. (30 sc)
— BEGIN FLARED RIM EXPANSION —
Rnd 17: [4 sc, inc] x6. (36 sc)
Rnd 18: [5 sc, inc] x6. (42 sc)
Rnd 19: [6 sc, inc] x6. Fasten off Cream. (48 sc)
— RED FLARED BORDER —
Rnd 20: Join Festive Red yarn in 1st st of Rnd 19.
Ch 2 (counts as hdc), [2 hdc, inc hdc] x15, 2 hdc. Sl st to top of 1st hdc. (64 hdc)
Rnd 21: Ch 1, sl st in BLO of each st around to create a raised rolled lip edge. (64 sl st)
- 🧶 Finishing: Fasten off Festive Red. Weave in ends neatly on the inside of the bell.
💛 Component 2: Internal Bell Clapper
Worked in Mustard Gold yarn and 2.75 mm hook.
Rnd 1: MR, 6 sc into ring. (6 sc)
Rnd 2: [inc] x6. (12 sc)
Rnd 3: Sc in each st around. (12 sc)
Rnd 4: Sc in each st around. (12 sc)
Rnd 5: [dec] x6. (6 sc)
Stuff lightly with a tiny pinch of fiberfill.
SUSPENSION CORD:
Do not fasten off! Ch 14 directly from the top of the clapper sphere.
- 🧶 Finishing: Fasten off, leaving an 8-inch tail for securing inside the bell crown.
🍃 Component 3: Sculpted Holly Leaves
Make 2 using Forest Green yarn and 2.75 mm hook. Worked around both sides of a central foundation chain.
Foundation: Ch 10.
Rnd 1: Sc in 2nd ch from hook, hdc in next ch,
(1 dc, picot [ch 2, sl st in 1st ch]) in next ch,
dc in next ch, hdc in next ch,
(1 dc, picot) in next ch,
hdc in next ch, sc in next ch,
(1 sc, picot, 1 sc) in last ch (leaf tip).
Rotate to work along opposite side of foundation chain:
sc in next ch, hdc in next ch,
(1 dc, picot) in next ch,
hdc in next ch, dc in next ch,
(1 dc, picot) in next ch,
hdc in next ch, sc in last ch. Sl st to 1st sc.
- 🧶 Finishing: Fasten off, leaving an 8-inch tail for sewing onto the bell crown.
🍒 Component 4: Twin Holly Berries
Make 2 using Festive Red yarn and 2.75 mm hook.
Rnd 1: MR, 6 sc into ring. (6 sc)
Rnd 2: [1 sc, inc] x3. (9 sc)
Rnd 3: [1 sc, dec] x3. (6 sc)
- 🧶 Finishing: Stuff lightly with a tiny scrap of yarn or fiberfill. Fasten off, leaving an 8-inch tail. Thread tail through front loops of the 6 sts and pull tight to close into a sphere.
🎀 Component 5: Red Bow & Hanging Loop Assembly
Worked in Festive Red yarn and 2.75 mm hook.
PART 1: HANGING LOOP CORD
Ch 42. Sl st in 1st ch to form a long folded loop string. Fasten off leaving a 6-inch tail.
PART 2: BOW CORD
Ch 55. Fasten off. Tie string into a neat 2-loop bow with 1.25-inch loops and 1.5-inch dangling tails[span_35](start_span)[span_35](end_span).
🎨 L. STYLING / ASSEMBLY / STABILITY / FINAL SHAPING
🪡 Step-by-Step Assembly Sequence
[⭕ Red Hanging Loop]
|
[🎀 Festive Red Cord Bow]
|
[🍒 Twin Red Holly Berries]
|
[🍃 2 Forest Green Holly Leaves]
|
[🔔 Cream Bell Body (Rnds 1-21)]
|
[💛 Suspended Golden Clapper]
- Mount Internal Clapper: Thread the 8-inch tail from the Clapper Suspension Cord (Component 2) up through the tiny hole at the magic ring apex (Rnd 1) inside the Cream Bell Body. Adjust cord length so the top half of the gold clapper extends below the red rim. Knot firmly inside the top crown.
- Attach Holly Leaves: Position the 2 Forest Green Holly Leaves (Component 3) across the top crown of the bell, angling them outward at a 180-degree flat angle. Stitch down through the leaf bases into the cream crown using a tapestry needle.
- Attach Holly Berries: Nest the 2 Red Holly Berries (Component 4) at the center junction where the two leaf stems meet. Sew firmly into place.
- Attach Bow & Hanging Loop: Anchor the center knot of the Festive Red Cord Bow (Component 5) directly above the berries. Attach the Red Hanging Loop directly behind the bow at the apex center.
📍 Shaping & Blocking Instructions
- Shape the Bell Body: Insert your thumbs inside the cream bell cavity and push outward gently to smooth the cone walls and accentuate the bottom flared rim.
- Block Leaf Tips: Lightly dampen the green holly leaves with water spray, pinch each picot point outward, and let dry flat for 2 hours so the leaves hold their pointed shape.
- Adjust Clapper Drop: Ensure the clapper hangs freely down the center axis without touching the inner bell walls.
✅ Final Finishing Checklist
- ✅ Cream bell walls are firm, hollow, and self-supporting.
- ✅ Red flared rim curves outward evenly all the way around.
- ✅ Gold clapper hangs centered and extends slightly below the bottom rim.
- ✅ Holly leaves lie flat with crisp, pointed picot tips.
- ✅ Red berries sit securely at the leaf bases.
- ✅ Bow loops are symmetrical and the top hanging loop is anchored firmly.
- ✅ All yarn tails are hidden inside the crown or under the leaves.
💡 M. HELPFUL CROCHET TIPS
- 💡 Keep Tension Tight: Using a 2.75 mm hook with sport weight yarn ensures a tight, dense fabric so the hollow bell body stays rigid without sagging.
- 💡 Clean Spiral Tracking: Always use a stitch marker on Round 1–19 to ensure your increase math remains aligned down the cone.
- 💡 Perfect Clapper Length: Test-hang the clapper before knotting the cord inside the crown; the clapper looks best when its bottom third peeks out below the red rim.
- 💡 Crisp Leaf Points: When working the picot stitches on the holly leaves, pull the slip stitch tight to create a sharp point.
- 💡 Neat Bow Loops: Dab a tiny drop of clear craft glue on the back knot of the red cord bow to keep it from unraveling.
- 💡 Invisible Decreases for Berries: Use the invisible decrease method (working FLO of 2 sts together) on the berries for a smooth 3D sphere.
- 💡 Optional Stiffening Spray: If your yarn is soft, spray the inside of the cream bell body with laundry starch or fabric stiffener to make it extra sturdy.
- 💡 Batch Making: Crochet 5 or 6 bell bodies at once to make a full ornament set or holiday garland!
🧼 N. CARE INSTRUCTIONS
- 🧼 Cleaning: Dust gently with a soft dry brush or duster. Spot clean with a damp cloth and mild soap if needed; do not submerge in water.
- 🧽 Reshaping: If compressed during storage, gently press out the interior cavity with your fingers to restore the bell shape.
- 📦 Off-Season Storage: Store flat or lightly stuffed with tissue paper inside a small box to prevent crushing during storage.
❓ R. FAQ
❓ Can I use Worsted Weight (#4) yarn instead of Sport weight?
Yes! Using worsted weight yarn with a 3.5 mm hook will produce a larger bell ornament measuring approximately 5 inches tall—perfect as a door knob hanger or wreath centerpiece.
❓ Do I need to stuff the bell body?
No, the main bell body remains hollow. The dense single-crochet gauge provides enough structure for it to hold its flared shape independently. Only the clapper and berries use a small amount of stuffing.
❓ How do I stop the bottom rim from flaring unevenly?
Ensure your increase stitches on Rounds 17–19 are evenly spaced, and work Round 21’s BLO slip-stitch edge with consistent tension to lock in the rounded rim shape.
❓ Can I turn this into a ringing bell by adding a real metal jingle bell?
Crucially, yes! You can replace the crocheted gold clapper with a 15 mm metal jingle bell tied to the interior suspension cord so it makes a sound when moved.
❓ What is the best way to attach the ornament to a tree branch?
The top red hanging loop can slip directly over branch tips. Alternatively, attach a metallic gold ornament hook through the loop base for easy positioning.
❓ How long does it take to make one bell ornament?
An intermediate crocheter can complete a single bell ornament—including all components and assembly—in approximately 1 to 1.5 hours.