📖 B. INTRODUCTION
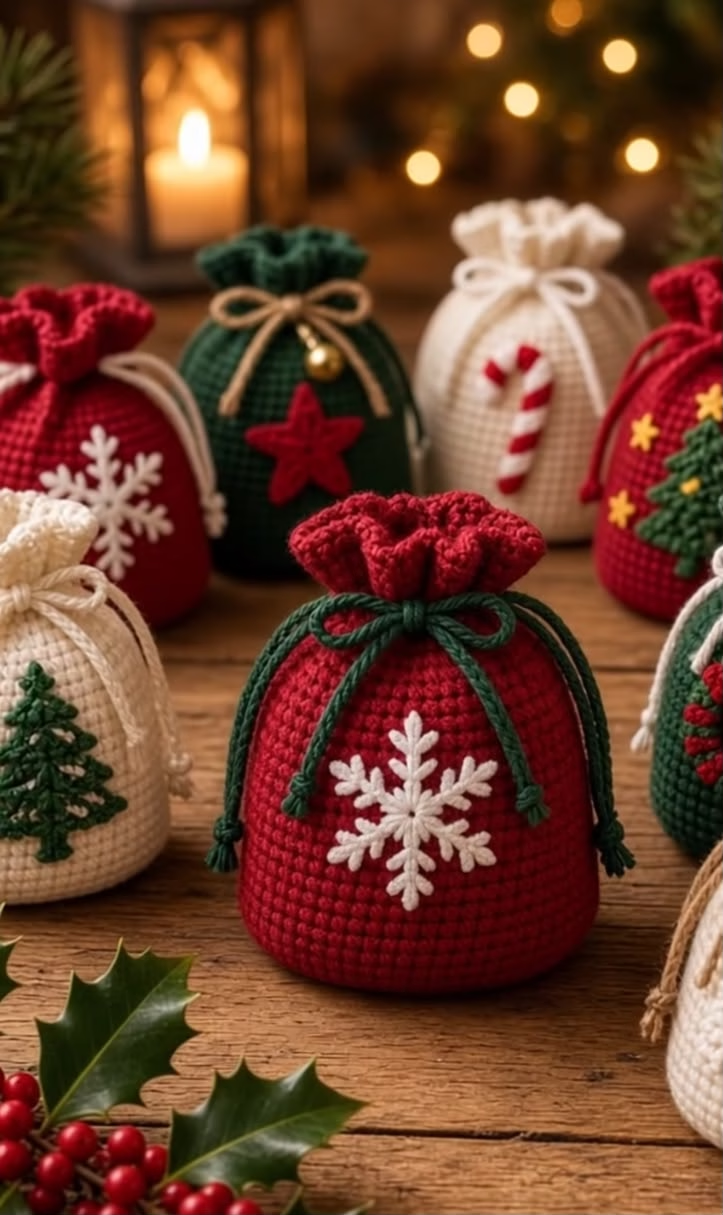
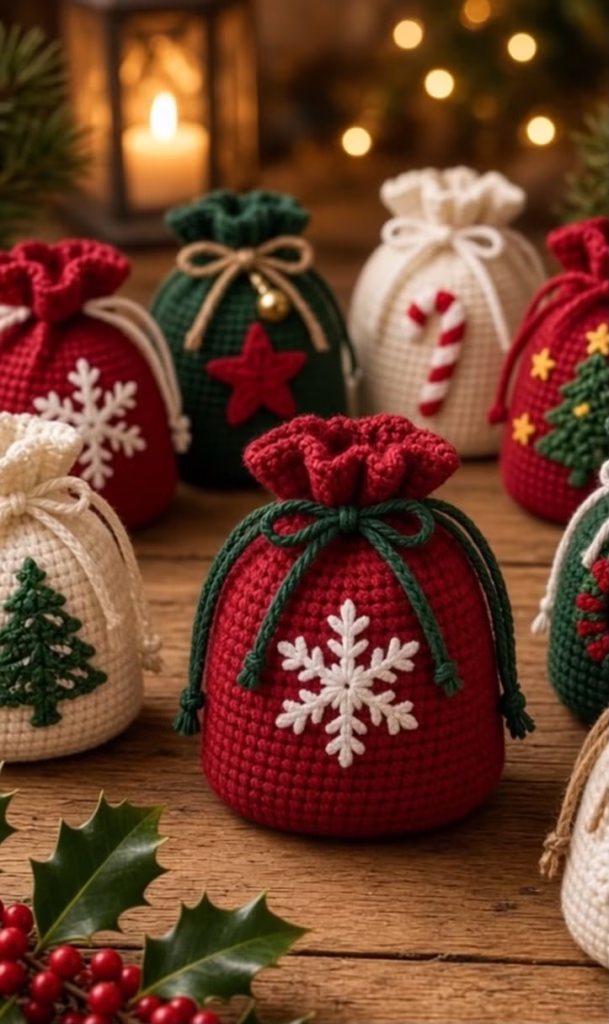
this Christmas Snowflake Pouch pattern is the perfect handmade touch for your seasonal gifting. The design features a sturdy, deep red cylindrical base that sits flat, adorned with a striking white six-pointed snowflake appliqué. A rich green drawstring cord weaves through the top, elegantly cinching the pouch closed to create a beautiful, gathered ruffled edge.
Whether you are packaging gift cards, hiding sweet treats, or creating reusable eco-friendly wrapping for small presents, this bag elevates the art of giving. Crocheting your own gift packaging adds a thoughtful, personalized keepsake element that recipients can hang on their tree or reuse for years to come. You can easily adapt the colors to match different seasonal themes, but the classic red, green, and white combination offers an unmistakable vintage holiday aesthetic.
🔍 C. MAIN PATTERN OVERVIEW
This project is constructed in three distinct, manageable modules:
- 🎒 The Pouch Body: Crocheted seamlessly from the bottom up in continuous rounds, starting with a flat circular base that transitions into straight vertical walls, finishing with an eyelet round for the drawstring and an increasing ruffled top edge.
- ❄️ The Snowflake Appliqué: A separate, quick-to-work motif featuring six branched points created using simple chain spaces and slip stitches.
- 🧵 The Drawstring Cord: A simple, sturdy green chain cord that weaves through the eyelets to cinch the bag closed and tie into a bow.
🎯 D. SKILL LEVEL
Easy / Advanced Beginner
This pattern uses foundational crochet stitches but requires some basic assembly and precision. It is perfect for crocheters who are comfortable working in the round.
- 🧶 Magic Ring (MR)
- 🔄 Working in continuous rounds and joined rounds
- ➕ Basic increases
- 🔗 Creating chain spaces (for the drawstring eyelets and snowflake branches)
- 🪡 Basic sewing and applique attachment
📏 E. FINISHED SIZE
- Height: Approximately 5 inches (12.5 cm) from the flat base to the top of the ruffle.
- Width: Approximately 4 inches (10 cm) in diameter across the base.
- Note: The final size will vary slightly depending on your tension, the specific brand of worsted weight yarn you choose, and your hook size.
🧮 F. GAUGE
- Gauge: 16 sc and 18 rows = 4 inches (10 cm) worked in the round.
- While gauge is not strictly critical for this project, you want your stitches to be tight and dense enough so that the contents of the gift bag cannot be seen through the fabric. If your stitches are too loose, consider dropping down a hook size.
🧶 G. REQUIRED YARN AMOUNTS
This project uses medium Worsted Weight (Category 4) yarn. Cotton or a cotton-blend is highly recommended for durability and a crisp stitch definition, but acrylic works wonderfully as well.
- 🔴 Main Color (Red): Approximately 50 yards (45 meters) for the pouch body.
- ⚪ Accent Color 1 (White): Approximately 10 yards (9 meters) for the snowflake.
- 🟢 Accent Color 2 (Green): Approximately 10 yards (9 meters) for the drawstring.
🧰 H. MATERIALS
- 🪝 Crochet Hook: 4.0 mm (US G/6) or size needed to achieve a dense fabric.
- ✂️ Scissors: For cutting yarn tails.
- 🪡 Tapestry Needle: A blunt-tipped yarn needle for sewing the appliqué and weaving in ends.
- 📍 Stitch Markers: Essential for marking the first stitch of each continuous round.
- 📌 Sewing Pins: To hold the snowflake securely in place while sewing.
🔤 I. ABBREVIATIONS – US TERMS
- ch: chain
- sc: single crochet
- inc: increase (2 sc in the same stitch)
- sl st: slip stitch
- BLO: back loop only
- st(s): stitch(es)
- sk: skip
- sp: space
- MR: magic ring
- FO: fasten off
- (…) x N: repeat the instructions within the parentheses N times
- […]: total number of stitches at the end of the round
📝 J. NOTES BEFORE YOU BEGIN
- 🔄 The main pouch body is worked in continuous, unjoined rounds. Do not slip stitch or chain 1 at the end of these rounds. Move your stitch marker up to the first stitch of each new round.
- 🛑 The snowflake is worked in joined rounds.
- 🧵 Leave a long starting or ending tail on your appliqué pieces to make sewing easier.
- 🎨 When sewing the snowflake to the bag, only sew through the front loops of the bag’s stitches if you want to avoid seeing the white yarn on the inside of the pouch, though sewing all the way through is perfectly secure.
🪡 K. COMPLETE PATTERN
🎒 Pouch Body
Purpose: The main vessel of the gift bag. Yarn Color: Red Quantity: Make 1 Starting Point: Worked from the bottom center base outward, then up the sides.
- R1: Create a MR, work 6 sc into the ring. [6]
- R2: inc in each st around. [12]
- R3: (1 sc, inc) x6. [18]
- R4: (2 sc, inc) x6. [24]
- R5: (3 sc, inc) x6. [30]
- R6: (4 sc, inc) x6. [36]
- R7: (5 sc, inc) x6. [42]
- R8: (6 sc, inc) x6. [48]
- R9: (7 sc, inc) x6. [54]
- R10: Working in the BLO for this round only, sc in each st around. [54] (Note: This creates the crisp fold that allows the bag to sit flat.)
- R11-30: Working in both loops again, sc in each st around. [54](Note: You will complete 20 rounds of straight vertical building. The bag should look like a simple cylinder).
- R31 (Eyelet Round): (sc in next 7 sts, ch 2, sk 2 sts) x6. [54 sts/chains total]
- R32: sc in next 7 sts, place 2 sc into the ch-2 space. Repeat this pattern 6 times total around. [54]
- R33: (2 sc, inc) x18. [72]
- R34: (3 sc, inc) x18. [90]
- R35: sc in each st around. [90]
- Fasten off: Cut yarn and weave in the end invisibly.
❄️ Snowflake Appliqué
Purpose: The decorative element for the front of the pouch. Yarn Color: White Quantity: Make 1 Starting Point: Center of the snowflake.
- R1: Create a MR, ch 1, work 6 sc into the ring. Pull tight, sl st to the first sc to join. [6]
- R2 (Making the 6 branches):
- Branch 1: ch 5. sl st into the 2nd ch from hook. ch 3, sl st into the same ch space. ch 3, sl st into the same ch space. (This creates a tiny 3-loop clover at the tip). sl st down the remaining 3 chains of the main stem. sl st into the next sc on the MR base.
- Branches 2-6: Repeat the instructions for Branch 1 five more times to create six distinct points.
- Fasten off: Leave a long 12-inch (30 cm) tail for sewing.
🧵 Drawstring Cord
Purpose: To close the bag and create the ruffled top. Yarn Color: Green Quantity: Make 1 Starting Point: A simple slip knot.
- Row 1: ch 90.
- Row 2: Working into the back bumps of the chain for a smoother finish, sl st in the 2nd ch from the hook and in each ch across. [89]
- Fasten off: Cut yarn, pull through, and weave both ends neatly into the cord itself so the tips are clean and finished. (Alternative: You may simply chain 100 with a doubled strand of yarn if you prefer a faster, thicker cord).
🎨 L. STYLING / ASSEMBLY / STABILITY / FINAL SHAPING
1. Attaching the Snowflake
- Placement: Flatten the bag slightly to find the front center. Pin the white snowflake appliqué centrally onto the red pouch body. It should sit about halfway between the bottom ridge (R10) and the eyelet row (R31).
- Sewing: Using your tapestry needle and the long white tail left on the snowflake, carefully whip stitch the center and the six branches to the bag. For the neatest look, tack down the very tip of each branch so they don’t curl away from the bag.
- Tip: Sew the appliqué before you thread the drawstring or cinch the bag; keeping the fabric flat makes placement much easier.
2. Threading the Drawstring
- Attach a safety pin or weave your tapestry needle onto one end of your green drawstring cord.
- Weave the cord in and out of the six ch-2 eyelet spaces created in R31 of the pouch body.
- Ensure both tails exit through the front-facing eyelets (directly above the snowflake) so the bow ties perfectly in the front.
3. Final Shaping Checklist
- ✅ Base Flatness: Press the bottom of the bag firmly against a table to define the BLO edge (R10) so it stands upright on its own.
- ✅ Cinch and Ruffle: Pull the green drawstring evenly to gather the fabric. Gently fan out the top rounds (R33-35) with your fingers to emphasize the decorative ruffle.
- ✅ Appliqué Security: Ensure all six points of the snowflake are tacked down smoothly and aren’t puckering.
- ✅ Bow: Tie the green drawstring into a neat, secure bow at the front.
💡 M. HELPFUL CROCHET TIPS
- 💡 Invisible Finish: When finishing the red pouch, use the invisible join method instead of a standard slip stitch. It creates a seamless edge on your top ruffle.
- 💡 Stiffening the Applique: If your snowflake wants to curl, lightly steam block it before sewing it onto the bag.
- 💡 Seamless Color Variation: Want to make the green and white variations seen in the background? Simply swap the Main Color and Appliqué colors in the materials list, keeping the construction exactly the same!
- 💡 Yarn Under (x-stitch): For an ultra-dense amigurumi-style fabric that holds its shape beautifully, try using the “yarn under, yarn over” single crochet technique.
- 💡 Fraying Cords: If you chose to use a twisted cord instead of a crocheted one, tie tight knots at the very ends of your string and dab a tiny amount of fabric glue on the tips to prevent unravelling over time.
- 💡 Eyelet Alignment: Double-check your stitch count on Round 31 before proceeding. Having exactly 6 eyelet spaces ensures the bag gathers symmetrically.
🧼 N. CARE INSTRUCTIONS
To keep your handmade pouch looking fresh for many holiday seasons to come:
- Washing: Hand wash gently in cool water with a mild detergent. Do not aggressively scrub the appliqué.
- Drying: Do not wring or twist. Press gently between two towels to remove excess moisture, then stuff the pouch lightly with dry paper towels or plastic bags to help it maintain its cylindrical shape while it air dries.
- Storage: Store flat or lightly stuffed in a dry place. Avoid storing in direct sunlight to prevent the vibrant red and green yarn from fading.
❓ R. FAQ
❓ Can I make this bag larger or smaller?
Yes! To make it wider, simply continue the increase rounds on the base (e.g., R10: 8 sc, inc) before working the BLO round. For every increase round you add, you will need to adjust the math for the eyelet spaces and the ruffle. To make it taller, simply add more rounds of plain single crochet between R11 and R30.
❓ Can I use blanket yarn or plush yarn for this?
Absolutely. Using a super bulky yarn (Category 6) and a larger hook (like a 6.5mm or 7.0mm) will yield a much larger, squishier bag using the exact same pattern. It makes a great oversized gift sack!
❓ My snowflake looks messy, what did I do wrong?
Small appliqués require tight tension. Make sure you are using slip stitches exactly where indicated, and pull your loops firmly. Blocking the snowflake before sewing it on is the best way to open up the chain spaces and make the points look sharp.
❓ Does the bag need a lining?
No, if you use worsted weight yarn and the recommended hook size, the fabric should be dense enough to hide whatever is inside. However, if you plan to put very tiny items (like loose earrings or small candies) inside, hand-sewing a simple fabric lining to the inside below the eyelet round is a great upgrade.
❓ Can I glue the snowflake on instead of sewing?
While you can use a high-quality fabric glue, sewing is highly recommended for longevity, especially if the bag will be handled, opened, and closed frequently, as the flexing of the bag can cause glue to pop off over time.