📖 B. INTRODUCTION
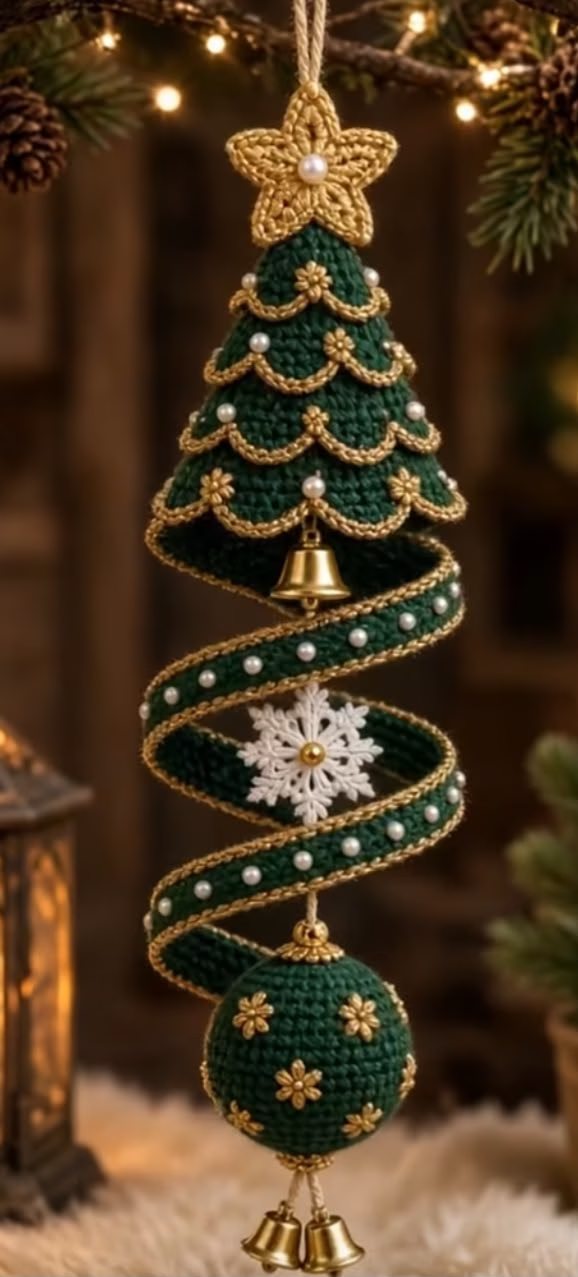
Bring a touch of elegant magic to your holiday decor with this stunning, gravity-defying Christmas ornament design. Perfect as a centerpiece for your tree, a standalone window decoration, or a deeply memorable handmade gift, this project transforms classic crochet stitches into a beautiful architectural piece. The ornament draws the eye downward through a cascade of deep forest green and brilliant metallic gold.
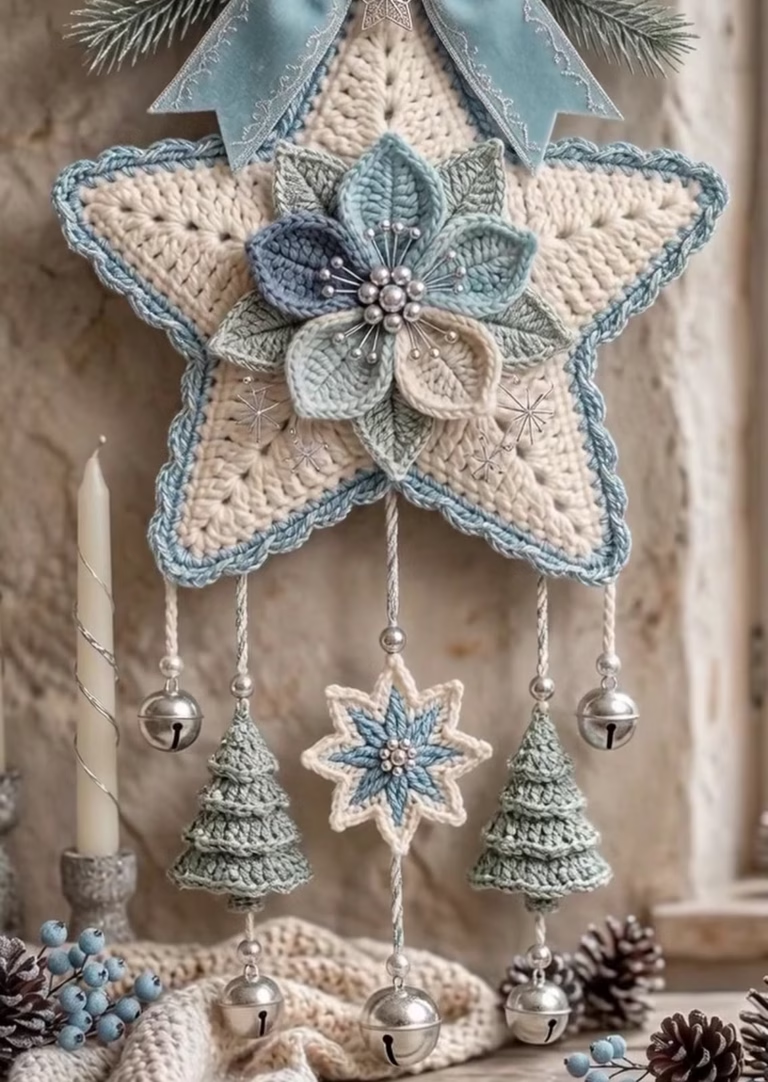
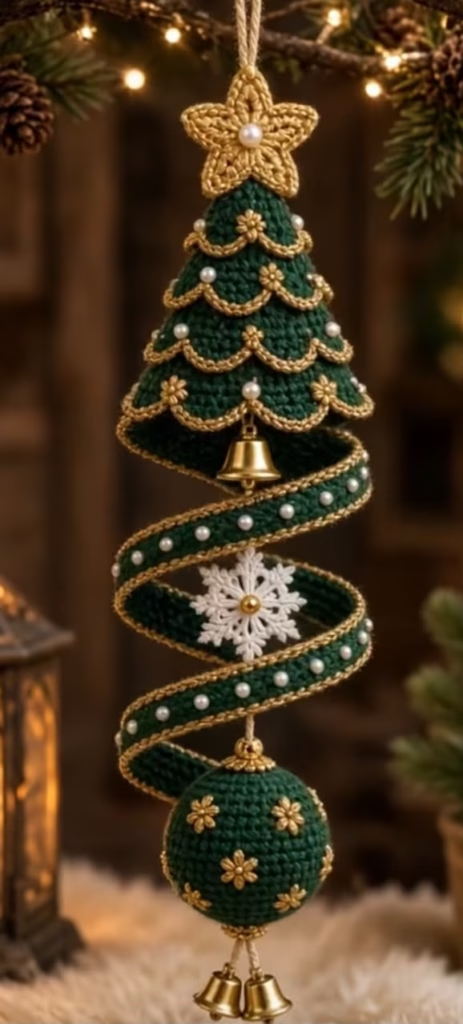
At first glance, the design features a traditional conical tree top crafted with overlapping, gold-edged scallops. However, the true magic happens at the base of the cone, where the structure seamlessly transitions into a continuous, sweeping spiral ribbon decorated with delicate pearl beads. Suspended straight through the center of this spiral is a delicate arrangement of holiday charms: a ringing gold bell, a stark white micro-crochet snowflake, and a beautifully embroidered green bauble finished with twin bells at the very bottom.
While it looks incredibly complex, the secret lies in clever modular construction and the strategic use of flexible craft wire hidden within the ribbon’s gold edging. Whether you are looking to challenge your amigurumi skills or create a personalized keepsake for an ornament exchange, this pattern will guide you step-by-step through every technique needed to achieve this breathtaking silhouette.
🔍 C. MAIN PATTERN OVERVIEW
This heirloom ornament is constructed in several distinct modules that are assembled along a central structural hanging cord.
- The Tree Cone: Worked from the top down, featuring unworked front loops that are later used to create four distinct tiers of gold-edged scallops.
- The Spiral Ribbon: A long, flat strip crocheted directly off the base of the cone. It holds its permanent spring-like spiral shape thanks to craft wire hidden inside the final gold edging.
- The Topper & Charms: Two joined gold stars sit at the very top. A tiny white snowflake and a stuffed green bauble with gold embroidery hang suspended down the center axis.
- The Hardware: Pearls, bead caps, metallic bells, and a rustic hanging twine bring the mixed-media aesthetic together.
🎯 D. SKILL LEVEL
Intermediate to Advanced
This pattern requires comfort with amigurumi-style continuous rounds, working in front/back loops, surface crochet, and assembling multi-part structures. The most advanced technique involves crocheting over a wire to shape the ribbon and balancing the internal suspension string.
Techniques Involved:
- Magic ring (MR)
- Working in back loops only (BLO) and front loops only (FLO)
- Crocheting tightly over flexible craft wire
- Basic hand-embroidery (stars)
- String/cord assembly and tensioning
📏 E. FINISHED SIZE
Length: Approximately 12–14 inches (30–35 cm) from the top hanging loop to the bottom bells.
Width: Approximately 3.5 inches (9 cm) at the widest part of the spiral and bauble.
Size will vary depending on your chosen yarn weight, hook size, and how tightly you compress or stretch the wired spiral during final shaping.
🧮 F. GAUGE
Amigurumi Gauge: 6 sc and 6 rows = 1 inch (2.5 cm) using the main hook and sport-weight yarn.
Note: Exact gauge is not critical for this ornamental design. However, your stitches must be tight enough that the polyfill stuffing in the cone and bottom bauble does not show through.
🧶 G. REQUIRED YARN AMOUNTS
Estimates are based on Sport/DK weight yarn.
- 🟢 Main Color (MC) – Forest Green: Approx. 85 yards (78 meters) for the cone, ribbon, and bottom bauble.
- 🟡 Contrast Color (CC1) – Metallic Gold: Approx. 45 yards (41 meters) for the star, scallop edging, ribbon edging, and bauble embroidery.
- ⚪ Contrast Color (CC2) – Snow White: Approx. 5 yards (4.5 meters) for the central snowflake.
🧰 H. MATERIALS
- Crochet Hook: 2.5 mm (or size appropriate for your yarn to achieve a tight fabric).
- Yarn: Sport or DK weight cotton or cotton-blend yarn in Green, Gold, and White.
- Craft Wire: 20-gauge or 22-gauge flexible jewelry/craft wire (approx. 24 inches / 60 cm) to shape the ribbon.
- Twine/Cord: A strong jute twine or metallic cord for the central hanging axis.
- Bells: 3 small craft bells (approx. 10-12 mm). Gold colored.
- Pearls: 15–20 small half-pearls (4-6 mm) for gluing, or fully drilled pearls for sewing.
- Bead Caps: 2 ornate metal bead caps (approx. 8-10 mm) for the top and bottom of the bauble.
- Stuffing: High-quality polyfill stuffing.
- Tools: Tapestry needle, wire cutters, small pliers, stitch markers, fabric glue (optional, for half-pearls), and scissors.
- ⚠️ Safety Note: This item contains wire, small beads, and bells. It is a decorative item and should be kept out of reach of small children and pets.
🔤 I. ABBREVIATIONS – US TERMS
- MR: Magic ring
- ch: Chain
- sc: Single crochet
- hdc: Half double crochet
- dc: Double crochet
- tr: Treble crochet
- sl st: Slip stitch
- inc: Increase (2 sc in the same stitch)
- dec: Invisible decrease (sc 2 together using front loops only)
- BLO: Back loops only
- FLO: Front loops only
- st(s): Stitch(es)
- FO: Fasten off
- (…) x N: Repeat the instructions in the parentheses N times
📝 J. NOTES BEFORE YOU BEGIN
- Continuous Rounds: The cone and bauble are worked in continuous spirals. Do not join or turn unless explicitly instructed. Place a stitch marker in the first stitch of each round.
- Crocheting Over Wire: When you reach the gold edging of the ribbon, you will lay the craft wire flat along the top of your stitches. Insert your hook, yarn over, and pull up a loop under the wire to trap it inside the single crochet stitch.
- Suspension System: The entire ornament relies on a single continuous piece of twine running down the center. You will not sew the snowflake or bells to the crochet fabric; they will be tied to this central cord.
- Color Changes: When changing colors (e.g., attaching gold to the scallops), finish the final pull-through of the previous stitch with the new color for a seamless transition.
🪡 K. COMPLETE PATTERN
⭐ The Golden Topper Star (Make 2)
This forms the double-sided star at the top of the tree, hiding the main suspension knot inside.
🧵 Yarn: CC1 (Metallic Gold)
R1: MR, ch 1. (sc, hdc, dc, ch 2, sl st in 2nd ch from hook, dc, hdc) x 5 into the ring. (5 points made)
- Finishing: Pull the MR tightly. Join with a sl st to the first sc. FO the first star. Do not FO the second star.
- Hold both stars with wrong sides facing together. Ch 1, and working through both thicknesses, sc evenly around the perimeter to join them. Leave a small gap at the bottom open for the hanging twine later. FO and weave in ends.
- Sew or glue a small pearl to the front center.
🎄 Main Tree Cone
Worked from the top down. The unworked front loops will be used later for the decorative layered branches.
🧵 Yarn: MC (Forest Green)
R1: MR 4 sc. (4)
R2: (1 sc, inc) x 2. (6)
R3: (2 sc, inc) x 2. (8)
R4: (3 sc, inc) x 2. (10)
R5: (4 sc, inc) x 2. (12)
R6: BLO (1 sc, inc) x 6. (18) — Mark the FLO of this round; it will be Tier 1.
R7: 18 sc. (18)
R8: BLO (2 sc, inc) x 6. (24) — Mark the FLO of this round; it will be Tier 2.
R9: 24 sc. (24)
R10: BLO (3 sc, inc) x 6. (30) — Mark the FLO of this round; it will be Tier 3.
R11: 30 sc. (30)
R12: BLO (4 sc, inc) x 6. (36) — Mark the FLO of this round; it will be Tier 4.
- Do not FO. You will continue directly into the ribbon.
🌀 The Spiral Ribbon
This strip extends directly from the base of the cone.
🧵 Yarn: MC (Forest Green)
Row 1: From the end of R12, ch 100. Turn, sc in the 2nd ch from the hook and in each of the remaining 98 chs across. When you reach the cone, sl st into the next available st on R12 of the cone. (99 sc)
Row 2: Ch 1, turn. Skip the sl st. sc in each of the 99 sts across the ribbon. (99 sc)
Row 3: Ch 1, turn. sc in each of the 99 sts across. Sl st into the next unworked st on R12 of the cone.
- Finishing: FO Green. Weave in the end.
🌿 Tiered Cone Scallops (Surface Crochet)
We will now create the textured branches on the unworked front loops of the cone.
🧵 Yarn: MC (Forest Green) & CC1 (Metallic Gold)
- Tier 1 (Front Loops of R6): Hold the cone upside down. Attach MC to the first unworked front loop.
- Green Row: Ch 1, (sc in next st, skip 1 st, 5 dc in next st, skip 1 st) around. Join with sl st. FO Green.
- Gold Edging: Attach CC1 to the first sc. Sl st loosely in each sc and dc around the scallops. FO CC1.
- Tier 2 (Front Loops of R8): Repeat Green Row and Gold Edging.
- Tier 3 (Front Loops of R10): Repeat Green Row and Gold Edging.
- Tier 4 (Front Loops of R12): Repeat Green Row and Gold Edging.
- Sew or glue small pearls onto the peaks or dips of the scallops as desired.
🪢 Ribbon Wire Edging
This step locks the ribbon into its structural spiral shape.
🧵 Yarn: CC1 (Metallic Gold)
- Cut a piece of craft wire slightly longer than the perimeter of your ribbon (approx. 24 inches). Bend a tiny loop at each tip of the wire using pliers so it doesn’t poke through the yarn.
- Attach CC1 to the bottom corner of the ribbon (farthest from the cone).
- Lay the wire flat against the edge of the ribbon. Working over the wire, sc evenly along the bottom edge of the ribbon, working towards the cone.
- When you reach the cone base, carefully bend the wire and continue sc along the top edge of the ribbon, working back down towards the tip.
- At the tip, work 3 sc over the wire loop to round the corner. FO and weave in ends securely.
- Shape the wire: Gently coil the now-wired ribbon around two fingers or a thick marker to form a permanent, bouncy spiral.
- Apply pearls in a spaced line down the center of the green ribbon fabric.
❄️ Central Snowflake Charm
A delicate, floating centerpiece.
🧵 Yarn: CC2 (Snow White)
R1: MR, ch 1. (sc, ch 4, sl st in 2nd ch from hook and next 2 chs, sc back into the ring) x 6.
- Finishing: Pull MR tight. Join with sl st to first sc. FO and weave in ends.
- Add a tiny dab of gold yarn or a small gold bead to the center.
🧶 The Bottom Bauble
The weighted anchor of the ornament.
🧵 Yarn: MC (Forest Green)
R1: MR 6 sc. (6)
R2: inc x 6. (12)
R3: (1 sc, inc) x 6. (18)
R4: (2 sc, inc) x 6. (24)
R5: (3 sc, inc) x 6. (30)
R6-R10: 30 sc. (30) — 5 rounds total
R11: (3 sc, dec) x 6. (24)
R12: (2 sc, dec) x 6. (18)
- Stuff the bauble firmly with polyfill.R13: (1 sc, dec) x 6. (12)R14: dec x 6. (6)
- Finishing: FO, leaving a long tail. Weave the tail through the front loops of the final 6 stitches and pull tight to close.
- Embroidery: Using CC1 (Metallic Gold), embroider small 6-point stars evenly around the middle of the bauble. Place a French knot or a tiny pearl in the center of each embroidered star.
🎨 L. STYLING / ASSEMBLY / STABILITY / FINAL SHAPING
The visual success of this ornament depends entirely on the central suspension cord. Do not try to sew the pieces together directly.
- Prepare the Suspension Cord: Cut a 24-inch piece of strong twine or metallic string.
- Top Loop & Star: Tie a 2-inch loop at the very top of the cord for hanging. Thread the two loose ends of the cord down through the open bottom gap of the Gold Star. Tie a thick double knot just below the star to lock it in place.
- The Cone & Upper Bell: Thread the cord through the tip of the Green Cone and pull it down through the hollow center. Tie a knot exactly where you want the first gold bell to hang (just hidden inside the bottom of the cone). Thread the bell onto the cord, resting on the knot.
- The Snowflake: Measure down the cord to the middle of the ribbon spiral. Tie another knot. Thread the string through the top picot of the White Snowflake. Tie a knot below it to secure it.
- The Bauble Base: Measure down to the bottom of the spiral. Thread the cord through a metal bead cap, then directly through the center of the stuffed Green Bauble (from top to bottom).
- Bottom Bells: Thread the cord through a second metal bead cap at the bottom of the bauble. Thread your remaining two gold bells onto the cord. Push everything snugly upward to create tension, and tie a final, secure double knot below the bells to lock the entire assembly together. Trim excess cord.
- Final Shaping: Gently pull the wired ribbon so it spirals beautifully around the central cord, framing the bell and the snowflake perfectly.
💡 M. HELPFUL CROCHET TIPS
- 💡 Wire Handling: If your craft wire is very thin, double it over before crocheting around it to give the ribbon stronger shape retention.
- 💡 Scallop Contrast: When slip stitching the gold edging on the scallops, keep your tension loose so the green stitches beneath don’t buckle or curl inward.
- 💡 Cord Tension: Ensure the central hanging string is completely taut before making your final bottom knot. If the string is loose, the heavy bauble will pull on the cone and stretch the stitches.
- 💡 Pearl Placement: If using glue for the pearls, use a clear-drying fabric or jewelry glue (like E6000 or Gem-Tac) applied with a toothpick to prevent messy smudges on the dark green yarn.
- 💡 Cone Stuffing: The main cone is left unstuffed so the bell can hang inside it. If your cone is collapsing, you can paint the inside with a 1:1 mixture of PVA glue and water to stiffen the fabric.
- 💡 Embroidery Symmetry: Use dressmaker pins to mark the placement of your gold stars on the bauble before you start embroidering to ensure they are spaced evenly.
🧼 N. CARE INSTRUCTIONS
Because of the internal wire, metal bells, and glued/sewn pearls, this ornament is not machine washable.
- Cleaning: Use a lint roller or a piece of masking tape to gently remove household dust. For localized stains, spot clean carefully with a damp Q-tip and mild soap.
- Storage: Store the ornament in a hard-sided box surrounded by tissue paper. Do not place heavy ornaments on top of it, as this will crush the wired ribbon spiral and bend it out of shape. Keep in a dry, temperature-controlled area to prevent the metal bells and wire from tarnishing.
❓ R. FAQ
❓ Can I make this without the craft wire?
The wire is essential for the spiral ribbon to float around the center string. Without it, the ribbon will simply hang limp. If you absolutely cannot use wire, you must heavily starch the ribbon using liquid fabric stiffener and pin it around a cylinder to dry, though this is less durable.
❓ What if my bauble is pulling the cone out of shape?
This means your central string isn’t bearing the weight. The twine must be tied securely above the cone and below the bauble so that the string holds the weight of the bauble, not the crochet fabric of the cone.
❓ Can I use worsted-weight yarn instead?
Yes, but your ornament will be significantly larger and heavier. If using worsted weight yarn, increase your hook size to 3.5mm or 4.0mm, use a much thicker gauge of wire to support the heavier ribbon, and ensure your tree branch is strong enough to hold the final piece.
❓ Is there an alternative to sewing pearls?
Absolutely! You can use French knots in white yarn, puffy fabric paint, or iron-on rhinestones.
❓ How do I prevent the metallic yarn from fraying?
Metallic yarn is notoriously slippery. Leave extra-long tails when fastening off, weave them in multiple directions (creating a zig-zag path inside the stuffing or under stitches), and consider a tiny dot of fabric glue on the very end before snipping the excess.