📖 B. INTRODUCTION
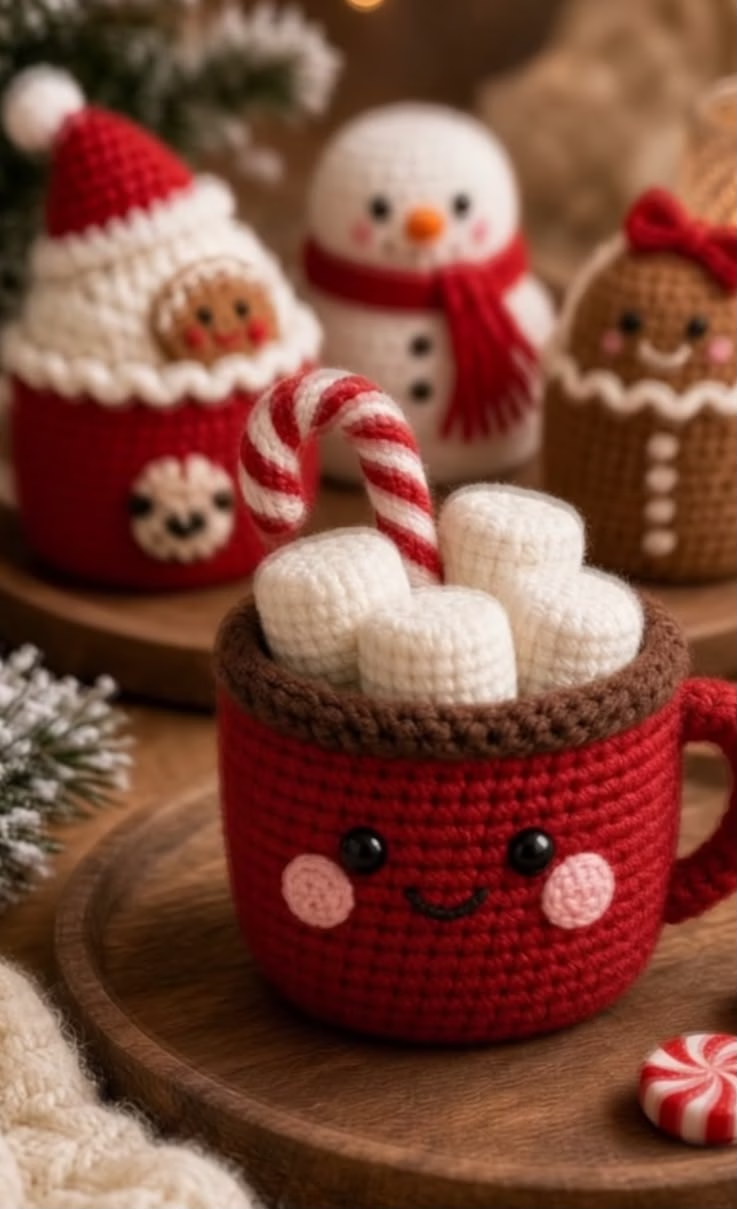
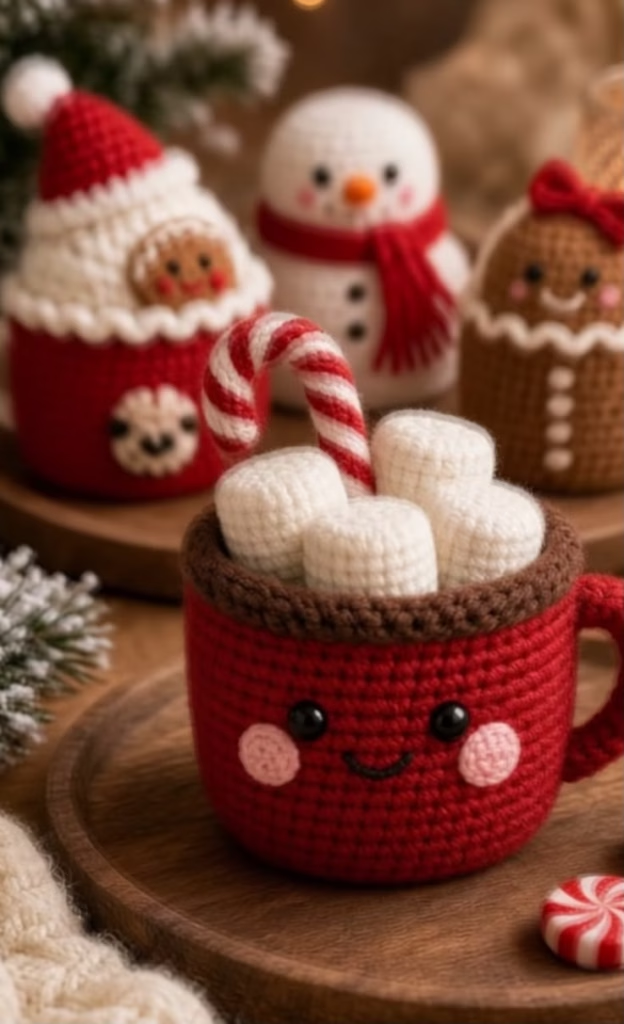
There is nothing quite as comforting as a steaming mug of hot cocoa on a chilly winter evening. This adorable amigurumi hot chocolate mug captures all that seasonal magic in a squishy, permanent form! Featuring a classic bright red mug, a deeply textured dark chocolate rim, a kawaii smiling face, and an irresistible topping of fluffy marshmallows and a striped candy cane, this project is guaranteed to bring a smile to anyone’s face.
Whether you are looking to create a whimsical centerpiece for your holiday table, a cheerful addition to a tiered tray display, or a unique handmade gift for the cocoa lover in your life, this pattern delivers. The cheerful blushing cheeks and wide-set eyes give the mug a distinctly modern kawaii aesthetic, while the oversized marshmallows add wonderful dimension and texture.
While the project title originally hints at a mug cozy, this specific design is engineered as a fully stuffed, freestanding amigurumi plush to perfectly match the charming reference design. It serves as a beautiful winter keepsake. The modular design means you can easily customize your mug—swap the red for your favorite pastel hue, add more marshmallows, or even embroider a tiny snowflake on the side. Grab your hook, your favorite holiday yarn, and let’s start stitching some winter warmth!
🔍 C. MAIN PATTERN OVERVIEW
This project is constructed in a modular, easy-to-manage format. We will begin by crocheting the main Mug Body, which features a flat base and tall, sturdy sides worked in a continuous spiral. Next, we create the Hot Chocolate Surface, a flat disc that will be sewn inside the top rim of the mug to enclose the stuffing.
From there, we will work on the character and accessories: a sturdy curved Handle, adorable pink Cheeks, three plush cylindrical Marshmallows, and a bendable Candy Cane. Finally, the assembly section will guide you through embroidering the face, attaching the components, and achieving the perfect overflowing-cocoa look.
🎯 D. SKILL LEVEL
Intermediate
This pattern uses foundational crochet stitches but requires precision in assembly, tension control, and shaping. It is an excellent project for confident beginners looking to expand their skills.
Techniques involved:
- Working in a continuous spiral (magic ring)
- Working in the Back Loop Only (BLO) and Front Loop Only (FLO)
- Invisible decreases
- Basic amigurumi color changing (for the candy cane)
- Stuffing and shaping geometric forms
- Sewing multi-part amigurumi components securely
- Basic facial embroidery
📏 E. FINISHED SIZE
When made with the recommended worsted weight yarn and a 4.0mm hook, the finished project measures approximately:
- Height: 6 inches (15 cm) from the base to the top of the candy cane curve.
- Width: 4.5 inches (11.5 cm) across the mug body, or 6 inches (15 cm) including the handle.
Size Adjustments:
The final size is highly dependent on your yarn weight and personal tension. Using a bulky blanket yarn with a 6.0mm hook will result in a massive, huggable plush, while using sport weight yarn with a 2.5mm hook will create a miniature version perfect for an ornament.
🧮 F. GAUGE
- 5 rounds of single crochet (measured from the magic ring outward) = 2 inches (5 cm) in diameter.
- Gauge is not strictly critical for this project, provided your stitches are tight enough that the polyfill stuffing does not show through the fabric. If you can see gaps in your stitches, switch to a hook that is 0.5mm smaller.
🧶 G. REQUIRED YARN AMOUNTS
All yardages are approximate and based on standard medium worsted weight (Category 4) acrylic yarn.
- 🔴 Main Color (Red): 110 yards (for the mug body and handle)
- 🟤 Contrast Color 1 (Dark Brown): 35 yards (for the hot chocolate surface and rim)
- ⚪ Contrast Color 2 (White): 50 yards (for the marshmallows and candy cane)
- 🌸 Accent Color (Soft Pink): 5 yards (for the cheeks)
- ⚫ Embroidery (Black): 1 yard of black yarn or embroidery floss (for the mouth)
🧰 H. MATERIALS
- Hook: 4.0mm (US G-6) crochet hook
- Yarn: Worsted weight (Category 4) in Red, Dark Brown, White, and Pink
- Eyes: One pair of 12mm black safety eyes
- Stuffing: High-quality polyester fiberfill
- Needle: Blunt-tipped yarn needle for sewing and embroidery
- Markers: Stitch markers (essential for tracking continuous rounds)
- Scissors: Sharp craft scissors
- Structural Insert (Optional): A piece of flat plastic canvas or thick cardboard (approx. 3.5 inches in diameter) to keep the mug base perfectly flat.
- Wire (Optional): One craft pipe cleaner or craft wire for the candy cane.
- ⚠️ Safety Note: If making this item for a child under 3, do not use wire in the candy cane, and embroider the eyes instead of using plastic safety eyes to prevent choking hazards.
🔤 I. ABBREVIATIONS – US TERMS
- MR: Magic Ring
- ch: chain
- st(s): stitch(es)
- sc: single crochet
- inc: single crochet increase (2 sc in the same stitch)
- dec: single crochet invisible decrease (sc 2 together using front loops only)
- sl st: slip stitch
- BLO: Back Loop Only
- FLO: Front Loop Only
- FO: Fasten Off
- ( … ) xN: repeat the sequence inside the parentheses N times
- [ … ]: total stitch count at the end of the round/row
📝 J. NOTES BEFORE YOU BEGIN
- Continuous Rounds: Most components in this pattern are worked in continuous spirals without joining. Always place a stitch marker in the first stitch of the round and move it up as you go.
- The “X” Stitch (Yarn Under): For the neatest, tightest amigurumi fabric, consider using the “yarn under” single crochet technique rather than the traditional “yarn over.” This creates small, cross-shaped stitches that are perfect for geometric shapes like mugs.
- Color Changes: When changing colors (especially on the candy cane), perform the color change on the final pull-through of the stitch prior to the new color.
- Sewing Tails: When a component’s instructions say “FO, leaving a long tail,” leave at least 12-15 inches of yarn. It is always better to have too much sewing yarn than too little!
🪡 K. COMPLETE PATTERN
☕️ Mug Body (Red and Dark Brown)
This piece forms the main structure. We start at the bottom and work our way up to the rim.
- Yarn: Start with Red
- R1: MR, 6 sc in ring. [6]
- R2: inc in each st around. [12]
- R3: (1 sc, inc) x6. [18]
- R4: (2 sc, inc) x6. [24]
- R5: (3 sc, inc) x6. [30]
- R6: (4 sc, inc) x6. [36]
- R7: (5 sc, inc) x6. [42]
- R8: (6 sc, inc) x6. [48]
- R9: (7 sc, inc) x6. [54]
- R10: (8 sc, inc) x6. [60]
- Note: Measure your base now. If using a plastic canvas insert for a flat bottom, cut a circle exactly the size of your work at R10.
- R11: BLO sc in each st around. [60]This creates the sharp right angle for the bottom of the mug.
- R12-R32: sc in each st around for 21 rounds. [60]You are now building the walls of the mug. If you want a taller mug, you can add 2-3 more rounds here.
- R33:Change to Dark Brown yarn in the last step of R32. sc in each st around. [60]
- R34: (This round creates the chunky rim) FLO sc in each st around. [60]
- FO and weave in the ends. (The unworked back loops of R34 will be used later to attach the hot chocolate surface).
🍫 Hot Chocolate Surface (Dark Brown)
This flat disc acts as a “lid” that holds the stuffing inside the mug and creates the illusion of liquid.
- Yarn: Dark Brown
- R1: MR, 6 sc in ring. [6]
- R2: inc in each st around. [12]
- R3: (1 sc, inc) x6. [18]
- R4: (2 sc, inc) x6. [24]
- R5: (3 sc, inc) x6. [30]
- R6: (4 sc, inc) x6. [36]
- R7: (5 sc, inc) x6. [42]
- R8: (6 sc, inc) x6. [48]
- R9: (7 sc, inc) x6. [54]
- R10: (8 sc, inc) x6. [60]
- FO, leaving a very long tail (approx. 24 inches) for sewing the surface to the mug body later.
🤏 Handle (Red)
Worked as a narrow tube.
- Yarn: Red
- R1: MR, 8 sc in ring. [8]
- R2-R22: sc in each st around for 21 rounds. [8]
- FO, leaving a long tail for sewing.
- Stuffing Note: Stuff the handle very lightly with fiberfill, or insert a pipe cleaner for shape. Do not overstuff, or it will be difficult to bend into a C-shape.
☺️ Cheeks – Make 2 (Pink)
Small, flat circles for the face.
- Yarn: Soft Pink
- R1: MR, 8 sc in ring. [8]
- FO, leaving a long tail for sewing.
- Note: Pull the magic ring closed tightly so there is no hole in the center.
🤍 Marshmallows – Make 3 (White)
Chunky cylinders that sit on top of the cocoa.
- Yarn: White
- R1: MR, 8 sc in ring. [8]
- R2: inc in each st around. [16]
- R3: (1 sc, inc) x8. [24]
- R4: BLO sc in each st around. [24]This creates the flat top edge of the marshmallow.
- R5-R10: sc in each st around for 6 rounds. [24]
- R11: BLO (1 sc, dec) x8. [16]
- Stuff the marshmallow firmly, pushing the stuffing out toward the sides to maintain a cylindrical shape.
- R12: dec x8. [8]
- FO, leaving a long tail. Use a yarn needle to weave the tail through the front loops of the remaining 8 stitches, pull tight to close the hole, and leave the remaining tail for sewing the marshmallow to the hot chocolate surface.
🍬 Candy Cane (Red and White)
A striped, bendable tube.
- Yarn: Start with Red
- R1 (Red): MR, 8 sc in ring. [8]
- R2 (Red): sc in each st around. [8]
- R3-R4 (White):Change to White. sc in each st around for 2 rounds. [8]
- R5-R6 (Red):Change to Red. sc in each st around for 2 rounds. [8]
- R7-R32: Continue alternating 2 rounds of White and 2 rounds of Red until you have 16 distinct colored stripes (8 red, 8 white). [8]
- FO, leaving a tail for sewing.
- Construction Note: To avoid weaving in dozens of ends, simply carry the unused color up the inside of the tube as you work. Once finished, insert a folded pipe cleaner inside the tube. Do not stuff with polyfill. Bend the top 2 inches to form the classic candy cane hook.
🎨 L. STYLING / ASSEMBLY / STABILITY / FINAL SHAPING
Assembly is where your amigurumi truly comes to life! Follow these steps in order to ensure the easiest construction and the neatest finish.
1. Face Placement & Embroidery
- Before stuffing the main mug, insert the 12mm safety eyes between Rounds 18 and 19 of the Mug Body. Space them roughly 8 or 9 stitches apart.
- Snap the safety washers securely onto the back of the posts inside the mug.
- Using a yarn needle and black embroidery floss (or separated plies of black yarn), stitch a small “V” or gentle curve for the smiling mouth, centered between the eyes on Round 17.
- Pin the pink cheeks just below and slightly to the outside of each eye. Sew them flat against the face using the leftover pink yarn tails. Tie off the ends inside the mug.
2. Stabilizing and Stuffing the Mug
- Place your plastic canvas or cardboard circle flat inside the bottom of the mug. This ensures the mug will sit completely flat on a table without wobbling.
- Begin stuffing the mug firmly with polyfill. Press the stuffing out toward the sides to create smooth, straight walls.
3. Attaching the Hot Chocolate Surface
- Thread the long Dark Brown tail from the Hot Chocolate Surface onto your needle.
- Align the disc with the opening of the mug.
- Sew the edge of the flat disc to the unworked back loops of Round 33 (the round just below the chunky rim).
- Stop when you have about 2 inches left unsewn. Add any final polyfill to ensure the mug is firmly packed and the dark brown surface sits relatively flat (a slight dome is okay).
- Sew the remaining gap closed, knot the yarn securely, and hide the tail inside the body.
4. Attaching the Handle
- Position the Handle on the right side of the mug (assuming the face is pointing forward).
- Pin the top of the handle around Round 27, and the bottom of the handle around Round 15. Make sure it forms a nice “C” shape.
- Sew both ends securely to the red mug body. Reinforce with a few extra stitches so the handle holds its shape.
5. Arranging the Toppings
- Marshmallows: Pin the three marshmallows to the dark brown hot chocolate surface. Cluster them together slightly off-center. They look best when slightly tilted rather than perfectly straight up and down. Sew around the base of each marshmallow to secure them to the brown surface.
- Candy Cane: Tuck the bottom end of the candy cane behind or beside the marshmallows. Sew the bottom 3-4 rounds of the candy cane securely to the hot chocolate surface and lightly tack it to the side of a marshmallow for extra stability. Ensure the “hook” of the candy cane is facing a visually pleasing direction.
Final Silhouette Check: ✅
- ✅ Does the mug sit completely flat on a table?
- ✅ Is the handle sturdy and evenly placed on the side?
- ✅ Are the eyes and cheeks symmetrical?
- ✅ Do the marshmallows look clustered and fluffy?
- ✅ Is the candy cane bent at a sharp, recognizable angle?
💡 M. HELPFUL CROCHET TIPS
- 💡 Preventing a Wobbly Base: If you don’t have plastic canvas for the base, a thoroughly cleaned plastic lid from a yogurt or deli container cut to size works perfectly!
- 💡 Seamless Stripes: To minimize the “jog” (the noticeable step-up where colors change) on the candy cane, try finishing the last stitch of a color block with a slip stitch instead of a single crochet, then chain 1 with the new color before beginning the next round.
- 💡 Pin Before You Sew: Never sew a piece on without pinning it first. Use long sewing pins to hold the handle, cheeks, and marshmallows in place. Look at the mug from all angles to ensure you are happy with the placement before committing to the first stitch.
- 💡 Even Stuffing: Add stuffing in small, golf-ball-sized chunks rather than one massive clump. This prevents lumps and keeps the cylindrical shape of the mug smooth.
- 💡 Hidden Knots: When fastening off sewn parts like the cheeks, pass the needle straight through the body and out the back of the mug. Tie your knot there, trim the yarn, and use the back of your needle to poke the knot deep inside the stuffing to hide it completely.
- 💡 Blush Alternative: If you don’t want to crochet the cheeks, you can use a small brush and real cosmetic blush or pink soft pastel chalk to gently shade the cheeks directly onto the red yarn.
🧼 N. CARE INSTRUCTIONS
Because this pattern utilizes polyfill stuffing and optional wire inserts, it should not be machine washed.
- Cleaning: Spot clean only using a damp cloth and mild detergent. Dab the soiled area gently; do not rub vigorously, as this can cause acrylic yarn to pill or fuzz.
- Drying: Allow to air dry completely in a well-ventilated area. Do not place in a dryer, as the heat can melt acrylic yarn and distort the plastic safety eyes.
- Storage: Pack away gently during the off-season without crushing the candy cane or marshmallows to help the piece retain its structural shape for years to come.
❓ R. FAQ
❓ Can I make this pattern as an actual, functional mug cozy for a real cup?
Yes! To turn this into a functional sleeve for a disposable coffee cup, simply omit the base (skip R1-R10 and instead chain an amount that fits snugly around your cup, join, and work in rounds from there). Omit the Hot Chocolate surface and the toppings entirely, and slide the sleeve right onto your cup!
❓ Why is my flat base curling up like a bowl?
If your base is curling during Rounds 1-10, your tension is likely too tight, or you missed an increase stitch. Ensure you have exactly the right stitch count at the end of each round. If it still curls slightly, don’t worry—the BLO round (R11) and the structural insert will force it to lay flat once stuffed.
❓ Is this safe for babies and toddlers?
As written, no. Safety eyes can be pulled out by determined little fingers and pose a choking hazard, and the wire in the candy cane is dangerous if it pokes through the yarn. To make it baby-safe, embroider the eyes with black yarn and stuff the candy cane lightly with polyfill instead of using wire.
❓ Can I use velvet or chenille yarn?
Absolutely! Blanket or chenille yarn makes an incredibly soft and oversized plush. Just remember to size up your hook appropriately (usually a 6.0mm or 7.0mm hook for blanket yarn) and ensure your stitches are tight enough to hold the stuffing. The pattern proportions remain exactly the same.
❓ How do I get my safety eyes to sit flush against the fabric?
Sometimes the thick posts of safety eyes push the surrounding stitches apart. You can carefully melt the back of the post with a lighter after attaching the washer (flattening it like a rivet), or simply ensure you place the eye directly between stitches, rather than splitting a strand of yarn.