📖 B. INTRODUCTION
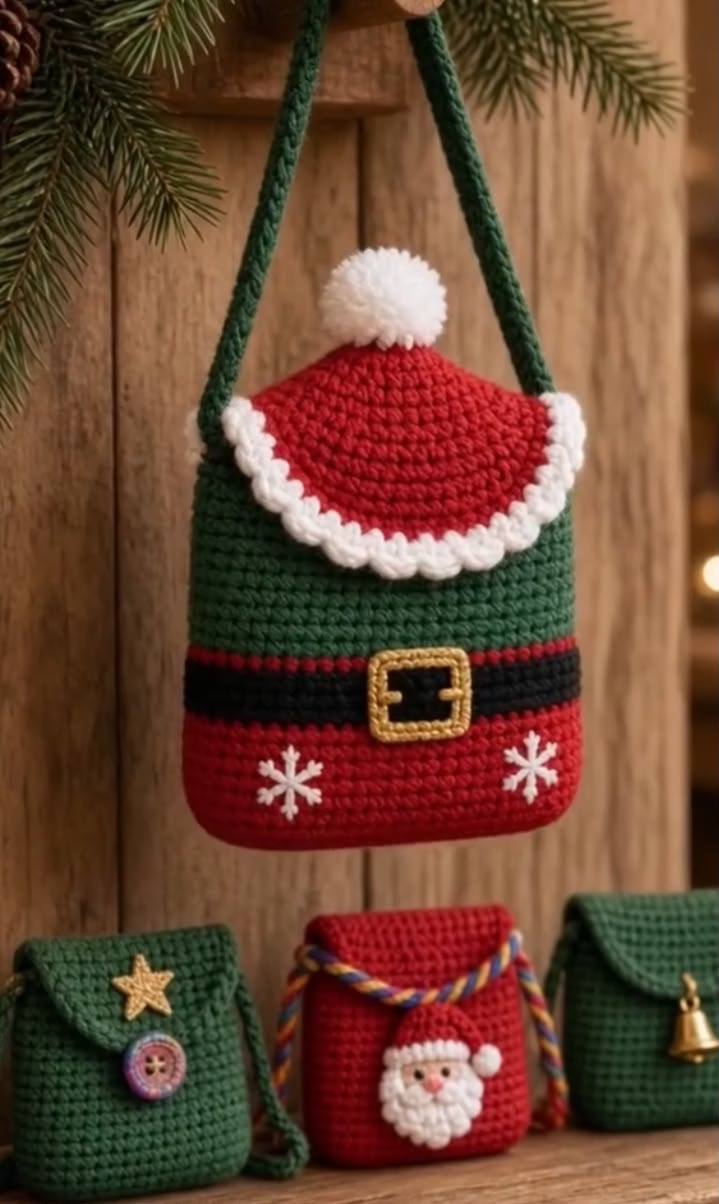
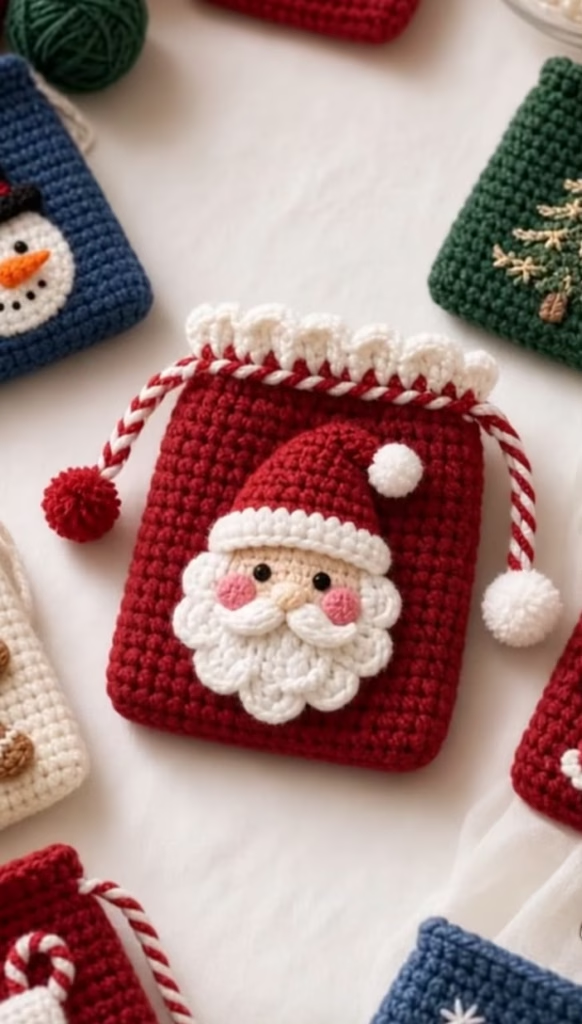
Bring festive holiday magic into your handmade celebrations with this charming Santa Face Christmas Gift Pouch! Designed with a classic crimson red body, a delicate white scalloped rim, and a candy-cane striped twisted drawstring, this pouch serves as a reusable gift bag, stocking stuffer holder, or heirloom holiday ornament.
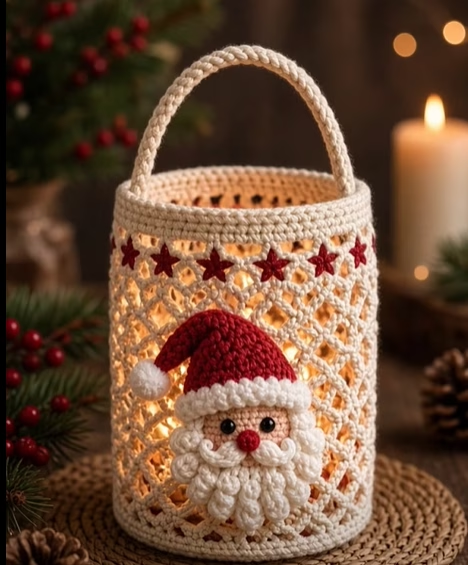
The standout feature of this design is the dimensional 3D Santa Claus applique stitched directly onto the front. Complete with a soft textured beard, plush mustache wings, a sweet button nose, rosy pink cheeks, and a folded stocking cap topped with a fluffy pom-pom, this cheerful character adds instant warmth and craftsmanship to any Christmas present.
Whether you are packing sweet treats, jewelry, gift cards, or small holiday keepsakes, this project is fast, rewarding, and ideal for scrap busting. It also makes a popular bestseller for holiday craft fairs and a cherished gift wrapping alternative that loved ones will reuse year after year.
This comprehensive guide includes step-by-step instructions for every component, precise stitch counts, assembly diagrams, and styling tips so you can create a perfectly finished Christmas pouch with complete confidence.
🔍 C. MAIN PATTERN OVERVIEW
The Santa Face Christmas Gift Pouch consists of two primary parts: a seamless flat-bottomed drawstring pouch and a multi-layered Santa face applique.
- 👝 Pouch Base & Body: Worked in one piece from the bottom up in continuous and joined rounds of single crochet, featuring a built-in eyelet row for the drawstring cord and finished with a decorative white shell stitch border.
- 🎅 Santa Face Applique: Constructed in modular layers—a beige facial disc base, a double-layered textured scalloped beard, a tapered folded red hat with a plush white brim, a two-part mustache, a button nose, and rosy cheek circles.
- 🎀 Twisted Drawstring Cord: A dual-color braided candy-cane cord threaded through the eyelet row, finished at both ends with stuffed crochet pom-pom end caps.
🎯 D. SKILL LEVEL
Skill Level: Easy to Intermediate
This pattern is accessible to adventurous beginners who know basic stitches and are ready to practice shaping, color switching, working in decorative loops, and assembling multi-piece appliques.
- 🧵 Required Techniques:
- 🔴 Working in continuous spiral rounds and joined rounds
- 🔴 Working in flat rows (turning)
- 🔴 Magic Ring (MR) initialization
- 🔴 Basic stitches: chain (ch), single crochet (sc), half double crochet (hdc), double crochet (dc)
- 🔴 Stitch modifications: increases (inc), decreases (dec), Back Loops Only (BLO), Front Loops Only (FLO)
- 🔴 Decorative stitch combinations: Shell stitch (5 dc in 1 st)
- 🔴 Color changing and neat tail weaving
- 🔴 Applique positioning and surface hand-sewing
📏 E. FINISHED SIZE
- 📏 Height: Approximately 18 cm (7.0 inches) from base to top scalloped trim.
- 📏 Width: Approximately 14 cm (5.5 inches) laid flat.
- 📏 Santa Applique Diameter: Approximately 8.5 cm (3.3 inches) wide by 10.5 cm (4.1 inches) tall including hat.
💡 Note: Finished measurements may vary slightly depending on individual crochet tension, yarn brand, and hook size. Using a stiffer yarn or smaller hook will yield a firmer, slightly smaller pouch.
🧮 F. GAUGE
- 🧶 Gauge Standard: 20 stitches and 22 rows = 10 cm x 10 cm (4″ x 4″) in single crochet using a 3.5 mm hook.
- 🎯 Gauge Tension Note: Gauge is not strictly critical for this functional pouch. However, maintaining tight, even tension is recommended so that small gift items do not slip through the stitches and the Santa applique maintains a crisp, structured form.
🧶 G. REQUIRED YARN AMOUNTS
All yarn estimates are calculated using standard Category 3 / Light Worsted (DK) Cotton or Cotton-Blend yarn:
- 🔴 Crimson Red (Main Body & Hat): ~45 grams / 110 meters (120 yards)
- ⚪ Bright White (Trim, Beard, Brim & Pom-poms): ~25 grams / 60 meters (65 yards)
- 🏻 Soft Beige / Peach (Face & Nose): ~10 grams / 23 meters (25 yards)
- 🌸 Dusty Pink (Cheeks): ~3 grams / 7 meters (8 yards)
- 🖤 Black Embroidery Thread / Yarn: Small scrap for eyes (or 2 x 6mm black safety eyes)
🧰 H. MATERIALS
- 🪡 Crochet Hooks:
- 3.5 mm (US E-4) — primary hook for pouch body and hat
- 3.0 mm (US C-2) — secondary hook for tight applique details (face, nose, cheeks)
- ✂️ Tapestry / Yarn Needle: Blunt-ended needle for weaving ends and sewing applique components.
- 📍 Stitch Markers: 2–4 markers to track round starts and side alignments.
- ☁️ Fiberfill Stuffing: Small pinch for the nose, hat pom-pom, and drawstring end balls.
- 👁️ Safety Eyes (Optional): 2 x 6mm black safety eyes (embroidered French knots can be substituted).
- ✂️ Scissors & Measuring Tape: For trimming tails and checking gauge.
⚠️ Safety Warning: If making this pouch for young children under 3 years old, omit plastic safety eyes and embroider the eye features securely with black yarn.
🔤 I. ABBREVIATIONS – US TERMS
- ch: chain
- sl st: slip stitch
- sc: single crochet
- hdc: half double crochet
- dc: double crochet
- inc: increase (2 single crochet in the same stitch)
- dec: decrease (single crochet 2 stitches together)
- MR: Magic Ring
- BLO: Back Loops Only
- FLO: Front Loops Only
- st(s): stitch(es)
- rnd(s): round(s)
- rep: repeat
- [ ]: repeat instructions inside brackets the specified number of times
- ( ): total stitch count at the end of the row/round
📝 J. NOTES BEFORE YOU BEGIN
- 📌 Construction Logic: The pouch is worked from the bottom base upward in joined rounds to create neat, straight sides. The Santa face is crocheted as separate modular pieces and sewn onto the front before inserting the drawstring.
- 📌 Round Join Method: When working joined rounds for the pouch, slip stitch into the first stitch of the round (not the turning chain) and start the next round in the same stitch unless specified otherwise.
- 📌 Color Changes: Change colors in the final pull-through of the stitch preceding the new color.
- 📌 Sewing Tails: Always leave a long tail (15–25 cm / 6–10 inches) when fastening off applique components to ensure smooth hand-sewing later.
🪡 K. COMPLETE PATTERN
👝 Part 1: Main Pouch Body
Worked from the bottom base up using Crimson Red yarn and 3.5 mm hook.
- 🔴 Foundation Chain: Ch 22.
- 🔴 Rnd 1: Sc in 2nd ch from hook, sc in next 19 chs, 3 sc in last ch. Working along opposite side of foundation chain: sc in next 19 chs, 2 sc in starting chain base. Sl st to first sc to join. (44 sts)
- 🔴 Rnd 2: Ch 1, inc in first st, sc in next 19 sts, inc in next st, sc in next st, inc in next st, sc in next 19 sts, inc in next st, sc in last st. Sl st to join. (48 sts)
- 🔴 Rnd 3: Ch 1, sc in each st around. Sl st to join. (48 sts)
- 🔴 Rnd 4–28 (25 Rnds): Ch 1, sc in each st around. Sl st to join. (48 sts)
- 🔴 Rnd 29 (Drawstring Eyelet Rnd): Ch 2 (counts as hdc), ch 1, sk 1 st, *hdc in next st, ch 1, sk 1 st; rep from * around. Sl st to 2nd ch of starting ch-2 to join. (24 hdc, 24 ch-1 spaces = 48 sts)
- 🔴 Rnd 30: Ch 1, sc in each hdc st and each ch-1 space around. Sl st to join. Fasten off Crimson Red yarn. (48 sts)
⚪ Switch to Bright White Yarn for Top Scalloped Border:
- ⚪ Rnd 31: Join Bright White yarn in any stitch. Ch 1, sc in same st, *sk 1 st, 5 dc in next st (shell made), sk 1 st, sl st in next st; rep from * around. End with 5 dc in penultimate st, sk last st, sl st to first sc. (12 shell motifs around top rim)
- ⚪ Fasten off White yarn and weave in ends neatly on the inside of the pouch.
🧠 Part 2: Santa Face Base
Worked in continuous spiral rounds using Soft Beige/Peach yarn and 3.0 mm hook.
- 🏻 Rnd 1: MR 6 sc. (6 sts)
- 🏻 Rnd 2: inc in each st around. (12 sts)
- 🏻 Rnd 3: [1 sc, inc] x6. (18 sts)
- 🏻 Rnd 4: [2 sc, inc] x6. (24 sts)
- 🏻 Rnd 5: [3 sc, inc] x6. (30 sts)
- 🏻 Rnd 6: [4 sc, inc] x6. Sl st to next st. Fasten off leaving a 20 cm tail. (36 sts)
🧔 Part 3: Santa Layered Beard
Worked directly onto the lower rim of the Beige Face Base using Bright White yarn and 3.5 mm hook.
- ⚪ Positioning: Identify the bottom 18 stitches of Round 6 of the Face Base (sts 10 to 27).
- ⚪ Inner Beard Layer (FLO):
- Join Bright White yarn in FLO of st 10.
- Work across FLO of next 18 sts: [Sl st in next st, sk 1 st, 5 dc in next st, sk 1 st] x4, sl st in last st. (4 textured beard shells)
- Fasten off.
- ⚪ Outer Beard Layer (Full Loop / Lower Edge):
- Join Bright White yarn behind the inner layer into st 8 of Round 6 (extending slightly wider up the cheeks).
- Work: Sl st in st 8, sc in st 9, [sk 1 st, 6 dc in next st, sk 1 st, sl st in next st] x5, sc in st 28, sl st in st 29. (5 outer full beard shells)
- Fasten off leaving a tail for securing to pouch wall.
🎓 Part 4: Santa Hat & Brim
Worked in flat turned rows using Crimson Red yarn and 3.5 mm hook.
- 🔴 Foundation: Ch 15.
- 🔴 Row 1: Sc in 2nd ch from hook and in each ch across, turn. (14 sts)
- 🔴 Row 2: Ch 1, sc across, turn. (14 sts)
- 🔴 Row 3: Ch 1, dec, sc in next 10 sts, dec, turn. (12 sts)
- 🔴 Row 4: Ch 1, sc across, turn. (12 sts)
- 🔴 Row 5: Ch 1, dec, sc in next 8 sts, dec, turn. (10 sts)
- 🔴 Row 6: Ch 1, sc across, turn. (10 sts)
- 🔴 Row 7: Ch 1, dec, sc in next 6 sts, dec, turn. (8 sts)
- 🔴 Row 8: Ch 1, sc across, turn. (8 sts)
- 🔴 Row 9: Ch 1, dec, sc in next 4 sts, dec, turn. (6 sts)
- 🔴 Row 10: Ch 1, dec, sc in next 2 sts, dec, turn. (4 sts)
- 🔴 Row 11: Ch 1, dec x2, turn. (2 sts)
- 🔴 Row 12: Ch 1, dec. (1 st)
- 🔴 Fasten off Crimson Red yarn.
⚪ White Fluffy Hat Brim:
- ⚪ Join Bright White yarn at the bottom foundation row of the red hat.
- ⚪ Work across bottom edge: [Sc in next st, ch 2, 2 dc in same st, sk 1 st] x7. Fasten off. (Creates a scalloped textured fleece brim).
⚪ Mini Pom-Pom for Hat Tip:
- ⚪ With White yarn & 3.0 mm hook: MR 6 sc. (6 sts)
- ⚪ Rnd 2: [1 sc, inc] x3. (9 sts)
- ⚪ Rnd 3: sc in each st around. (9 sts)
- ⚪ Rnd 4: [1 sc, dec] x3. (6 sts)
- ⚪ Stuff tiny fiberfill pinch, pull ring tight, and attach securely to the top point of the hat.
👨 Part 5: Mustache Wings (Make 2)
Worked in flat chains using Bright White yarn and 3.0 mm hook.
- ⚪ Wing 1: Ch 8. Sl st in 2nd ch from hook, sc in next ch, hdc in next ch, 2 dc in next ch, hdc in next ch, sc in next ch, sl st in last ch. Fasten off leaving a long tail.
- ⚪ Wing 2: Ch 8. Sl st in 2nd ch from hook, sc in next ch, hdc in next ch, 2 dc in next ch, hdc in next ch, sc in next ch, sl st in last ch. Fasten off leaving a long tail.
👃 Part 6: Nose & Rosy Cheeks
- 🏻 Nose (Soft Beige):
- Using 3.0 mm hook: MR 5 sc.
- Rnd 2: inc in each st around. (10 sts)
- Rnd 3: dec x5. (5 sts)
- Stuff tiny fiberfill, weave tail through FLO and pull tight to make a round button nose. Fasten off leaving tail.
- 🌸 Rosy Cheeks (Make 2 in Dusty Pink):
- Using 3.0 mm hook: MR 6 sc.
- Sl st to first st to close circle. Fasten off leaving a 15 cm sewing tail. (6 sts)
🎀 Part 7: Candy Cane Cord & End Pom-Poms
- 🔴⚪ Twisted Cord Construction:
- Cut two 180 cm (70 in) strands of Crimson Red yarn and two 180 cm strands of Bright White yarn.
- Tie the ends together in a knot. Secure one end to a door handle or heavy object.
- Pull taut and twist both colors together clockwise until very tight.
- Fold the cord in half, holding the middle; let the two halves twist naturally around each other counter-clockwise into a thick 2-color candy cane cord. Knot both ends.
- 🔴⚪ Drawstring End Pom-Poms / Balls (Make 1 Red, 1 White):
- Rnd 1: MR 6 sc. (6 sts)
- Rnd 2: inc in each st around. (12 sts)
- Rnd 3–4: sc in each st around. (12 sts)
- Rnd 5: dec x6. (6 sts)
- Stuff firmly with fiberfill before closing. Leave tail to attach to cord ends.
🎨 L. STYLING / ASSEMBLY / STABILITY / FINAL SHAPING
           +----------------------------------+
           |       [ White Scallop Rim ]      |
           |==================================|  <- Rnd 31 Shells
           |   ( ( ( Eyelet Drawstring ) ) )  |  <- Rnd 29 Eyelets
           |----------------------------------|
           |                                  |
           |             /\  <- Hat Tip       |
           |            /  \                  |
           |           /____\                 |
           |          [======] <- White Brim  |
           |          ( *  * ) <- Eyes        |
           |         (O (oo) O)<- Cheeks/Nose |
           |          \~~~~~~/                |
           |           \____/  <- Beard       |
           |                                  |
           |                                  |
           +----------------------------------+
📍 Step-by-Step Assembly Sequence
- 📍 Assemble Santa Face Details First:
- Pin the White Hat Brim to the top curve of the Beige Face Base.
- Stitch the Hat down onto the top 12 stitches of the face disc.
- Attach the 6mm Safety Eyes (or embroider black eyes with French Knots) between Rnds 3 and 4 of the Face Base, spaced 4 stitches apart.
- Sew the two Mustache Wings directly under the eyes, curling the tips slightly upward.
- Sew the Beige Nose over the center join of the two mustache wings.
- Sew the Dusty Pink Cheek Circles on either side of the mustache.
- Fold the tip of the Red Hat slightly down to the right side and catch with a tiny hidden stitch.
- 📍 Attach Santa Applique to Front Pouch Wall:
- Place the pouch flat on a table.
- Center the assembled Santa Face between Round 6 and Round 22 of the red pouch body.
- Pin securely in place using yarn pins.
- Using a tapestry needle and corresponding yarn tails, whip-stitch around the outer edges of the Beard, Hat, and Cheek pieces. Ensure stitches only go through the front wall of the pouch so the bag opening remains unblocked!
- 📍 Thread Drawstring Cord:
- Insert a safety pin or yarn needle through one end of the candy-cane cord.
- Weave through the Round 29 eyelet spaces (over one hdc, under next) around the entire perimeter, exiting through the front center eyelet.
- Attach the stuffed Red Pom-Pom to one cord tip and the White Pom-Pom to the other tip. Knot securely.
💡 M. HELPFUL CROCHET TIPS
- 💡 Tip 1 (Preventing Pouch Seam Skew): Turn your work or use seamless invisible slip-stitch joins every round to ensure the pouch sides remain perfectly square.
- 💡 Tip 2 (Crisp Face Outline): Use a smaller hook size (3.0 mm) for Santa’s face facial features so stitches stay extra dense and don’t leak fiberfill stuffing.
- 💡 Tip 3 (No-Sag Applique): When sewing Santa onto the pouch, stitch through every outer loop around the beard edge. This prevents the applique from drooping forward when heavy gifts are placed inside.
- 💡 Tip 4 (Cord Length Adjustment): Test cord length before trimming yarn! Fully open the pouch flat to ensure the cord ends leave at least 8–10 cm of slack on both sides.
- 💡 Tip 5 (Perfect Fluffy Beard Texture): Lightly brush the White beard shells with a wire pet slicker brush or clean toothbrush if you want a softer, faux-fur fluffy finish!
- 💡 Tip 6 (Neat Eye Placement): Insert eyes before sewing the face onto the pouch wall so safety backings don’t snag on the inside of the bag.
- 💡 Tip 7 (Scrap Yarn Usage): This pattern is an ideal scrap buster—small leftover cotton skeins are ideal for the cheeks, nose, brim, and pom-poms!
- 💡 Tip 8 (Color Contrast Check): Ensure your Crimson Red and Bright White offer high color contrast so the top scalloped border pops visually.
🧼 N. CARE INSTRUCTIONS
- 🧼 Washing: Hand wash gently in cold water using mild liquid detergent. Do not wring or twist.
- 🧼 Drying: Press pouch flat between two clean towels to absorb excess moisture, then reshape and lay flat to dry in shade.
- 🧼 Ironing/Steaming: Do not iron directly. If necessary, lightly steam from a distance of 15 cm (6 inches) away to smooth out any yarn creases.
- 🧼 Storage: Store flat in a cool, dry place. Avoid hanging heavy items inside for long periods to prevent stretching.
❓ R. FAQ
- ❓ Q: Can I use Worsted Weight (Category 4) yarn instead of DK weight?
- A: Yes! Using Category 4 Worsted yarn with a 4.0 mm hook will result in a slightly larger pouch (approx. 21 cm tall x 16 cm wide), perfect for holding larger gifts.
- ❓ Q: How do I adjust the pouch height?
- A: Simply add or subtract continuous sc rounds between Rnd 4 and Rnd 28. Every 2 added rounds will add roughly 1 cm of height to your bag.
- ❓ Q: Can I make the drawstring cord without twisting yarn?
- A: Absolutely. You can crochet an I-cord or simply chain 100 stitches with two strands held together for an easy alternative.
- ❓ Q: Is this pattern suitable for selling finished items at craft fairs?
- A: Yes! Finished pouches are popular items at Christmas markets. Be sure to credit your handmade craftsmanship and tag your original work.
- ❓ Q: How do I stop the top scallops from curling inward?
- A: Keep your double crochet stitches in the shell row slightly relaxed. If curling still occurs, lightly steam-block the white top border after finishing.
- ❓ Q: Can I embroider the eyes instead of using plastic safety eyes?
- A: Yes, embroidering eyes using black yarn or embroidery floss with satin stitch or French knots is recommended—especially if the gift pouch is intended for young children.