📖 B. INTRODUCTION
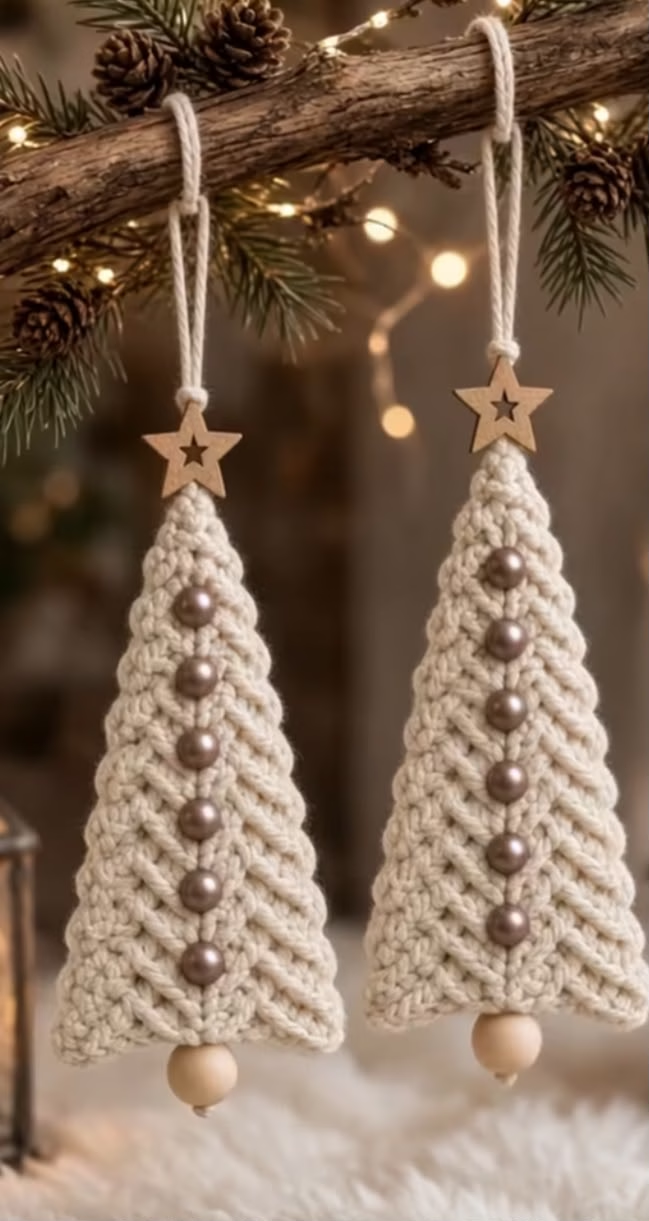
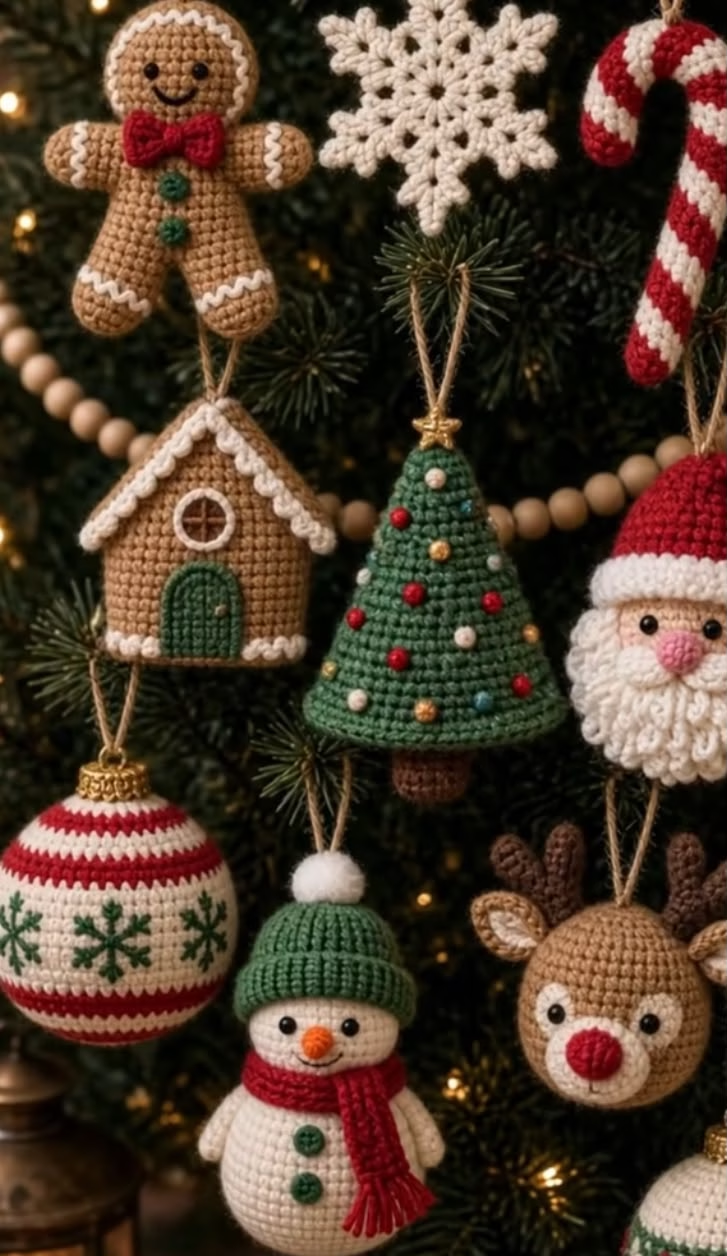
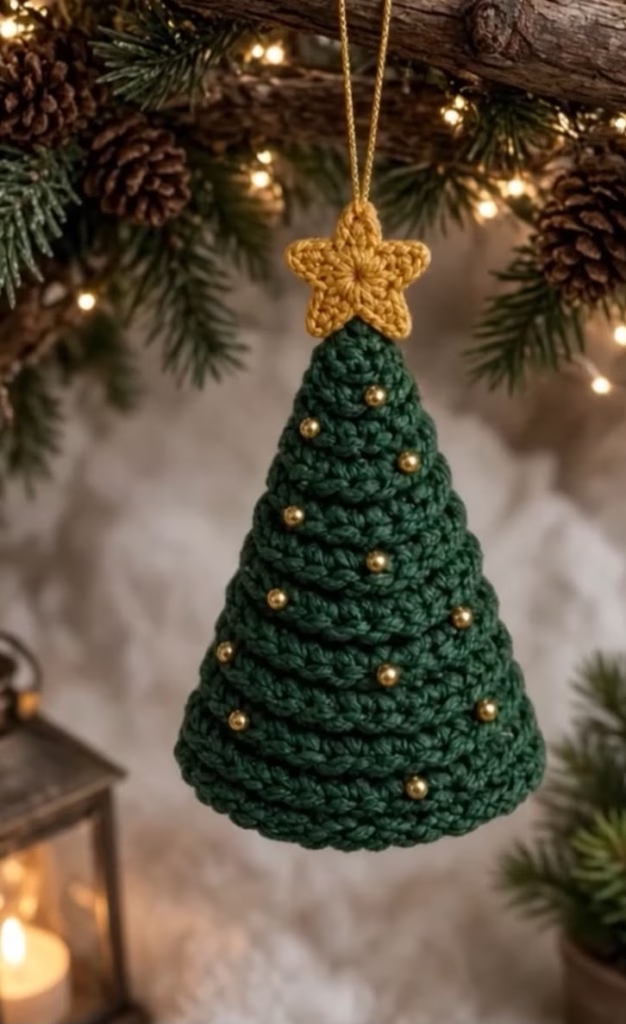
Bring a touch of handmade magic to your holiday decor with this elegant, textured amigurumi Christmas tree ornament. Featuring a rich, dark forest green color palette, this tree stands out thanks to its continuous spiral ridges that mimic the dense, layered branches of a classic evergreen. Designed to be a quick yet highly satisfying weekend project, it is the perfect make for craft fair season, thoughtful neighbor gifts, or a cozy addition to your own family tree.
What makes this design truly shine are the festive finishing touches. The tree is crowned with a bold, five-pointed gold crochet star, and the spiraling branches are dotted with metallic gold bead “ornaments” that catch the light beautifully. Finally, a simple gold string loop allows it to dangle elegantly from a real tree branch.
Because this pattern is worked in continuous rounds using a special loop technique, it builds up surprisingly fast. You can easily personalize your forest by experimenting with different yarn weights, swapping out the beads for colorful French knots, or crocheting the star in a frosty silver or bright yellow. Whether you are whipping up a single keepsake or an entire woodland of ornaments, this pattern provides all the structural details you need for a perfect finish.
🔍 C. MAIN PATTERN OVERVIEW
This ornament is constructed in three distinct, manageable modules to ensure structural integrity and a clean, professional finish:
- The Spiraled Tree Cone: The main body is crocheted from the top down in a continuous spiral. By working exclusively in the back loops, the unworked front loops are pushed outward, creating the distinct, continuous spiraling ridge visible on the tree.
- The Flat Base: To give the tree a crisp, professional silhouette and prevent the stuffing from bulging out the bottom, a flat circular base is crocheted separately and sewn to the bottom opening of the cone.
- The Star Topper & Decor: A quick, two-round star applique is crocheted in contrasting gold yarn and sewn securely to the top tip of the cone. Finally, the piece is embellished with sewn-on beads and a metallic hanger.
🎯 D. SKILL LEVEL
Skill Level: Easy / Advanced Beginner
This pattern is highly accessible but requires comfort with three-dimensional amigurumi shaping.
You will utilize the following techniques:
- 🧶 Crocheting in a continuous spiral (without joining rounds).
- 🧶 Crocheting in the Back Loop Only (BLO) to create texture.
- 🧶 Working basic increases to form a cone.
- 🧶 Crocheting small, tight shapes (the star).
- 🧶 Basic sewing for assembly and attaching beads.
📏 E. FINISHED SIZE
When made with standard worsted-weight (Category 4) yarn and the recommended hook, your finished ornament will measure:
- Height: Approximately 4.5 inches (11.5 cm) from the flat base to the tip of the star.
- Base Width: Approximately 3 inches (7.5 cm) in diameter.
Note: Your final size may vary slightly based on your personal tension, the exact brand of yarn you choose, and how firmly you pack the polyfill stuffing.
🧮 F. GAUGE
- Amigurumi Gauge: 5 sc stitches and 5 rounds = 1 inch (2.5 cm).
- Exact gauge is not strictly critical for this project. However, it is essential that your stitches are tight enough so that the polyfill stuffing does not show through the gaps. If you tend to crochet loosely, consider dropping down half a hook size.
🧶 G. REQUIRED YARN AMOUNTS
This is an excellent stash-busting project. The estimated yardage below is based on worsted weight (Medium 4) acrylic or cotton yarn:
- 🌲 Main Color (MC) – Dark Forest Green: Approximately 35 yards (32 meters).
- ⭐ Accent Color (AC) – Mustard/Gold: Approximately 5 yards (4.5 meters).
🧰 H. MATERIALS
- Hook: 3.5 mm (US E-4) crochet hook (or size needed to obtain a tight fabric).
- Yarn: Worsted weight yarn in Dark Green and Gold.
- Stuffing: High-quality polyester fiberfill (polyfill).
- Beads: 12 to 15 small spherical gold beads (approximately 4mm to 5mm in diameter).
- Hanger: A 6-inch length of gold metallic string or thin metallic embroidery cord.
- Tools:
- ✂️ Scissors.
- 🪡 Tapestry needle (for weaving in yarn ends and sewing the base/star).
- 🧵 Fine sewing needle and matching green sewing thread (for attaching the beads securely).
- 📍 Stitch marker.
- 📌 Straight sewing pins (for holding pieces in place during assembly).
⚠️ Safety Note: This pattern uses small hard beads which are a choking hazard. If making this ornament for a home with babies, toddlers, or pets, please substitute the beads with embroidered French knots using yellow or gold yarn.
🔤 I. ABBREVIATIONS – US TERMS
- MR = Magic Ring
- ch = chain
- sc = single crochet
- hdc = half double crochet
- sl st = slip stitch
- inc = single crochet increase (2 sc in the same stitch)
- BLO = Back Loop Only
- st(s) = stitch(es)
- rnd(s) = round(s)
- sk = skip
📝 J. NOTES BEFORE YOU BEGIN
- Continuous Rounds: Both the tree cone and the flat base are worked in continuous spirals. Do not slip stitch or chain 1 at the end of the rounds unless explicitly instructed to do so.
- Stitch Markers: Place a stitch marker in the first stitch of every round and move it up as you go. This is vital for cone shaping, as losing your place will make the tree lopsided.
- The Ridge Technique: After Round 1 of the tree cone, the entire body is worked in the Back Loop Only (BLO). This is the crucial step that creates the deep, horizontal spiraling ridges seen in the reference.
- Stuffing: Stuff the cone firmly, but push the stuffing up toward the point to ensure the base can remain completely flat once sewn shut.
🪡 K. COMPLETE PATTERN
🌲 The Tree Cone (Main Body)
What it is for: The main spiraled silhouette of the Christmas tree.
Yarn: Dark Forest Green (MC).
Quantity: Make 1.
Notes: Starting with Round 2, work every single stitch in the BLO.
Rnd 1: 6 sc in a MR. (6)
Rnd 2: Working in BLO, (sc in next st, inc in next st) 3 times. (9)
Rnd 3: In BLO, (sc in next 2 sts, inc) 3 times. (12)
Rnd 4: In BLO, (sc in next 3 sts, inc) 3 times. (15)
Rnd 5: In BLO, (sc in next 4 sts, inc) 3 times. (18)
Rnd 6: In BLO, (sc in next 5 sts, inc) 3 times. (21)
Rnd 7: In BLO, (sc in next 6 sts, inc) 3 times. (24)
Rnd 8: In BLO, (sc in next 7 sts, inc) 3 times. (27)
Rnd 9: In BLO, (sc in next 8 sts, inc) 3 times. (30)
Rnd 10: In BLO, (sc in next 9 sts, inc) 3 times. (33)
Rnd 11: In BLO, (sc in next 10 sts, inc) 3 times. (36)
Rnd 12: In BLO, (sc in next 11 sts, inc) 3 times. (39)
Rnd 13: In BLO, (sc in next 12 sts, inc) 3 times. (42)
Rnd 14: In BLO, (sc in next 13 sts, inc) 3 times. (45)
Rnd 15: In BLO, (sc in next 14 sts, inc) 3 times. (48)
Fasten off seamlessly. Leave a long yarn tail (about 12 inches) for sewing the base to the cone later. Set aside.
🪵 The Flat Base
What it is for: Sealing the bottom of the tree so it holds its conical shape without rounding out.
Yarn: Dark Forest Green (MC).
Quantity: Make 1.
Notes: Work in both loops for the entire base to create a dense, flat circle.
Rnd 1: 6 sc in a MR. (6)
Rnd 2: Inc in each st around. (12)
Rnd 3: (sc in next st, inc) 6 times. (18)
Rnd 4: (sc in next 2 sts, inc) 6 times. (24)
Rnd 5: (sc in next 3 sts, inc) 6 times. (30)
Rnd 6: (sc in next 4 sts, inc) 6 times. (36)
Rnd 7: (sc in next 5 sts, inc) 6 times. (42)
Rnd 8: (sc in next 6 sts, inc) 6 times. (48)
Fasten off. Weave in the starting and ending tails (you will use the tail from the cone for assembly).
⭐ The Gold Star
What it is for: The decorative topper sitting vertically at the apex of the tree. Yarn: Mustard/Gold (AC). Quantity: Make 1. Notes: This is worked flat in two quick rounds.
Rnd 1: 10 sc in a MR. Sl st into the first sc to join. Pull the ring tightly closed. (10) Rnd 2: Ch 4. Working back down the chain, sk the first ch from the hook, sl st in the 2nd ch, sc in the 3rd ch, hdc in the 4th ch. On the Round 1 base, sk the next sc, sl st into the following sc. Repeat from * 4 more times to create exactly 5 star points.
Fasten off. Leave a long yarn tail (about 8 inches) for sewing the star to the top of the tree.
🎨 L. STYLING / ASSEMBLY / STABILITY / FINAL SHAPING
Correct assembly is what transforms these individual pieces into a polished, premium-looking ornament. Follow this exact order:
1. Stuffing the Cone
- Begin packing polyfill into the green cone. Push small amounts firmly into the very tip using the back of your crochet hook.
- Continue stuffing until the cone is firm, but leave the bottom half-inch slightly under-stuffed so the flat base doesn’t bulge outward.
2. Attaching the Base
- Thread the long green tail left on the cone onto your tapestry needle.
- Align the Flat Base with the bottom opening of the cone. Both have exactly 48 stitches.
- Whipstitch the two pieces together. For the cleanest edge, sew through the unworked front loops of Round 15 of the cone, and through both loops of the Flat Base.
- When you are 3/4 of the way around, top up the stuffing if the tree feels a bit hollow.
- Sew the rest closed, knot securely, and hide the yarn tail inside the body.
3. Affixing the Star
- Thread the gold tail from the star onto your tapestry needle.
- Position the star vertically directly over the magic ring at the top of the green cone.
- Sew securely through the center of the star and down into the tip of the tree, making several passes so the star stands completely upright and does not flop over.
- Tie off and weave the end inside the tree.
4. Adding the Gold Bead Ornaments
- Thread your fine sewing needle with standard green sewing thread (knot the end).
- Insert the needle through the bottom of the tree and bring it out on one of the spiraling ridges.
- String on a single gold bead and sew it firmly to the ridge.
- Pass the needle through the stuffing to a new location on the spiral to attach the next bead.
- Scatter the beads evenly around all sides of the tree, nestling them gently onto the protruding ridges. Secure the thread with a tiny hidden knot and trim.
5. Attaching the Hanger
- Take your 6-inch metallic gold string.
- Pass it through the very top point (or the top chain space) of the gold star.
- Tie the two ends together in a secure double knot to create a hanging loop.
✅ Final Shaping Checklist
- ✅ Symmetry: Does the base sit perfectly flat when rested on a table? Press it gently against a hard surface to flatten it out.
- ✅ Texture: Are the unworked front loops clearly visible, spiraling evenly from top to bottom?
- ✅ Star Alignment: Is the star pointing straight up, aligned perfectly vertical to the cone?
- ✅ Bead Placement: Are the gold beads scattered organically without massive gaps on one side?
💡 M. HELPFUL CROCHET TIPS
- 💡 Mastering the Magic Ring: Ensure your magic ring is pulled completely tight on Round 1 of the cone. A loose ring will leave a hole at the top of the tree, making it hard to mount the star securely.
- 💡 Tension in BLO: When working in the Back Loop Only, stitches can naturally stretch out more than standard stitches. Keep a firm grip on your working yarn to maintain tight tension.
- 💡 Sharp Star Points: When slip stitching into the 2nd chain of the star points, work your stitch tightly. This ensures the points of the star remain sharp and defined rather than rounded.
- 💡 Invisible Finish: When finishing the flat base, use an invisible join rather than a standard slip stitch. It will make aligning the 48 stitches of the base to the cone much easier.
- 💡 Seamless Bead Sewing: By using green sewing thread instead of gold thread or yarn to attach the beads, your travel stitches (the stitches moving from one bead to the next) will remain completely invisible against the green tree.
- 💡 Aromatic Stuffing: For a truly festive touch, bury a small muslin sachet of dried pine needles, cinnamon, or cloves inside the stuffing before sealing the base!
🧼 N. CARE INSTRUCTIONS
Due to the delicate sewn-on beads and the three-dimensional stuffed shape, this ornament should never be put in a washing machine or fully submerged in water.
- Cleaning: Use a lint roller to gently remove dust. If the yarn becomes soiled, spot-clean gently with a damp cloth and mild soap.
- Storage: After the holidays, store the ornament in a rigid box rather than a soft bag to prevent the star from being bent or the cone from being permanently squashed out of shape.
❓ R. FAQ
❓ Can I make this tree bigger or smaller?
Yes! To make it smaller, simply stop increasing the cone earlier (e.g., stop at Round 10) and make a matching base that stops at Round 5. To make it larger, continue the (sc, inc) sequence past Round 15 until you reach your desired width, and do the same for the flat base.
❓ The star keeps flopping over. How do I fix it?
If your star is floppy, it may be due to loose tension or a very soft yarn. You can stiffen the star by lightly spraying it with fabric stiffener before attaching it, or simply sew slightly higher up on the bottom two points of the star to anchor it deeper into the tree tip.
❓ Can I use blanket/chenille yarn for this pattern?
Absolutely. Using super bulky velvet or chenille yarn will result in a much larger, plush tree perfect for a mantle decoration rather than a hanging ornament. If doing this, make sure to size up your hook (usually a 6.0mm or larger) and use much larger beads or pom-poms for the ornaments.
❓ Is it necessary to crochet the flat base?
If you plan to exclusively hang the ornament and don’t care if the bottom is slightly rounded, you can skip crocheting a separate base. Instead, after Round 15, simply work a few rounds of decreases (e.g., in BLO: 14 sc, dec, etc.) until the hole closes. However, the flat base provides a much crisper, professional shape.
❓ Are the beads safe for children? No. The small gold beads are a choking hazard. If you are gifting this to a family with small children or pets, please embroider French knots onto the ridges using gold yarn instead of using hard beads.