📖 B. INTRODUCTION
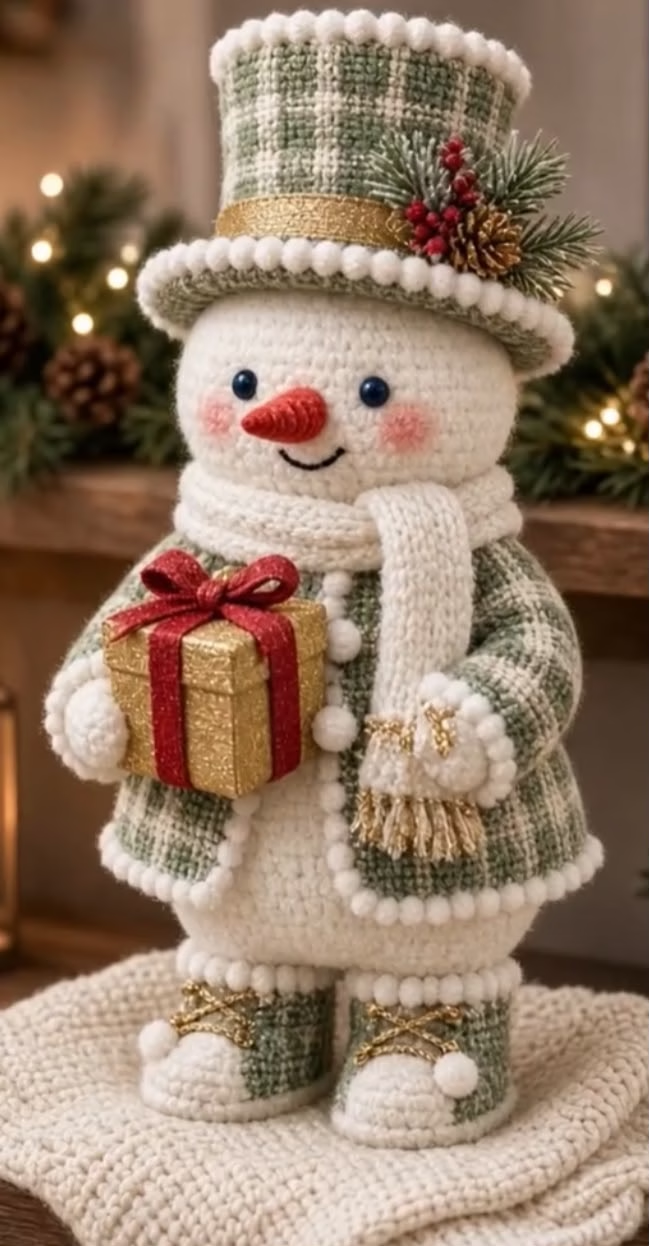
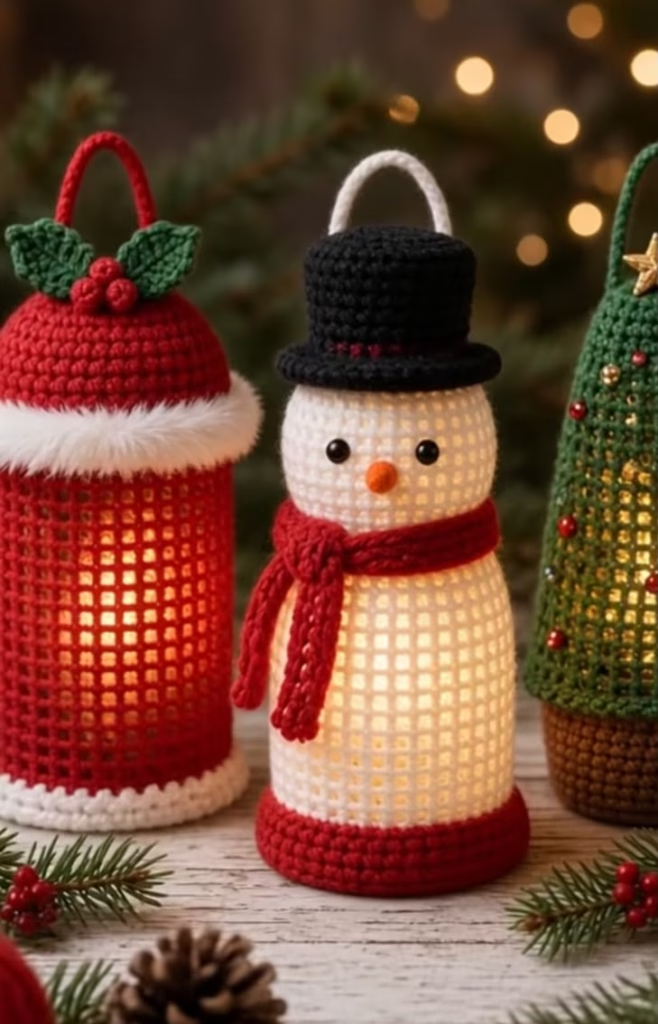
Bring the warmth of the winter season indoors with this charming Crochet Snowman Lantern Cover. Designed to slip perfectly over a standard battery-operated LED pillar candle or a glass jar filled with fairy lights, this delightful piece transforms simple lighting into a glowing, festive centerpiece. During the day, it stands proudly as a classic amigurumi snowman complete with a dapper top hat, cozy red scarf, and a sweet carrot nose. At night, the open-mesh design of its body allows a beautiful, soft light to cast geometric shadows across your room.
Creating seasonal decor that serves a dual purpose is incredibly rewarding. This pattern merges traditional solid amigurumi techniques for the snowman’s head with an airy, structured mesh stitch for the body. It is the perfect weekend project for holiday decorating, winter craft fairs, or as a thoughtful handmade gift for teachers and neighbors.
Because safety is paramount when combining textiles and lighting, this design is intentionally crafted as an open-bottom sleeve. This allows you to easily slide it over a safe, heat-free LED light source. Whether you choose to customize the scarf with your favorite colors or adjust the height to fit a specific jar, this glowing snowman will quickly become a beloved part of your winter traditions.
🔍 C. MAIN PATTERN OVERVIEW
This lantern cover is constructed using a clever mix of solid shaping and openwork crochet. To minimize sewing, the head and the mesh body are worked as a single, continuous piece from the top of the head down to the red base.
- The Head: Crocheted in tight, continuous rounds and stuffed with polyfil to maintain a perfect spherical shape.
- The Body: Transitions immediately from the neck into a classic open-grid mesh (using double crochets and chain spaces) to allow light to shine through.
- The Base: Finished with thick, solid rounds of red yarn to provide structural stability and visual weight.
- The Accessories: The black top hat with its white hanging loop, the tiny orange carrot nose, and the ribbed red scarf are crocheted separately and securely attached during the final styling phase.
🎯 D. SKILL LEVEL
Skill Level: Easy to Intermediate
This pattern is well-suited for an adventurous beginner who is comfortable with basic amigurumi shapes and wants to learn how to transition into openwork crochet.
Techniques you will use:
- 🧶 Magic Ring (MR)
- 🧶 Working in continuous rounds and joined rounds
- 🧶 Single crochet increases and invisible decreases
- 🧶 Double crochet and chain spaces (filet-style mesh)
- 🧶 Working in the front loop only (FLO) and back loop only (BLO)
- 🧶 Basic sewing for amigurumi assembly
📏 E. FINISHED SIZE
When made with the recommended worsted weight yarn and a 4.0 mm hook, the finished snowman lantern cover will measure:
- Height: Approximately 9 inches (23 cm) from the red base to the top of the hat.
- Diameter at Base: Approximately 4 inches (10 cm).
- Internal Fit: The hollow mesh body easily slips over standard 3-inch (7.5 cm) diameter LED pillar candles, standard 16 oz mason jars, or a standalone fairy light battery pack.
Note: You can easily adjust the height of the lantern by adding or subtracting rounds in the mesh body section.
🧮 F. GAUGE
For the solid amigurumi parts (Head, Hat, Base):
4 sc stitches and 4 rows = 1 inch (2.5 cm).
Tight tension is critical for the head so the stuffing does not show through the stitches.
For the mesh body:
Gauge is less critical here, provided the fabric has enough structure to stand upright. If your mesh feels too loose or floppy, consider dropping down half a hook size for the body section.
🧶 G. REQUIRED YARN AMOUNTS
This pattern uses medium/worsted weight (Category 4) yarn. A stiff acrylic or cotton yarn is highly recommended for structural integrity so the lantern cover can stand independently.
- Main Color (White): Approximately 100 yards (91 meters). Used for the head, mesh body, and the loop on the hat.
- Contrast Color A (Red): Approximately 50 yards (45 meters). Used for the solid base and the scarf.
- Contrast Color B (Black): Approximately 30 yards (27 meters). Used for the top hat.
- Accent Color (Orange): A small scrap (about 2 yards). Used for the carrot nose.
🧰 H. MATERIALS
- Crochet Hook: 4.0 mm (US G/6)
- Yarn: Worsted weight (Category 4) in White, Red, Black, and Orange
- Safety Eyes: One pair of 8 mm solid black safety eyes
- Stuffing: High-quality polyester fiberfill (for the head only)
- Light Source: ⚠️ STRICTLY BATTERY-OPERATED LED LIGHTS ONLY. Use an LED pillar candle, an LED tea light, or a string of fairy lights inside a glass jar. Never use a real flame.
- Tools: Yarn needle (tapestry needle), stitch markers, scissors, and straight pins for assembly.
- Optional Structure: A clear, empty plastic or glass cylinder (like a clean jam jar) to slip the cover over for perfectly rigid posture.
🔤 I. ABBREVIATIONS – US TERMS
- MR – Magic Ring
- ch – chain
- st(s) – stitch(es)
- sl st – slip stitch
- sc – single crochet
- hdc – half double crochet
- dc – double crochet
- inc – single crochet increase (2 sc in one stitch)
- dec – single crochet invisible decrease (sc 2 together using front loops)
- BLO – back loop only
- FLO – front loop only
- rnd(s) – round(s)
- sp – space
- ( … ) x N – repeat the instructions between parentheses N times
- [ … ] – total stitch count at the end of the round/row
📝 J. NOTES BEFORE YOU BEGIN
- Two Types of Rounds: The head and the hat are worked in continuous, unjoined spirals. Use a stitch marker to mark the first stitch of each round. The mesh body and the solid red base are worked in joined rounds to keep the grid and color changes perfectly level.
- Invisible Decrease: For a cleaner look on the snowman’s face, always use the invisible decrease method (insert hook through the front loops only of the next two stitches, yarn over, pull through, yarn over, pull through both loops).
- Stuffing Strategy: Only the head gets stuffed. Do not overstuff the head, or it will become too heavy and cause the hollow mesh body to collapse.
- Safety Warning: ⚠️ Yarn is highly flammable. This pattern is strictly designed for heat-less LED light sources.
🪡 K. COMPLETE PATTERN
🧠 Snowman Head & Body (Worked as one piece)
Yarn/Color: White
Quantity: Make 1
Starting Point: Top of the head, working downward to the base.
Notes: Worked in continuous rounds until the neck, then switches to joined rounds for the body.
The Solid Head: R1: MR, 6 sc in ring. [6] R2: inc in each st around. [12] R3: (1 sc, inc) x6. [18] R4: (2 sc, inc) x6. [24] R5: (3 sc, inc) x6. [30] R6: (4 sc, inc) x6. [36] R7: (5 sc, inc) x6. [42] R8-15: sc in each st around. (8 rounds) [42] Place safety eyes between R11 and R12, with approximately 6 stitches between them. Ensure the starting tail/marker remains at the back of the head. R16: (5 sc, dec) x6. [36] R17: (4 sc, dec) x6. [30] R18: (3 sc, dec) x6. [24] Firmly stuff the head now. Shape it into a neat sphere.
Transition to the Mesh Body: R19 (The Shoulders): Working in FLO for this round only, inc in each st around. [48] Note: Working in the front loops pushes the stitches slightly outward, creating a perfect little shelf for the scarf to rest on, while keeping the neck opening narrow. R20: ch 4 (counts as 1 dc and ch 1), skip 1 st, 1 dc in next st, ch 1, skip 1 st repeat from * to * around. Join with a sl st to the 3rd chain of the starting ch-4. [24 dc, 24 ch-1 spaces] R21-30: sl st into the first ch-1 sp, ch 4 (counts as 1 dc and ch 1), 1 dc in the next ch-1 sp, ch 1 repeat from * to * around. Join with a sl st to the 3rd chain of the starting ch-4. (10 rounds of mesh) [24 dc, 24 ch-1 spaces] Note: The mesh should look like an open grid that will let the light shine out. If you want a taller lantern, add more rounds here. Fasten off White and weave in the end.
🧱 The Solid Base
Yarn/Color: Red Quantity: Make 1 (attached directly to the body) Starting Point: The last round of the white mesh. Notes: Worked in joined rounds.
R31: Join Red yarn in any ch-1 space of R30. ch 1, 1 sc in the ch-1 sp, 1 sc in the next dc repeat from * to * around. Join with a sl st to the first sc. [48]
R32-35: ch 1, sc in each st around. Join with a sl st to the first sc. (4 rounds) [48]
R36: ch 1, (7 sc, inc) x6. Join with a sl st to the first sc. [54]
Note: This subtle increase flares the base just enough to give it a sturdy, flat standing edge.
R37: ch 1, sc in each st around. Join with a sl st to the first sc. [54]
Fasten off and weave in all ends seamlessly.
🎩 The Top Hat
Yarn/Color: Black
Quantity: Make 1
Starting Point: Top of the hat, working down to the brim.
Notes: Worked in continuous rounds.
R1: MR, 6 sc in ring. [6]
R2: inc in each st around. [12]
R3: (1 sc, inc) x6. [18]
R4: (2 sc, inc) x6. [24]
R5: Working in BLO for this round only, sc in each st around. [24]
This creates the sharp, flat edge at the top of the hat.
R6-10: sc in each st around. (5 rounds) [24]
R11: Working in FLO for this round only, (1 sc, inc) x12. [36]
R12: sc in each st around. [36]
Fasten off, leaving a long tail (about 15 inches) for sewing the hat to the head.
⚪ Hat Handle / Loop
Yarn/Color: White
Quantity: Make 1
Starting Point: Worked flat as a simple chain.
Row 1: ch 20. Fasten off, leaving long tails at both ends. This forms the white decorative hanging loop shown on top of the hat.
🥕 Carrot Nose
Yarn/Color: Orange
Quantity: Make 1
Starting Point: Tip of the nose.
R1: MR, 4 sc in ring. [4]
R2: (1 sc, inc) x2. [6]
R3: sc in each st around. [6]
Fasten off, leaving a tail for sewing. You do not need to stuff the nose; simply use the tail of the magic ring to bulk out the inside.
🧣 Ribbed Scarf
Yarn/Color: Red Quantity: Make 1 Starting Point: Worked flat in rows to create a long strip.
Row 1: ch 65.
Row 2: Working in the 3rd ch from the hook, hdc in each ch across. [63]
Fasten off and weave in both ends.
🎨 L. STYLING / ASSEMBLY / STABILITY / FINAL SHAPING
Correct assembly is what brings an amigurumi character to life. Follow this sequence for the best results:
1. Attach the Hat Handle: Thread the white tails of the ch-20 loop through the top flat surface of the black hat (around R3), spacing them about 3-4 stitches apart. Tie the tails securely together on the inside of the hat to form a standing loop.
2. Sew the Hat to the Head: Lightly stuff the main cylinder of the black top hat. Position the hat squarely on top of the white head. Using the long black tail from the hat and a tapestry needle, sew the hat to the head by passing the needle through the remaining back loops of R10 of the hat, and down into the head.
3. Attach the Nose: Center the orange carrot nose between the safety eyes, aligning it slightly lower than the center point of the eyes. Pin it in place. Sew securely around all 6 stitches of the nose.
4. Tie the Scarf: Wrap the red scarf around the narrowest part of the neck (R18). Tie a simple, single overhand knot at the front, slightly off-center to the left or right, letting the two ends hang down over the mesh body. Use a tiny dab of fabric glue or a hidden stitch under the knot to secure it permanently if desired.
5. Structure and Lighting: Stand the cover upright on its red base. If your yarn is soft, slide a clear plastic craft tube or a clean glass jar inside the mesh body to act as a skeleton. Finally, place your battery-operated LED pillar candle or fairy lights inside the structure.
✅ Final Shaping Checklist:
- ✅ Are the safety eyes level and secure?
- ✅ Is the nose centered exactly between the eyes?
- ✅ Does the white hat loop stand up clearly?
- ✅ Is the head lightly stuffed so it isn’t top-heavy?
- ✅ Does the lantern cover sit perfectly flat on its red base?
- ✅ Is the light source strictly a heat-less LED?
💡 M. HELPFUL CROCHET TIPS
- 💡 Mastering the Mesh: To ensure your lantern body looks like a clean grid, make sure you are placing your double crochets directly into the chain space from the previous round, not into the chain stitch itself.
- 💡 Invisible Finish: When finishing the red base, use an invisible join (needle join) instead of a standard slip stitch. This eliminates the jagged step where the round ends and creates a flawless flat edge for standing.
- 💡 Stiffening the Yarn: If you used soft acrylic and want the mesh to be rigid without using an internal glass jar, you can brush the inside of the mesh section lightly with a mixture of equal parts PVA glue and water. Let it dry completely over a bottle before use.
- 💡 Fairy Light Diffusion: If using a string of fairy lights, stuff a handful of clear cellophane or white tulle fabric inside the body along with the lights. This diffuses the harsh LED bulbs and creates a soft, even, frosty glow.
- 💡 Custom Sizing: To make a wider cover for a larger jar, increase the stitch count of the head symmetrically up to 48 or 54 stitches, and carry that count down into the mesh base.
- 💡 Scarf Texture: For a more rustic scarf, you can add small fringe tassels to the ends of the red hdc strip.
🧼 N. CARE INSTRUCTIONS
- Cleaning: Spot clean only with a damp cloth and mild detergent.
- Washing Warning: Do not machine wash. The agitation will cause the mesh grid to warp and the stuffed head to lose its perfect spherical shape.
- Electronics: ⚠️ ALWAYS remove the LED light source, batteries, or fairy lights before attempting to clean or store the cover.
- Storage: Store upright in a cool, dry place. Do not crush the lantern beneath heavier decorations, as the hat brim and mesh body can become permanently creased.
❓ R. FAQ
❓ Can I use real candles with this cover?
Absolutely not. Yarn (especially acrylic and cotton) is highly flammable. This design is strictly intended for battery-operated LED candles or fairy lights only.
❓ My mesh body is collapsing under the weight of the head. What did I do wrong?
This usually happens for one of two reasons: either your yarn is too soft/silky, or the head is overstuffed. Try removing some stuffing from the head. If the body is still too soft, slip the cover over a rigid clear glass jar to provide internal support.
❓ How can I adjust this pattern to fit a specific glass jar I already own?
Measure the circumference of your jar. Adjust the increases on the head until the maximum stitch count matches the circumference of your jar (remembering that 4 sts = 1 inch). The mesh body will perfectly follow the stitch count of the widest part of the head.
❓ Can I use a different weight yarn?
Yes, but it will drastically change the size. Bulky weight yarn (Category 5) will result in a much larger, taller snowman that may require a very large pillar candle to fill the space. Sport weight (Category 3) will create a tiny ornament-sized cover suitable for little LED tea lights.
❓ Do I have to work the mesh in the front loops only at the neck?
Working R19 in the FLO creates a sharp 90-degree angle that acts as a shoulder, giving the scarf a natural place to rest without sliding down the body. While you can work in both loops, the FLO technique yields a much cleaner silhouette.