Skill Level: Intermediate
Terminology: US Crochet Terms
📖 B. INTRODUCTION
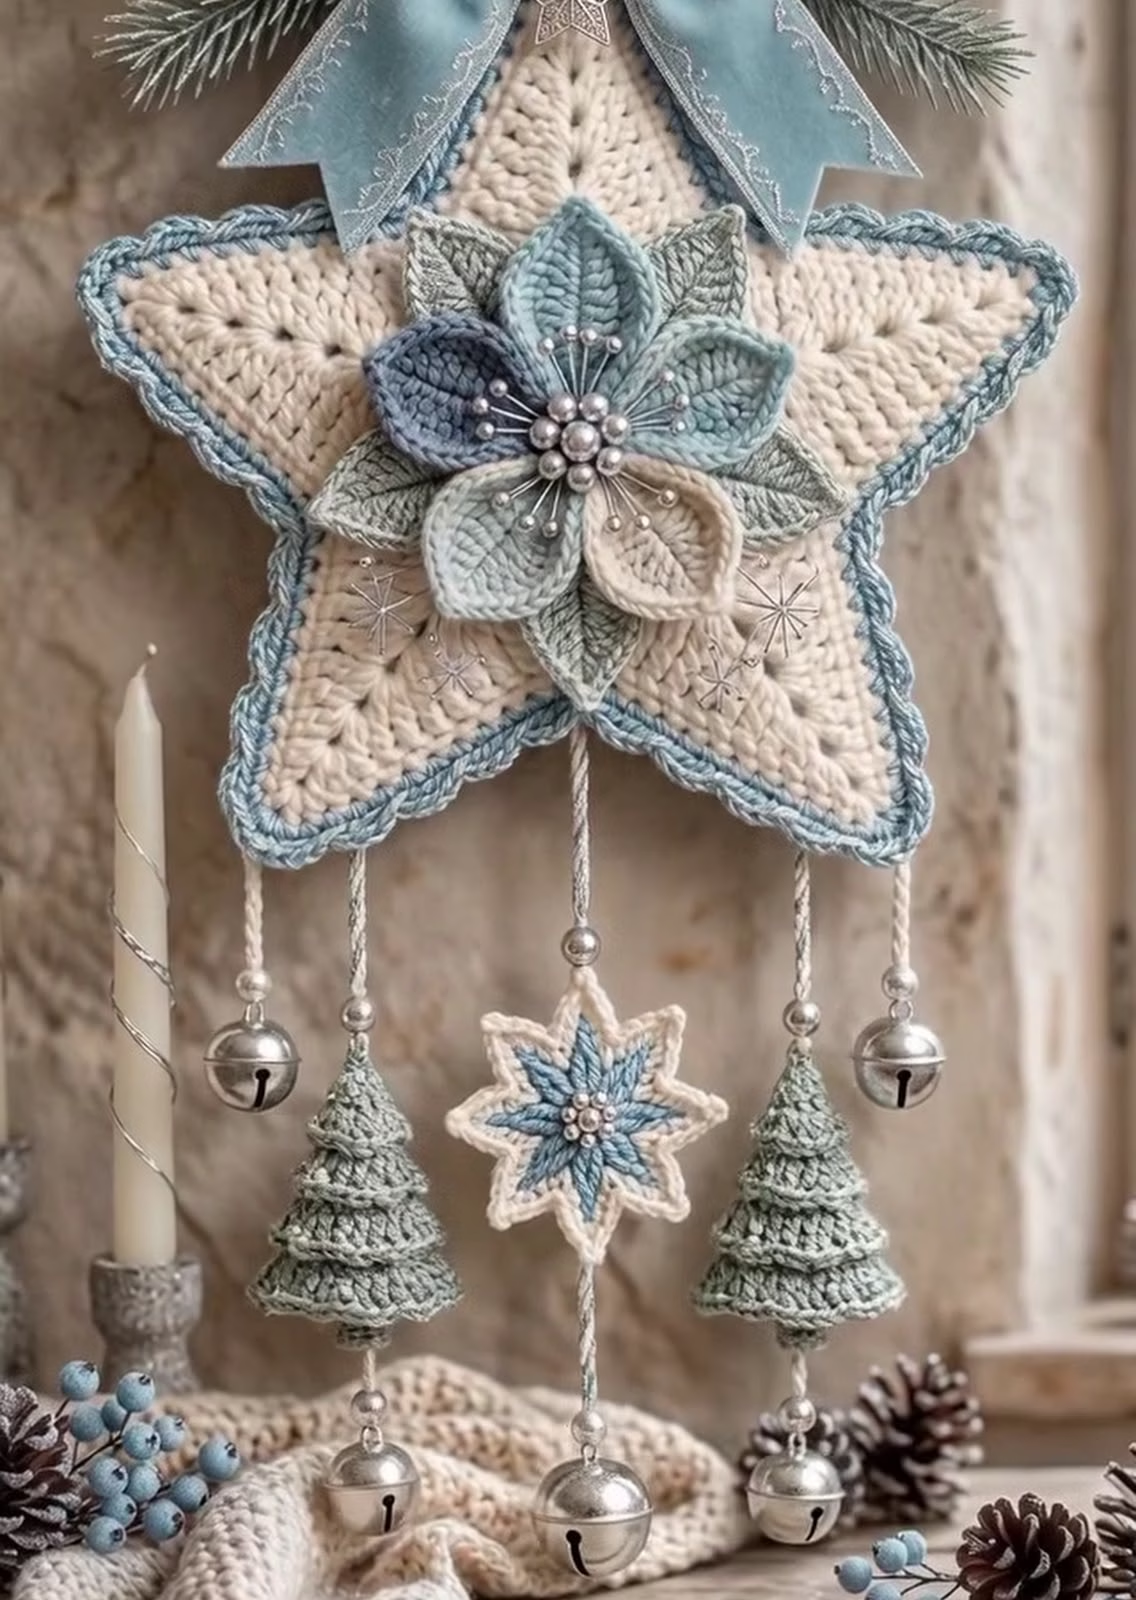
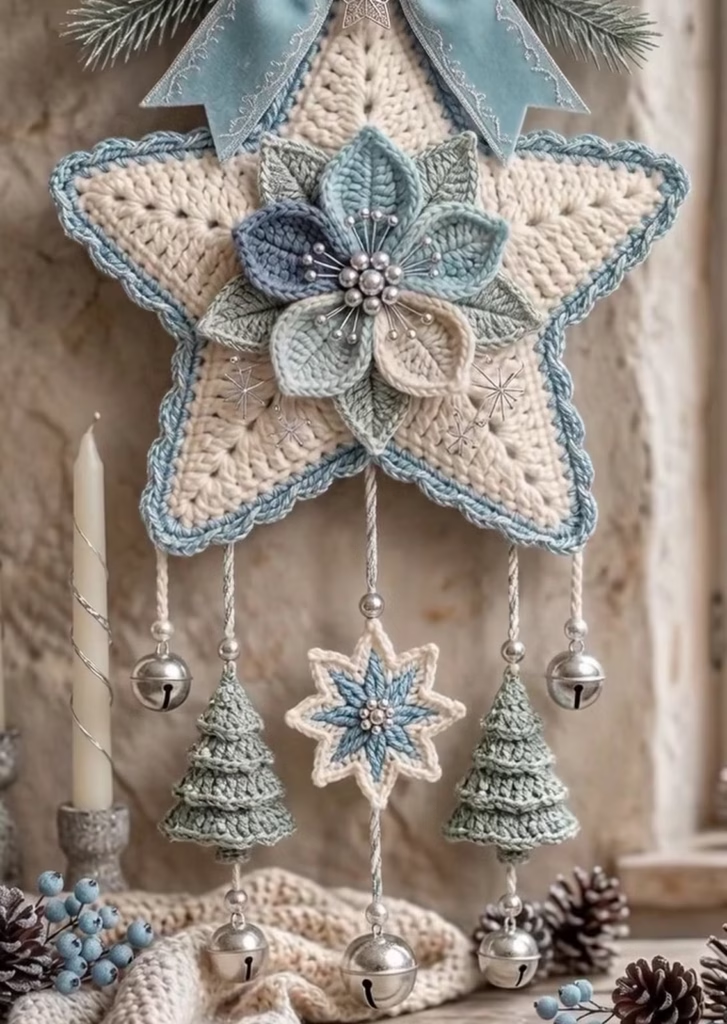
Bring the tranquil elegance of a frosted winter forest into your home with this heirloom-quality Winter Botanical Star Wall Hanging. Designed as a dimensional wall piece, this project combines classic geometric star construction with sculpted botanical embellishments, delicate silver embroidery, and soft jingling bells. The neutral cream centerpiece provides a warm canvas for muted slate blue and sage green floral accents, creating a calm, Scandinavian-inspired seasonal display.
Whether displayed on a front door, suspended above a cozy mantel, or gifted as a housewarming keepsake, this decorative piece brings a handmade touch to holiday decor. Its modular construction allows for creative customization—adjust the hanging lengths, mix yarn colors to match your seasonal palette, or modify the central botanical arrangement to suit any time of year.
Crafted using worsted and sport weight cotton yarns, the central star maintains a crisp, structured silhouette while remaining lightweight enough to hang gracefully. Delicate silver thread accents add a hint of shimmer that catches indoor lighting, while cascading dangling cords with mini pine trees, a star charm, and silver jingle bells add gentle movement and sound.
🔍 C. MAIN PATTERN OVERVIEW
This project consists of a structured 5-pointed star main panel trimmed with a textured picot border. The center features a dimensional multi-layered winter flower framed by ribbed leaf appliques and silver embroidered starbursts. The top loop is accented with a velvet ribbon bow and faux pine sprigs, while five structured cords suspend mini 3D Christmas trees, a dual-tone star charm, and silver jingle bells below.
                        [ Hanging Loop & Ribbon Bow ][cite: 1]
                                     |
                          ★ MAIN STAR PANEL ★[cite: 1]
                   /     /       |       \     \
     [Embroidered Snowflake Accents]  [Layered Botanical Flower][cite: 1]
                   \     \       |       /     /
                          ★ PICOT BORDER ★[cite: 1]
          _______________________|_______________________
         |           |           |           |           |
     [Cord 1]    [Cord 2]    [Cord 3]    [Cord 4]    [Cord 5]
         |           |           |           |           |
      [Bead]      [Bead]      [Bead]      [Bead]      [Bead]
      [Bell]    [Mini Tree]  [Mini Star] [Mini Tree]   [Bell]
                 [Bead/Bell]  [Bead/Bell] [Bead/Bell][cite: 1]
🎯 D. SKILL LEVEL
Intermediate
While the core star and accessories rely on foundational crochet stitches, this pattern requires intermediate skill due to:
- 🧶 Working both flat rows and continuous rounds.
- 🪡 Precise stitch placement (working in Front Loops Only / Back Loops Only for 3D textures).
- 🎨 Multi-layered assembly, embroidery surface work, and structural blocking/stiffening.
📏 E. FINISHED SIZE
- 📐 Main Star Diameter: Approximately 10.5 inches (26.5 cm) from point to point.
- 📏 Total Hanging Length: Approximately 21 inches (53.5 cm) from top hanging loop to bottom central jingle bell.
- 🌲 Mini 3D Trees: 2.25 inches (5.7 cm) height.
- ⭐ Mini Star Charm: 2.5 inches (6.3 cm) diameter.
Note: Yarn weight, hook size, and stuffing density will influence your final dimensions.
🧮 F. GAUGE
- 🧶 Gauge for Main Star: 16 sc x 18 rows = 4 inches (10 cm) using a 3.5 mm (E-4) hook and worsted weight yarn.
- 💡 Tight, consistent tension is key to preventing the star points from curling and ensuring the motif lays flat against the wall.
🧶 G. REQUIRED YARN AMOUNTS
- 🧶 Main Star Base Yarn (Cream / Natural White): Worsted weight (#4), approx. 140 yards (128 m).
- 🩵 Edging & Accent Yarn (Dusty Slate Blue): Sport / Light Worsted weight (#3), approx. 65 yards (59 m).
- 🍃 Botanical Leaf Yarn (Sage Green): Sport / Light Worsted weight (#3), approx. 40 yards (36 m).
- 🌸 Inner Flower Petal Yarn (Muted Powder Blue): Sport weight (#2/#3), approx. 25 yards (23 m).
- ✨ Embroidery & Metallic Accent: Silver metallic embroidery floss, approx. 12 yards (11 m).
🧰 H. MATERIALS
- 🪡 Crochet Hooks: 3.5 mm (US E-4) for main star and trees; 2.75 mm (US C-2) for detailed petals and leaves.
- ☁️ Stuffing: Premium polyester fiberfill (small amount for mini trees).
- 🔔 Jingle Bells: 5 silver metallic jingle bells (approx. 18 mm – 22 mm diameter).
- 🔮 Beads & Pearl Centers: 8–10 silver round wooden/acrylic beads (8 mm) and 5–7 pearl craft beads/stamen pins for flower center.
- 🎀 Ribbon & Trim: 1.5-inch wide Dusty Blue velvet ribbon (approx. 20 inches / 50 cm).
- 🌲 Decorative Accents: Faux pine sprig needles or mini greenery picks.
- ✂️ Notions: Tapestry needle, stitch markers, scissors, fabric glue or hot glue gun (optional for securing ribbon/sprigs).
🔤 I. ABBREVIATIONS – US TERMS
- ch: chain
- sl st: slip stitch
- sc: single crochet
- hdc: half double crochet
- dc: double crochet
- tr: treble crochet
- inc: single crochet increase (2 sc in same stitch)
- dec / sc2tog: single crochet decrease (sc 2 stitches together)
- BLO: back loop only
- FLO: front loop only
- MR: magic ring
- st(s): stitch(es)
- picot: ch 2, sl st into 1st ch
📝 J. NOTES BEFORE YOU BEGIN
- 📌 Construction Method: The main star consists of two flat star panels stitched together around the perimeter to create a sturdy, double-thick structure.
- 📍 Stitch Markers: Use stitch markers at the tip of each star point during construction to maintain alignment when joining panels.
- 🧵 Tension Control: Maintain firm, even tension on all components. If your star points curl inward, switch to a hook 0.5 mm smaller.
- ⚠️ Embroidery Timing: Complete all silver snowflake embroidery on the front star panel BEFORE joining it to the back panel.
🪡 K. COMPLETE PATTERN
⭐ 1. Main Star Panels (Make 2: 1 Front, 1 Back)
Worked in Cream Worsted Weight Yarn with a 3.5 mm hook.
Pentagon Center Base
- R1: In a MR, ch 1, work 10 sc. Sl st to 1st sc to join. (10 sts)
- R2: Ch 1, (inc in next st) x 10. Sl st to 1st sc. (20 sts)
- R3: Ch 1, (1 sc, inc) x 10. Sl st to 1st sc. (30 sts)
- R4: Ch 1, (2 sc, inc) x 10. Sl st to 1st sc. (40 sts)
- R5: Ch 1, (3 sc, inc) x 10. Sl st to 1st sc. (50 sts)
The pentagon base now has 50 perimeter stitches, dividing evenly into 10 stitches per star point.
Star Points (Make 5 on each Pentagon)
Worked back and forth in short rows directly onto the pentagon base edge.
- Row 1: Attach yarn in any stitch of R5. Ch 1, sc in same st and next 9 sts, ch 1, turn. (10 sts)
- Row 2: Sc2tog, sc in next 6 sts, sc2tog, ch 1, turn. (8 sts)
- Row 3: Sc across all 8 sts, ch 1, turn. (8 sts)
- Row 4: Sc2tog, sc in next 4 sts, sc2tog, ch 1, turn. (6 sts)
- Row 5: Sc across all 6 sts, ch 1, turn. (6 sts)
- Row 6: Sc2tog, sc in next 2 sts, sc2tog, ch 1, turn. (4 sts)
- Row 7: Sc across all 4 sts, ch 1, turn. (4 sts)
- Row 8: (Sc2tog) x 2, ch 1, turn. (2 sts)
- Row 9: Sc2tog, ch 1. Fasten off. (1 st at point tip)
Repeat Rows 1–9 across the remaining 4 sets of 10 stitches around the pentagon edge until all 5 star points are complete.
🩵 2. Joining & Picot Border Edging
Worked with Dusty Slate Blue Yarn and 3.5 mm hook.
- Place Front Panel (with completed embroidery) and Back Panel with Wrong Sides facing together.
- Join Dusty Slate Blue yarn through both layers at any inner valley (where two points meet).
- Joining Round:
- Work 9 sc evenly up the side of the star point toward the tip.
- At the tip stitch: work (1 sc, ch 2, sl st in 1st ch [picot], 1 sc) all in the tip stitch.
- Work 9 sc evenly down the opposite side of the point toward the valley.
- In the valley stitch: work sc2tog across the inner corner stitch of the current point and the adjacent point to keep the angle sharp.
- Repeat around all 5 points. Sl st to 1st sc to join. Fasten off and weave in ends.
🍃 3. Textured Winter Leaves (Make 5)
Worked in Sage Green Yarn with 2.75 mm hook.
- Foundation: Ch 11.
- R1: Sl st in 2nd ch from hook, sc in next ch, hdc in next ch, dc in next 4 chs, hdc in next ch, sc in next ch, (1 sc, ch 2, sl st in 1st ch [picot], 1 sc) in last ch.
- Opposite Side: Rotate chain to work along bottom loop: sc in next ch, hdc in next ch, dc in next 4 chs, hdc in next ch, sc in next ch, sl st in last ch.
- Ribbing Center Vein: Sl st up the center chain spine from base to tip to create a raised ribbed vein. Fasten off, leaving a 10-inch tail for sewing.
🌸 4. Layered Winter Flower
Worked with 2.75 mm hook.
Outer Petals (Make 5 in Sage/Dusty Blue Yarn)
- Foundation: Ch 10.
- R1: Sl st in 2nd ch from hook, sc in next ch, hdc in next ch, dc in next 3 chs, hdc in next ch, sc in next ch, (1 sc, ch 2, sl st in 1st ch, 1 sc) in last ch.
- Opposite Side: Sc in next ch, hdc in next ch, dc in next 3 chs, hdc in next ch, sc in next ch, sl st in last ch. Fasten off tail.
Inner Petals (Make 5 in Powder Blue Yarn)
- Foundation: Ch 8.
- R1: Sl st in 2nd ch from hook, sc in next ch, hdc in next ch, dc in next 2 chs, hdc in next ch, sc in next ch, (1 sc, ch 1, 1 sc) in last ch.
- Opposite Side: Sc in next ch, hdc in next ch, dc in next 2 chs, hdc in next ch, sc in next ch, sl st in last ch. Fasten off tail.
Flower Base Assembly
- Arrange the 5 Outer Petals in a star pattern and sew bases together.
- Overlay the 5 Inner Petals offset between the outer petals and stitch securely at center.
- Attach silver stamen pins and craft pearls through the center core.
🎄 5. Mini 3D Christmas Trees (Make 2)
Worked in Sage Green Yarn in continuous rounds with 3.5 mm hook.
- R1: MR 4 sc. (4 sts)
- R2: (1 sc, inc) x 2. (6 sts)
- R3: (2 sc, inc) x 2. (8 sts)
- R4: In BLO, (3 sc, inc) x 2. (10 sts)
- R5 (Ruffle Tier 1): In FLO of R4, (ch 3, sl st in next st) around. Fasten off tier loop.
- R6: Attach yarn back into unworked Back Loops of R4: (4 sc, inc) x 2. (12 sts)
- R7: (5 sc, inc) x 2. (14 sts)
- R8: In BLO, (6 sc, inc) x 2. (16 sts)
- R9 (Ruffle Tier 2): In FLO of R8, (ch 3, sl st in next st) around.
- R10: Attach yarn back into unworked Back Loops of R8: (7 sc, inc) x 2. (18 sts)
- R11: In BLO, (8 sc, inc) x 2. (20 sts)
- R12 (Ruffle Tier 3): In FLO of R11, (ch 3, sl st in next st) around.
- R13 Base Close: In unworked Back Loops of R11: (sc2tog) x 10. (10 sts)
Stuff tree lightly with fiberfill. - R14: (sc2tog) x 5. (5 sts). Fasten off and weave tail to close bottom.
✨ 6. Mini Hanging Star Motif (Make 1)
Worked in Cream and Dusty Slate Blue Yarn with 2.75 mm hook.
- R1 (Cream): In MR, ch 1, 10 sc. Sl st to join. Fasten off Cream.
- R2 (Dusty Slate Blue): Attach Blue yarn to any st. (Ch 4, sl st in 2nd ch from hook, sc in 3rd ch, hdc in 4th ch, skip 1 st on R1, sl st in next st on R1) x 5 times. (5 mini points)
- R3 (Cream Outline): Join Cream yarn at valley: sl st up side of point, (sl st, ch 2, sl st) at tip, sl st down side to valley. Repeat for all 5 points. Fasten off.
🔔 7. Hanging Strands & Bell Assembly
Create 5 braided or twisted cords using Cream and Blue yarn:
- 🧵 Strand 1 (Far Left – 7 inches / 18 cm): Attach to outer left star valley. Thread 1 silver bead and 1 jingle bell at bottom.
- 🧵 Strand 2 (Left Inner – 10 inches / 25 cm): Attach to lower-left star point. Thread silver bead, top-to-bottom through Mini Tree, silver bead, jingle bell.
- 🧵 Strand 3 (Center – 13 inches / 33 cm): Attach to bottom-most valley. Thread silver bead, Mini Star Motif, silver bead, jingle bell.
- 🧵 Strand 4 (Right Inner – 10 inches / 25 cm): Attach to lower-right star point. Thread silver bead, top-to-bottom through Mini Tree, silver bead, jingle bell.
- 🧵 Strand 5 (Far Right – 7 inches / 18 cm): Attach to outer right star valley. Thread 1 silver bead and 1 jingle bell at bottom.
🎨 L. STYLING / ASSEMBLY / STABILITY / FINAL SHAPING
                          [ Hanging Ribbon Loop ][cite: 1]
                                    ||
                             /--------------\
                            /   PINE SPRIGS  \[cite: 1]
                            \  VELVET BOW    /[cite: 1]
                             \--------------/
                                    ||
                           /------------------\
                          /    FLOWER MOTIF    \[cite: 1]
                         |   & LEAF APPLIQUES   |[cite: 1]
                          \                    /
                           \------------------/
                             /  |    |    |  \
                            /   |    |    |   \
                           🔔   🎄   ⭐   🎄   🔔[cite: 1]
- Snowflake Embroidery: Using metallic silver embroidery thread, embroider 5 starburst snowflakes onto the cream body surrounding the central area before attaching the flower motif.
- Flower & Leaf Attachment: Position the 5 leaf appliques radially around the star center. Sew or hot-glue the assembled Winter Flower directly over the leaf bases.
- Top Loop & Trim: Fold a 10-inch ribbon length into a hanging loop and attach to top star point tip. Tie remaining velvet ribbon into a bow and secure at the top point alongside faux pine sprigs.
- Blocking & Stiffening: Spray the main star thoroughly with fabric stiffener spray or a diluted PVA glue solution and pin flat on a blocking board until dry to prevent point curling.
💡 M. HELPFUL CROCHET TIPS
- 💡 Maintain Tight Tension: Keep stitches firm so the star holds its shape without requiring heavy cardboard inserts.
- 💡 Block Before Assembly: Pin out each star point to exact symmetry before assembling the dangling strands.
- 💡 Secure Silver Threads: Knot silver embroidery thread on the inside of the front panel to keep stitches taut.
- 💡 Bead Needle Trick: Use a fine wire threader or collapsible eye needle to easily pass yarn through small bead holes.
- 💡 Prevent Cord Twisting: Use two strands of yarn twisted together and folded in half for strong, non-fraying hanging cords.
- 💡 Balanced Bell Weights: Ensure jingle bells are evenly weighted so the star hangs straight against the wall.
🧼 N. CARE INSTRUCTIONS
- 🧼 Dusting: Clean softly with a dry microfiber cloth or soft feather duster.
- 🧼 Spot Cleaning: Spot clean with a damp cloth and mild detergent if needed; do not submerge in water to protect metallic embroidery and stiffening.
- 🧼 Storage: Store flat in a dry, cool box between tissue paper layers to maintain blocking shape.
❓ R. FAQ
❓ Can I use acrylic yarn instead of cotton?
Yes! Cotton yarn offers superior stitch definition and natural stiffness, but acrylic yarn works well if blocked with gentle steam.
❓ How do I make the star points lay completely flat?
Blocking with fabric stiffener spray or a 50/50 mixture of water and white craft glue works best.
❓ Can I adjust the length of the dangling cords?
Absolutley. Customize the cord lengths to suit your wall space or mantel height.
❓ Do I need to stuff the main star?
No, the double-layer construction (joining front and back panels) provides structural body without needing fiberfill.
❓ Where can I find jingle bells and pearl centers?
Standard craft stores carry 18–20 mm jingle bells and pearl embellishment pins in their jewelry/holiday aisles.