Vintage Burgundy & Cream Serpentine Floral Table Runner Crochet Pattern
Category: Home Decor / Table Linens — Technique: Modular Openwork Lace & 3D Botanical Crochet
📖 B. INTRODUCTION
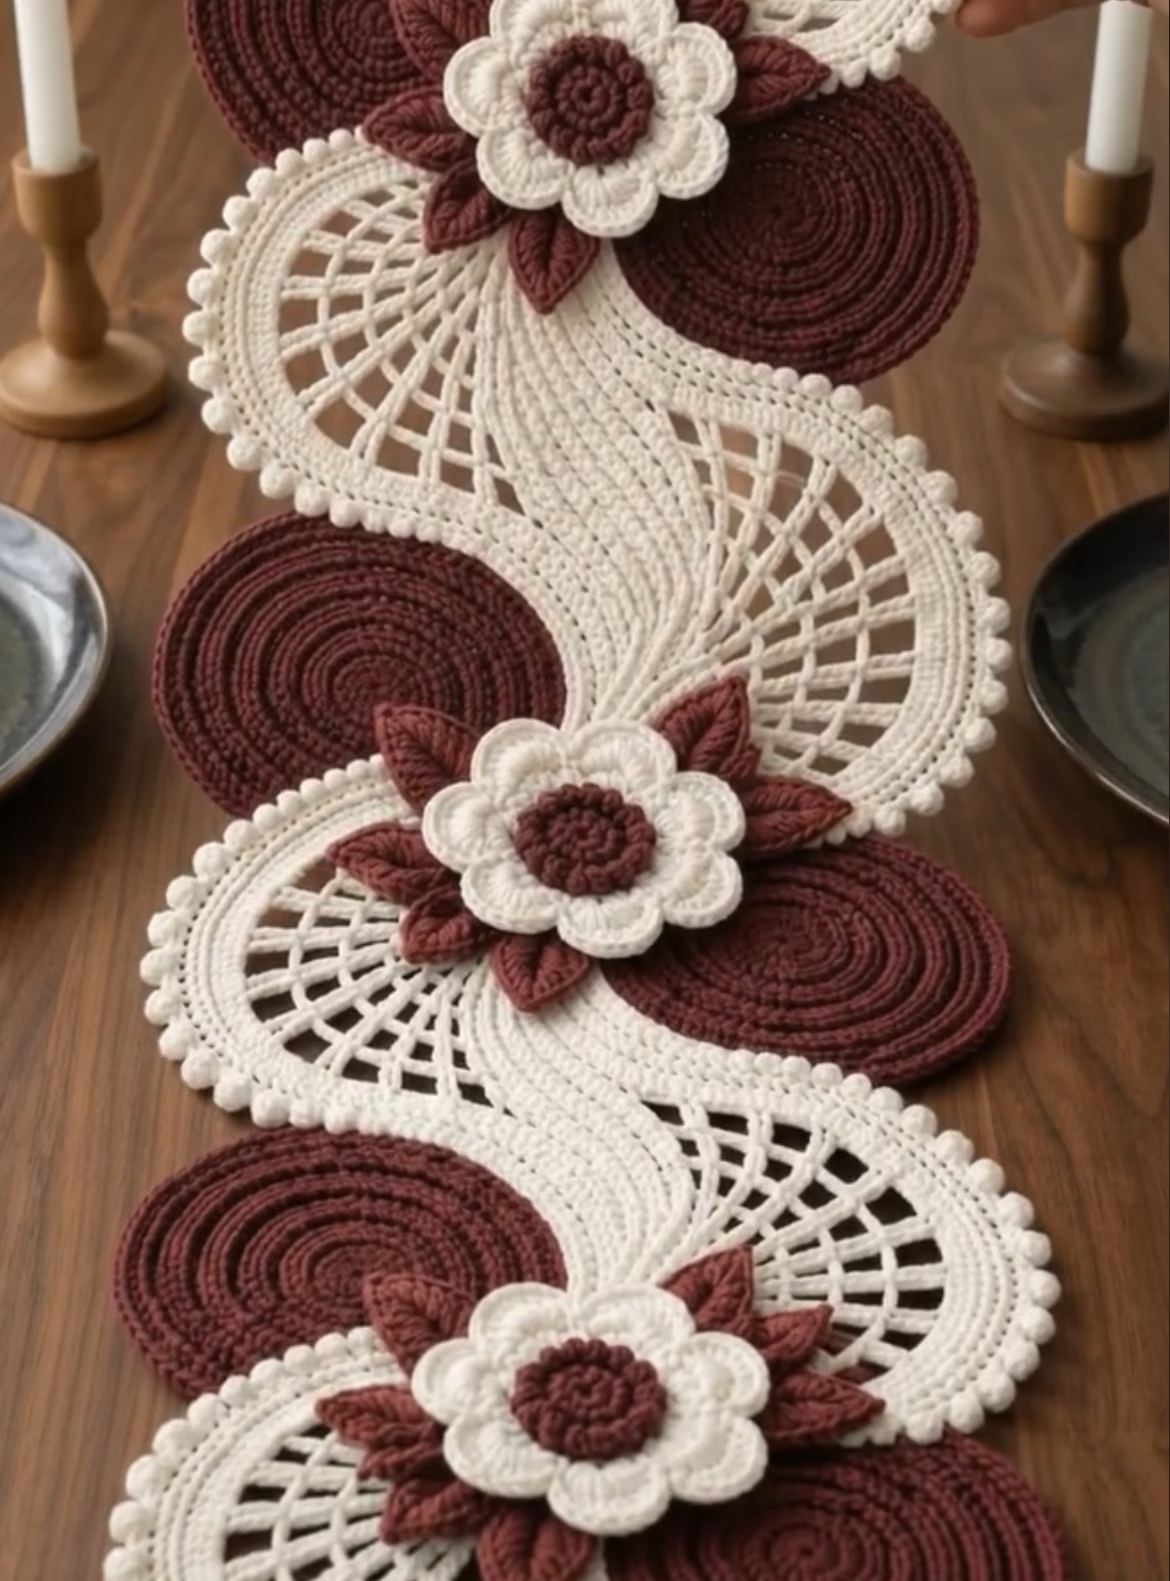
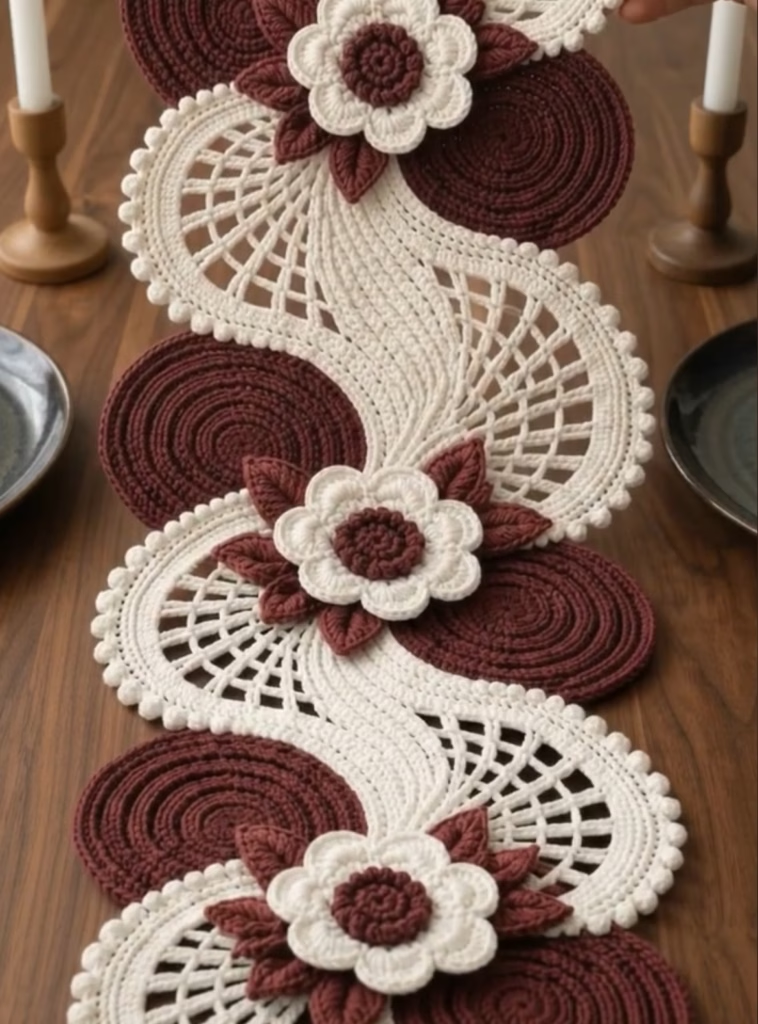
The Vintage Burgundy & Cream Serpentine Floral Table Runner is a heirloom-quality home accent that fuses structural geometry with graceful fluid curves. Constructed around alternating, solid deep-wine circular bases, this project features a sweeping cream openwork lace ribbon that snakes dynamically along the center axis, creating an elegant S-curve silhouette across any table surface.
The design is anchored by dense double-crochet discs worked in rich burgundy maroon, providing stability and rich contrast against radiating ivory mesh arches and delicate picot borders. At key structural junctions, multi-layered 3D floral blooms—featuring textured burgundy popcorn centers and dual-tiered cream petals—are framed by sculpted, ribbed burgundy leaves that radiate outward.
Designed to bring a touch of vintage elegance to romantic autumn dinners, holiday tablescapes, or rustic everyday dining rooms, this runner lays beautifully flat on hardwood, linen, or glass surfaces.
This modular pattern allows complete customization: you can adjust the length by altering the number of base discs and interlocking lace wave panels, or adapt the color combination to suit seasonal celebrations, such as forest green and gold for Christmas or dusty rose and cream for spring.
🔠C. MAIN PATTERN OVERVIEW
This runner utilizes a modular construction method where individual components are crafted separately and assembled into a cohesive serpentine structure:
- 🷠Solid Burgundy Base Discs: Eight dense, flat double-crochet circular motifs in deep burgundy wine that anchor the outer waves of the runner.
- ðŸ•Šï¸ Serpentine Lace Waves: Seven interlocking crescent-shaped lace panels in warm cream, featuring a solid ribbed inner curve that transitions into an expanding open mesh lattice finished with a scalloped picot edge.
- 🌸 3D Focal Camellia Flowers: Three multi-layered botanical flowers consisting of a textured burgundy popcorn center and dual tiers of cream petals.
- 🂠Ribbed Leaf Clusters: Eighteen sculpted, surface-ribbed burgundy leaves grouped around the three central floral clusters.
🎯 D. SKILL LEVEL
Level: Intermediate
This pattern is ideal for crocheters comfortable with foundational stitches who want to expand into motif assembly, lace expansion, and textured 3D floral elements.
- âž° Magic Ring & Circular Rounds: Working seamless flat circular increases without cupping or waving.
- 📠Lace Mesh Expansion: Incremental chain-space lattice growth and stitch placement into chain arches.
- 🿠Textured Popcorn Stitches: Working 5-hdc popcorn stitches for multi-dimensional flower centers.
- 🌸 Layered Back-Loop / Front-Loop Work: Working behind existing petal layers to build multi-tiered blooms.
- 📌 Blocking & Precision Assembly: Pinning crescent panels to flat motifs to achieve clean serpentine curves.
📠E. FINISHED SIZE
| Measurement Metric | Imperial | Metric |
| Total Length | 58.0 inches | 147.0 cm |
| Total Width at Peaks | 14.0 inches | 35.5 cm |
| Solid Base Disc Diameter | 6.5 inches | 16.5 cm |
| 3D Flower Diameter | 4.5 inches | 11.5 cm |
| Single Leaf Length | 2.5 inches | 6.4 cm |
Note: Length can be easily adjusted by adding or subtracting pairs of Base Discs and Lace Wave Panels.
🧮 F. GAUGE
- Solid Disc Gauge: Rounds 1–4 of the Base Disc pattern measure 3.5 inches (8.9 cm) in diameter using a 3.5 mm hook.
- Flat Stitch Gauge: 18 dc x 9 rows = 4 inches x 4 inches (10 cm x 10 cm) in solid double crochet.
Tension Note: Gauge in home decor lace influences finished dimensions and yarn usage. Work with firm, consistent tension so the solid discs lay flat without fluting and the lace arches hold structural definition after blocking.
🧶 G. REQUIRED YARN AMOUNTS
Yarn Weight: DK / Light Worsted (#3), Mercerized 100% Cotton (or Cotton-Acrylic blend for enhanced stitch definition).
| Colorway | Role / Component | Skeins Needed | Estimated Yardage | Estimated Grams |
| 🷠Deep Wine Burgundy | Base Discs, Flower Centers, Leaves | 3 Skeins | ~520 Yards (475 m) | 250 g |
| ðŸ•Šï¸ Cream Ivory | Lace Waves, Layered Petals | 3 Skeins | ~610 Yards (558 m) | 300 g |
| 📊 Project Total | Combined Runner Materials | 6 Skeins | ~1,130 Yards (1,033 m) | 550 g |
🧰 H. MATERIALS
- 🪡 Crochet Hook: 3.5 mm (US E-4) ergonomic aluminum hook (or size needed to obtain gauge).
- 🧶 Yarn: DK weight mercerized cotton in Deep Wine Burgundy and Cream Ivory.
- âœ‚ï¸ Scissors: Precision yarn snips.
- 🪡 Tapestry Needle: Size 18 steel blunt-ended yarn needle for weaving in ends and joining motifs.
- 📠Blocking Tools: Foam blocking mats, rust-proof stainless steel T-pins, and a garment steamer or water spray bottle.
- ðŸ·ï¸ Stitch Markers: 10–12 locking stitch markers for alignment during assembly.
- âš ï¸ Safety Note: Keep small pins and yarn needles safely stored away from young children and pets during assembly.
🔤 I. ABBREVIATIONS – US TERMS
| Abbreviation | Stitch / Technique |
| ch | Chain |
| sl st | Slip stitch |
| sc | Single crochet |
| hdc | Half double crochet |
| dc | Double crochet |
| tr | Treble (triple) crochet |
| inc | Increase (work 2 sts in same st) |
| MR | Magic Ring / Magic Circle |
| popcorn | 5-hdc popcorn stitch |
| picot | Ch 3, sl st in 1st ch |
| FLO | Front Loop Only |
| BLO | Back Loop Only |
| sp(s) | Space(s) |
| st(s) | Stitch(es) |
| [ ] / ( ) | Repeat instructions within brackets/parentheses as directed |
📠J. NOTES BEFORE YOU BEGIN
- 🔄 Joined Rounds: Solid discs and flower centers are worked in joined rounds. Always join with a slip stitch to the first stitch of the round (not the turning chain) unless specified otherwise.
- 🧶 Color Switching: When changing colors between components, fasten off the old color leaving a 6-inch tail for weaving, and join the new color with a standing stitch or slip stitch as indicated.
- 📠Alignment Pinning: Due to the serpentine structure, pin all burgundy discs and cream lace panels to a blocking grid before final stitching to maintain balance.
- 🧵 Sewing Tails: Leave an 8-to-10-inch tail on all burgundy leaves and cream lace panels to facilitate sewing during final assembly.
🪡 K. COMPLETE PATTERN
🷠Component 1: Solid Base Discs
Make 8 total using Deep Wine Burgundy yarn and 3.5 mm hook.
R1: MR, ch 2 (does not count as st throughout), 12 dc into ring. Sl st to 1st dc. (12 dc)
R2: Ch 2, 2 dc in each st around. Sl st to 1st dc. (24 dc)
R3: Ch 2, [1 dc in next st, 2 dc in next st] x12. Sl st to 1st dc. (36 dc)
R4: Ch 2, [1 dc in next 2 sts, 2 dc in next st] x12. Sl st to 1st dc. (48 dc)
R5: Ch 2, [1 dc in next 3 sts, 2 dc in next st] x12. Sl st to 1st dc. (60 dc)
R6: Ch 2, [1 dc in next 4 sts, 2 dc in next st] x12. Sl st to 1st dc. (72 dc)
R7: Ch 2, [1 dc in next 5 sts, 2 dc in next st] x12. Sl st to 1st dc. (84 dc)
R8: Ch 2, [1 dc in next 6 sts, 2 dc in next st] x12. Sl st to 1st dc. (96 dc)
- 🧶 Finishing: Fasten off. Weave in starting tail firmly inside the magic ring. Leave an 8-inch tail on 4 of the discs for assembly joins.
ðŸ•Šï¸ Component 2: Serpentine Interlocking Lace Waves
Make 7 total using Cream Ivory yarn and 3.5 mm hook. Worked flat in turned rows.
Row 1: Ch 25. Sc in 2nd ch from hook and in each ch across. Turn. (24 sc)
Row 2: Ch 3 (counts as 1 dc), dc in same st, 1 dc in next 22 sts, 2 dc in last st. Turn. (26 dc)
Row 3: Ch 3 (counts as 1 dc), 1 dc in next 25 sts. Turn. (26 dc)
Row 4: Ch 4 (counts as 1 dc + ch 1), skip 1 st, [dc in next st, ch 1, skip 1 st] x12, dc in last st. Turn. (13 dc, 12 ch-1 sps)
Row 5: Ch 5 (counts as 1 dc + ch 2), dc in next dc, [ch 2, dc in next dc] x11, ch 2, dc in 3rd ch of turning ch-4. Turn. (13 dc, 12 ch-2 sps)
Row 6: Ch 6 (counts as 1 dc + ch 3), dc in next dc, [ch 3, dc in next dc] x11, ch 3, dc in 3rd ch of turning ch-5. Turn. (13 dc, 12 ch-3 sps)
Row 7: Ch 1, *(2 sc, ch 3, sl st in 1st ch for picot, 2 sc) in next ch-3 sp, sl st in next dc*; repeat from * across all 12 ch-3 sps. (12 picot scallops)
- 🧶 Finishing: Fasten off, leaving a 12-inch tail for joining to adjacent discs.
🌸 Component 3: 3D Layered Focal Flowers
Make 3 total using Deep Wine Burgundy (Center) and Cream Ivory (Petals) with 3.5 mm hook.
🷠Center (Deep Wine Burgundy)
R1: MR, ch 1, 8 sc into ring. Sl st to 1st sc. (8 sc)
R2: Ch 2, [work 5-hdc popcorn in next st, ch 1] x8. Sl st to top of 1st popcorn. Fasten off Burgundy. (8 popcorns, 8 ch-1 sps)
ðŸ•Šï¸ Inner Petals (Cream Ivory)
R3: Join Cream Ivory in any ch-1 sp from R2. *(Ch 2, 3 dc, ch 2, sl st) in same sp, sl st into next ch-1 sp*; repeat from * 7 more times. (8 small inner petals)
ðŸ•Šï¸ Outer Petal Base Loops (Cream Ivory)
R4: Working behind inner petals, fold inner petals forward. Join Cream Ivory to back post of any R2 popcorn st. [Ch 4, sl st to back post of next R2 popcorn] x8. (8 ch-4 back loops)
ðŸ•Šï¸ Outer Petal Layer (Cream Ivory)
R5: Into each ch-4 loop work: (sl st, ch 3, 4 tr, ch 3, sl st). Repeat in all 8 ch-4 loops. Sl st to base of 1st petal. (8 wide outer petals)
- 🧶 Finishing: Fasten off leaving a 14-inch tail for sewing onto the runner center.
🂠Component 4: Pointed Ribbed Leaves
Make 18 total using Deep Wine Burgundy yarn and 3.5 mm hook. Worked around both sides of a foundation chain.
Foundation: Ch 11.
R1: Sc in 2nd ch from hook, hdc in next ch, dc in next 2 ch, tr in next 2 ch, dc in next 2 ch, hdc in next ch, (1 sc, ch 2, 1 sc) in last ch (leaf tip).
Rotate to work along opposite side of foundation chain: hdc in next ch, dc in next 2 ch, tr in next 2 ch, dc in next 2 ch, hdc in next ch, sc in last ch. Sl st to 1st sc. (20 sts + 1 ch-2 tip)
R2: Ch 1, sl st in BLO of next 9 sts, (1 sc, ch 2, sl st in 1st ch for picot, 1 sc) in ch-2 tip sp, sl st in BLO of remaining 9 sts down opposite side.
- 🧶 Finishing: Fasten off leaving a 10-inch tail for joining.
🎨 L. STYLING / ASSEMBLY / STABILITY / FINAL SHAPING
📠Layout Diagram & Serpentine Alignment
Arrange the 8 Burgundy Base Discs in an alternating, staggered S-curve layout down the center of your working surface:
[Disc 1] [Disc 3] [Disc 5] [Disc 7]
\ / \ / \ /
\ / \ / \ /
[Disc 2]——– [Disc 4]——– [Disc 6]——–[Disc 8]
- Placing Base Discs: Discs 1, 3, 5, and 7 offset to the left/top; Discs 2, 4, 6, and 8 offset to the right/bottom. Adjacent discs overlap by approximately 0.75 inches (12 sts along Round 8).
- Fitting Lace Waves: Place one Cream Lace Wave Panel (Component 2) in the inner curve between each pair of discs. The straight edge (Row 1) stitches securely to the edge of the inner disc, while the outer expanding picot border fans outward to create the crest of the serpentine wave.
- Positioning Focal Flowers: Position one 3D Focal Flower over the overlap points at the junctions between Discs 2/3, Discs 4/5, and Discs 6/7.
- Arranging Leaf Clusters: Group 6 Ribbed Leaves around each flower motif, tucking the stem ends under the outer petal tier in a starburst arrangement.
🪡 Step-by-Step Assembly Sequence
- Join Discs: Whipstitch the 8 Burgundy Discs together at their designated 12-stitch overlapping edges using Deep Wine Burgundy yarn and a tapestry needle.
- Attach Lace Waves: Using the long tails on the Lace Wave Panels, sew Row 1 of each wave panel to the corresponding edge of the burgundy discs along the central curve.
- Attach Leaves: Pin 6 leaves around each junction point, angling them outward. Stitch securely to the burgundy disc surfaces through the back loops of the leaves.
- Mount Flowers: Center a 3D Flower directly over each 6-leaf cluster. Sew down through R4 back-loops so the outer petals remain free and dimensional.
- Weave Ends: Securely weave all remaining yarn tails into dense stitch areas on the reverse side.
📠Wet Blocking & Stability Instructions
Because this runner combines solid circles with open lattice lace, wet blocking is essential to achieve a flat lay:
- Submerge the assembled runner in lukewarm water with a rinse-free wool wash for 15 minutes.
- Gently press out excess water in a towel (do not wring or twist).
- Pin out on foam blocking mats, using T-pins along every picot loop of the lace wave borders to accentuate the scalloped fans.
- Ensure burgundy discs lie completely flat and smooth. Pin outer leaf tips flat.
- Allow to dry completely for 24 hours before unpinning.
✅ Final Shaping Checklist
- ✅ All 8 Burgundy Discs are flattened and aligned along a smooth S-curve.
- ✅ All 7 Lace Waves fan out evenly without puckering or sagging.
- ✅ All 3 Floral centerpieces sit centered over disc junctions.
- ✅ All 18 Leaf tips point outwards symmetrically around the blooms.
- ✅ All yarn ends are tucked into matching color sections on the back.
💡 M. HELPFUL CROCHET TIPS
- 💡 Prevent Disc Cupping: If your solid discs start to dish or wave, double-check your stitch count on each round. Consistent 12-stitch increases per round guarantee a flat circle.
- 💡 Crisp Lattice Lines: When working Row 4–6 of the lace panels, insert your hook directly into the middle of the double crochet stitches below rather than into chain spaces to keep lattice grid columns perfectly aligned.
- 💡 Tight Magic Rings: Double-knot the magic ring center tail on the back of the floral centers and burgundy discs before weaving it in so the centers never loosen with use.
- 💡 Mercerized Cotton Advantage: Mercerized cotton yarn gives stitch definition, structural stability, and a gentle sheen that highlights lace details.
- 💡 T-Pin Precision: When blocking, pin the center of each burgundy disc first before pulling the lace picot edges outward.
- 💡 Seamless Color Changes: Always perform the final yarn yarn-over of a color-changing stitch with the new yarn shade.
- 💡 Dimensional Petals: Steaming outer flower petals gently from the reverse side helps them flare upward without losing their 3D shape.
- 💡 Customizing Runner Length: To add 12 inches (30.5 cm) to the runner, make 2 additional Base Discs, 2 additional Lace Wave Panels, 1 additional Flower, and 6 additional Leaves.
🧼 N. CARE INSTRUCTIONS
- 🧼 Washing: Hand wash gently in cold water using a mild liquid soap. Do not agitate or machine wash.
- 🧽 Drying: Press gently between clean dry towels to remove moisture. Lay flat to dry on a towel or blocking mat away from direct sunlight.
- â™¨ï¸ Ironing / Pressing: Do not press iron directly onto yarn. Use a garment steamer held 2 inches away from the surface, or steam iron through a damp cotton press cloth.
- 📦 Storage: Store flat or gently rolled around a cardboard tube to prevent creasing the lace panels. Avoid folding tightly across 3D flower centers.
â“ R. FAQ
â“ Can I use a different yarn weight for this pattern?
Yes, you can substitute Sport (#2) yarn with a 3.0 mm hook for a delicate, lace-weight runner, or Worsted (#4) yarn with a 4.0 mm hook for a larger, bolder table accent. Keep in mind that yarn quantities and overall runner dimensions will scale accordingly.
â“ How do I fix a disc that curls at the edges?
If a burgundy disc curls upward into a bowl shape, your tension is too tight or stitch count is low. Ensure you complete 12 increases per round. Blocking will flatten minor tension variances.
â“ Do I have to sew the pieces together, or can I join as I go?
While sewing with tapestry needles yields precise alignment for these curved pieces, advanced crocheters can use a join-as-you-go slip-stitch technique on Row 7 of the Lace Waves to attach them directly to the Base Discs.
â“ How can I make this runner fit a shorter table?
Reduce the motif count: make 6 Base Discs, 5 Lace Wave Panels, 2 Focal Flowers, and 12 Leaves for a shorter ~42-inch (106 cm) runner.
â“ Will the 3D flowers flatten when items are placed on the table?
The popcorn centers and layered petals are dense enough to resist flattening during light use. For table settings, place flower clusters where dishes won’t directly cover them, or use them as focal frames for centerpieces.
â“ How do I keep the lace wave edges crisp over time?
A light spray of fabric stiffener or spray starch applied to the picot borders during blocking will keep the fan edges crisp through repeated display.