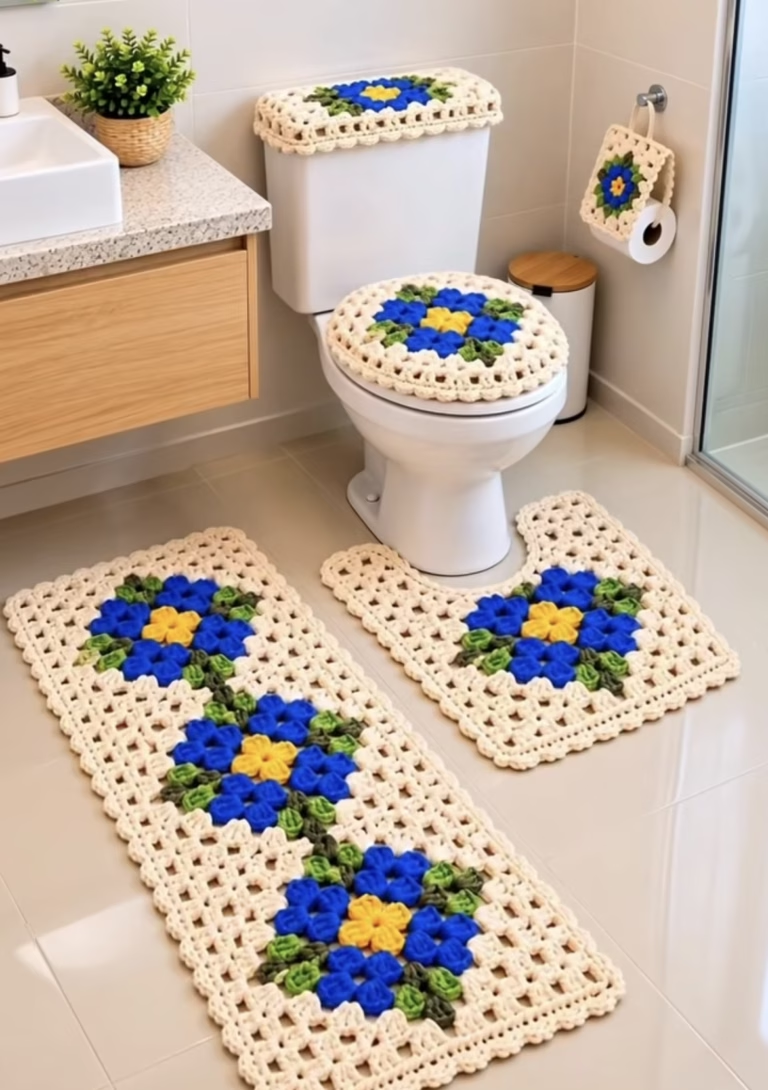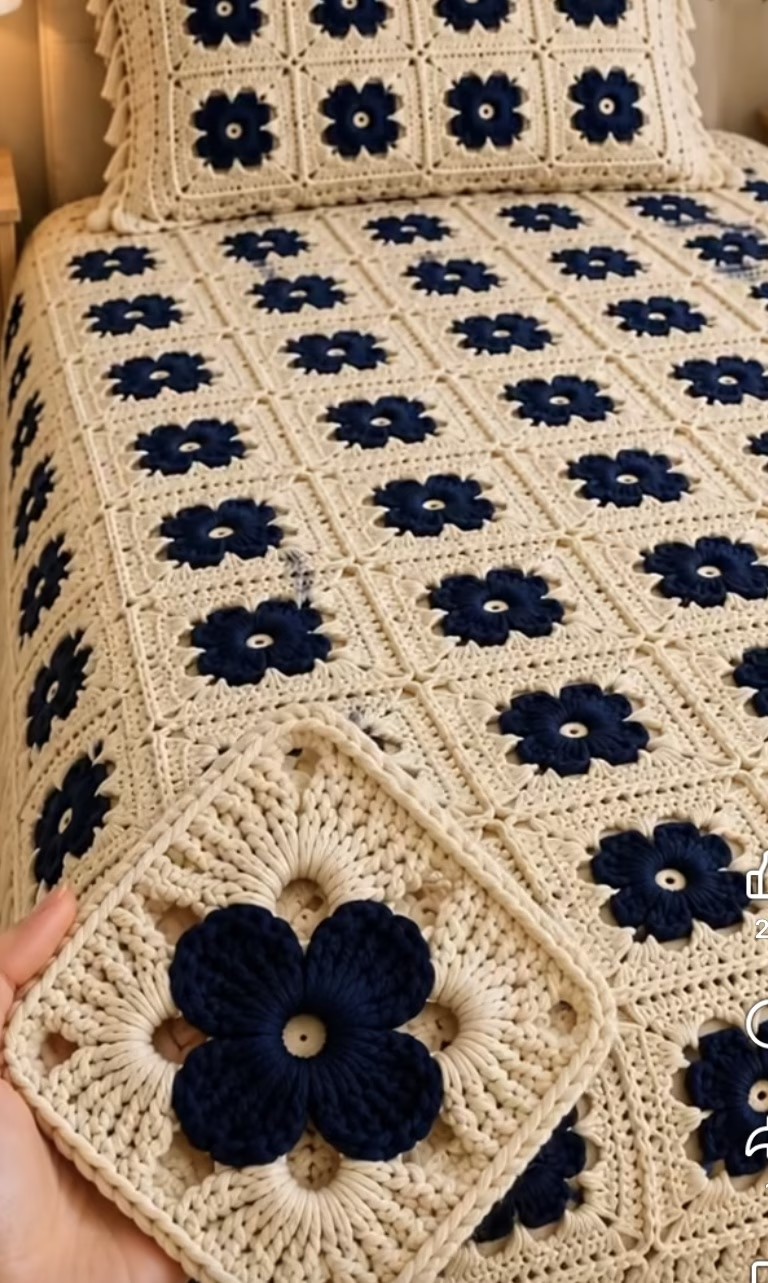
If you’re looking for a striking, nostalgic crochet project, this vintage-inspired flower granny square bedspread is a true showpiece. Each square boasts a vivid flower motif, featuring plush, rounded petals in a deep, contrasting blue set against a creamy ivory background. The result is a harmonious blend of bold color and classic texture, perfect for a cozy, handmade blanket that brings warmth and personality to any room. You can use this adaptable motif for bedspreads, throws, cushion covers, or as a standalone decorative piece. The construction is straightforward, but the result is visually captivating!
The deep blue flowers pop from the neutral background, making the motif especially eye-catching. Every square has a unique center: a thick, puffy-petaled flower radiating from a small open ring, surrounded by creamy stitches that transition into a lacy, slightly dense frame. The blanket is assembled from these squares, joined seamlessly for an elegant finish. The dense petals and sturdy background give the piece a satisfying balance between structure and softness, ideal for cozying up in style.
This project is delightful for anyone who enjoys modular crochet and wants to create a handmade heirloom. The motif’s bold colorwork and textured flower make it a joy to work up, while the endless customization possibilities mean you can truly make it your own.
Project Overview
This bedspread is made from individual flower granny squares, each worked separately in the round. The squares start at the center with a puff-petaled flower and are then edged with a neutral-color granny-style border. Once all the motifs are complete, they’re joined together in neat rows to form the blanket (or any size project you like!).
Skill Level
Intermediate. This project involves working in the round, shaping flower petals with textured stitches, and joining multiple motifs together. Confident beginners familiar with reading patterns and basic color changes could attempt it, but intermediate crocheters will find it comfortably challenging.
Materials
- Yarn Weight: Worsted weight yarn (#4)
- Suggested Fiber: 100% cotton or soft acrylic for durability and stitch definition
- Color A (Flower): Approx. 600–900g dark blue yarn (yardage will depend on blanket size; about 12g per square for a twin-size bedspread)
- Color B (Background): Approx. 1,500–2,200g cream or off-white yarn (about 32g per square for a twin-size bedspread)
- Crochet Hook: 4.5 mm (US size 7)
- Tapestry needle for weaving in ends and seaming
- Sharp scissors
- Stitch markers (optional, helpful for marking rounds or corners)
- Measuring tape (for checking gauge and finished size)
Finished Size
Each individual granny square measures approximately 15 x 15 cm (6 x 6 inches) after light blocking.
- Bedspread shown: Approximately 17 squares wide x 22 squares long = 102 x 132 inches (260 x 335 cm)
- To adjust size: Add or subtract motif rows/columns as needed.
- Pillow cover: Usually 4 squares across and 4 squares down.
Gauge
Each completed square (blocked) should be about 15 x 15 cm (6 x 6 in). Work the first motif and adjust your hook size if needed. Slight differences in gauge will not ruin the project, but will affect your finished blanket size and yarn requirements.
Stitches and Abbreviations
- ch – chain
- sl st – slip stitch
- sc – single crochet
- hdc – half double crochet
- dc – double crochet
- tr – treble crochet
- MR – magic ring
- pc – puff cluster (see notes below)
- st(s) – stitch(es)
- sp – space
- inc – increase
Important Pattern Notes
- Ch-3 at the beginning of a round always counts as the first dc unless otherwise noted.
- Join rounds with a slip stitch to the top of the initial ch-3 unless specified.
- Change colors by completing the last yarn-over of the stitch before the color shift with the new yarn.
- Work the flower motif tightly for best petal puffiness; keep the border at a relaxed, even tension.
- Use a stitch marker in the first stitch of each round if needed.
- Right side should face you throughout unless noted otherwise.
- Puff clusters (pc) are made as follows: [Yarn over, insert hook in st, yarn over, pull up loop] 4 times in same stitch, yarn over, pull through all 9 loops on hook, ch 1 to close.
Detailed Crochet Pattern
Part 1: Center Flower
- With Color A (blue), make a MR or ch 4 and join with sl st to form a ring.
- Round 1: Ch 1 (does not count), work 8 sc in ring. Sl st to first sc. Pull MR tight. (8 sts)
- Round 2: *Ch 2, work a puff cluster (pc) in the next st, ch 2, sl st in next st*; repeat from * to * 3 more times, so you have 4 petals with ch-2 spaces between each. Fasten off Color A.
(4 petals, 4 ch-2 spaces)
Each puff cluster will form a rounded flower petal. For extra puffiness, pull up loops generously.
Part 2: Granny Square Background
- Join Color B (cream) in any ch-2 space between petals.
- Round 3: In joining ch-2 sp: Ch 3 (counts as dc), 2 dc in same sp, ch 2 (corner), 3 dc in same sp (corner made).
*In each of next 3 ch-2 spaces: (3 dc, ch 2, 3 dc) in each sp.* Join with sl st to top of ch-3.
(4 corners, 24 dc) - Round 4: Sl st to next ch-2 corner sp.
Ch 3 (counts as dc), (2 dc, ch 2, 3 dc) in same corner, *3 dc in sp between 3-dc groups, (3 dc, ch 2, 3 dc) in next corner*; repeat from * to * around, joining with sl st to top of ch-3.
(4 corners, 36 dc) - Round 5: Sl st to corner, ch 3 (counts as dc), (2 dc, ch 2, 3 dc) in corner, *3 dc in each sp between 3-dc groups (2 times), (3 dc, ch 2, 3 dc) in next corner*; repeat around. Join with sl st to top of ch-3.
(4 corners, 48 dc) - Round 6: Sl st to corner, ch 1, sc in corner, ch 2, sc in same sp, *sc in each st across to next corner, (sc, ch 2, sc) in corner*; repeat around. Join with sl st to first sc. Fasten off, weave in ends.
(4 corners, 56 sc)
If you want a sturdier square, add another round or make the last round with a decorative edge (ex: crab stitch or picot).
Part 3: Joining the Squares
- Lay out all your squares in the desired arrangement, ensuring the flower petals all face the same direction for a tidy look. (Alternating orientation is also attractive!).
- Join using your favorite seaming technique. For a seamless look, use whip-stitch through the back loops only with color B, or join-as-you-go with sc or sl st.
- Work across each row, then join the rows to each other.
Part 4: Border
- With Color B, join yarn at any corner of the blanket.
- Ch 1, (sc, ch 2, sc) in each corner ch-2 space, sc in each st and join seam around the entire blanket.
- Repeat for 2–4 more rounds or until desired border width is reached.
- For a lacy effect, add a round of (sc in next st, skip 1 st, ch 3, sc in next st).
Part 5: Decorative Elements (Optional)
- For extra detail, consider adding a button or embroidered center to each flower. Sew securely through the flower’s center hole, making sure the bedspread remains comfortable if you intend to use it for sleeping.
- For pillows, add a simple envelope or button-back closure with additional granny squares or a fabric lining.
Assembly and Finishing
- After joining all squares, weave in all remaining yarn ends with a tapestry needle.
- Gently hand-wash or dampen the blanket, pin to finished measurements, and block flat to straighten the motifs and set the stitches.
- Adjust motif positions during blocking so all floral centers appear centered and the corners lay flat.
- Allow to dry completely before use.
Customization Ideas
- Try alternate flower colors: Pastels, rainbow, or gradients all look stunning against a neutral background.
- Change yarn weight: Use DK or bulky weight yarn for different square sizes, adjusting hook size accordingly.
- Make a matching set: Use the motif for pillows, bags, chair cushions, wall hangings, coasters, or even a table runner.
- Add a decorative edge: Finish with a scalloped, picot, or shell border for a more ornate look.
- Solid color background: Try a single color for all backgrounds or alternate background shades for a patchwork effect.
Troubleshooting Tips
- Curling squares: Check your tension and try blocking the squares before joining.
- Uneven edges: Make sure your stitch count is consistent for each round; add blocking if needed.
- Motif too large or too small: Adjust hook size if your squares don’t measure about 15 cm square before joining.
- Loose color changes: Carefully finish the last yarn-over with the new yarn; weave in color transitions securely at the back.
- Uneven tension: Pause after every few squares to check consistency and block if necessary before joining.
Care Instructions
- Hand wash in cool water with gentle detergent for best results.
- Lay flat to dry and block to keep squares even.
- Avoid twisting or wringing to maintain motif shape.
- If using acrylic, you may machine wash cold and tumble dry on low, but always check your yarn label first.
Final Notes
Before beginning full assembly, double-check your stitch counts on a sample square and adjust as needed. Consistent tension and careful blocking will keep your motifs crisp and your blanket beautifully flat. Use the photo as a visual guide for color placement and join technique. Enjoy the process of creating a cheerful, decorative crochet bedspread that is sure to become a treasured heirloom in your home!