📖 B. INTRODUCTION
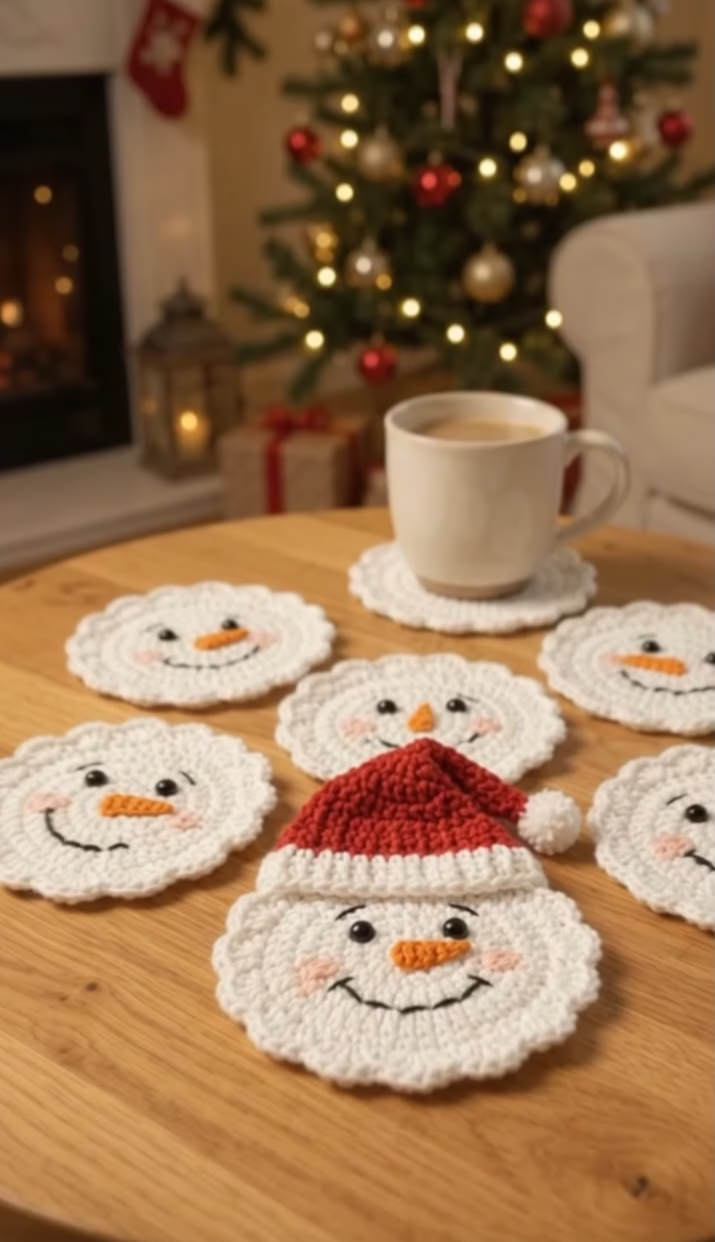
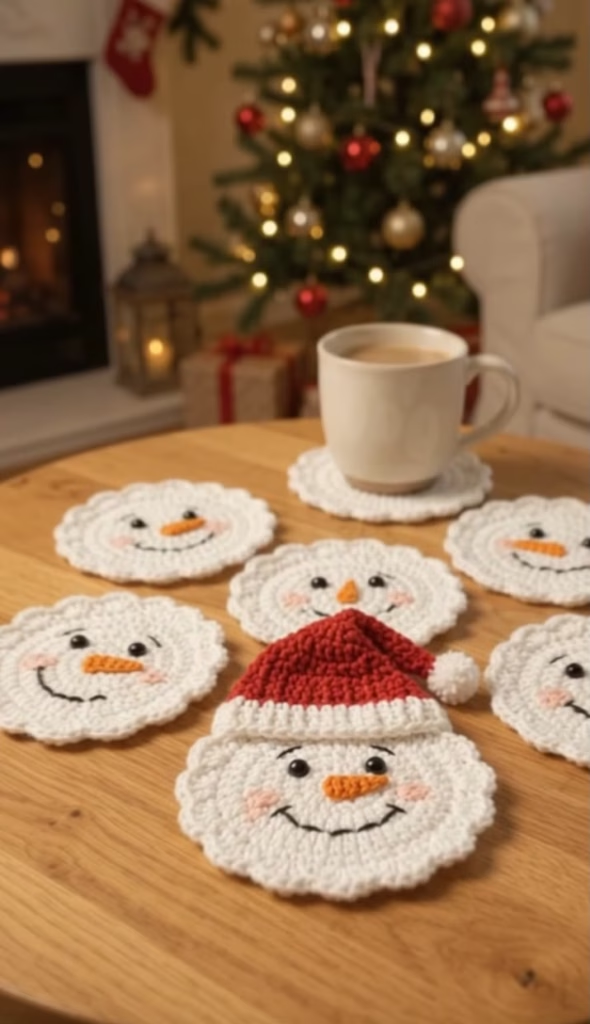
Add a touch of handcrafted charm to your holiday decor with this adorable Crochet Snowman Coasters pattern! These quick-to-crochet snowmen, featuring cozy smiles, rosy cheeks, and festive Santa hats, are perfect for protecting your surfaces while bringing holiday cheer to your coffee table.
Crocheting these festive coasters is a wonderful way to prepare for the Christmas season. They make heartwarming, thoughtful gifts for friends and family or charming favors for holiday parties. This easy crochet gift project is also highly customizable; you can adjust the facial embroidery, add tiny pom-poms, or change the hat colors to create a unique snowman family. So grab your hook, cozy up, and let’s make some winter crochet magic!
🔍 C. MAIN PATTERN OVERVIEW
This pattern will guide you through creating a set of whimsical Crochet Snowman Coasters. The design is based on making multiple circular white coasters that serve as the snowman’s face. One special coaster includes a distinctly crafted red and white Santa-style hat to lead the festive pack.
The basic construction is worked in the round to create a flat, absorbent circle for the coaster base. After crocheting the bases, you will apply original facial embroidery instructions to bring each snowman to life with safety eyes, a stitched carrot nose, and a happy smile. The result is a consistent and delightful set of functional holiday home decor.
🎯 D. SKILL LEVEL
Level: Intermediate
While the coaster base is relatively simple, this pattern is rated as Intermediate due to the required skills for sewing assembly, inserting safety eyes correctly, and performing specific facial embroidery techniques (whip stitch, back stitch).
Key techniques used:
- Crocheting in continuous rounds
- Increases (inc)
- Basic embroidery (whip stitch, back stitch)
- Safety eye insertion (with safety notes)
- Simple color changes for the hat
📏 E. FINISHED SIZE
Practical measurements: approximately 4 inches (10 cm) in diameter.
Please note that finished measurements can vary based on individual tension, the exact yarn brand used, and hook choice. A tighter gauge will produce a slightly smaller, firmer coaster.
🧮 F. GAUGE
Gauge (tension guidance): 4 rounds = 2 inches (5 cm).
For amigurumi-style decor like these coasters, tight and consistent stitches are preferred to keep the surface flat and absorbent and to hold the stuffing for any applied elements (like the hat). Gauge is not critical for fit, but keeping tension even will ensure all coasters in your set are the same size.
🧶 G. REQUIRED YARN AMOUNTS
The following is an estimate for creating a standard set of 6 coasters (5 basic + 1 with a Santa hat). We recommend using an absorbent, worsted-weight cotton yarn.
- 🧵 White: 100-120 yards (approx. 1-2 skeins)
- 🧵 Red: 15-20 yards (small amount)
- 🧵 Orange, Black, Pink: Very small amounts each for embroidery.
- Total Estimate: Approximately 140-160 yards for the entire set.
🧰 H. MATERIALS
- Hook: G/4.00mm or size needed to obtain gauge.
- Yarn: Worst-weight cotton or cotton-blend yarn (see colors in Section G).
- Eyes: 12 total (2 per coaster) small black safety eyes (e.g., 6mm or 8mm).
- ⚠️ Safety Note: For coasters used by small children, please embroider the eyes instead of using plastic safety eyes to avoid a choking hazard.
- Stuffing: Small amount of polyester fiberfill (for the Santa hat).
- Needles: Tapestry needle for assembly, fine embroidery needle.
- Notions: Scissors, stitch markers, straight pins.
- Optional: Real makeup blush and a small brush (for cheeks).
🔤 I. ABBREVIATIONS – US TERMS
- MR: Magic Ring
- ch: chain
- sc: single crochet
- sl st: slip stitch
- inc: increase (2 sc in the same stitch)
- dec: decrease (sc2tog)
- st(s): stitch(es)
- R: Round
- fpsc: front post single crochet
- bpsc: back post single crochet
📝 J. NOTES BEFORE YOU BEGIN
- Continuous Rounds: Most components (Coaster Base, Hat) are worked in continuous rounds. Do not join at the end of rounds unless explicitly instructed.
- Marker Use: Place a stitch marker in the first stitch of each round and move it up as you progress to keep track of your rounds.
- Safety Eyes: Remember to insert and secure safety eyes before you are too far into a component, especially if it is being closed. If you prefer to embroider eyes, save this for the styling phase.
- Sewing Tails: When fastening off, leave long yarn tails for components that need to be sewn onto the base.
- Stuffing: Stuff the hat firmly but evenly to help it maintain its shape. The coaster bases are not stuffed.
🪡 K. COMPLETE PATTERN
🧠 White Coaster Base
Make 6 (or your desired set quantity) Yarn: White Start: Begin with a Magic Ring.Instructions: R1: MR 6. (6) R2: inc around. (12) R3: (1 sc, inc) x6. (18) R4: (2 sc, inc) x6. (24) R5: (3 sc, inc) x6. (30) R6: (4 sc, inc) x6. (36) R7: (5 sc, inc) x6. (42) R8: (6 sc, inc) x6. (48) R9: sc around. (48) R10: (sl st, skip 1, 5 dc in next, skip 1) repeat around. Join with sl st to first st. (This creates the scallop/piquot edge). Fasten off and weave in ends for the first 5 coasters. Leave a long tail for the 6th coaster if you plan to sew facial features or the hat directly onto it.
🦵 Santa Hat – Red Section
Make 1Yarn: Red Start: Begin with a Magic Ring.Instructions: R1: MR 6. (6) R2: sc around. (6) R3: (inc, 1 sc) x3. (9) R4: sc around. (9) R5: (inc, 2 sc) x3. (12) R6: sc around. (12) R7: (inc, 3 sc) x3. (15) R8: sc around. (15) R9: (inc, 4 sc) x3. (18) R10: sc around. (18) R11: (inc, 5 sc) x3. (21) Fasten off, leaving a long tail for sewing. Start stuffing lightly.
🦵 Santa Hat – White Trim
Make 1Yarn: White Start: Begin by chaining enough to fit the base of the red hat section (e.g., ch 22), sl st to first ch to form a ring.Instructions: R1: sc around. (approx. 22) R2: (ch 3, skip 1, sc) repeat around. (This creates a simple ruffled texture). Fasten off. Join the white trim ring to the last round (R11) of the red hat using a tapestry needle and white yarn, ensuring the texture faces outward. Finish stuffing the hat.
🦵 White Hat Pom-Pom
Make 1Yarn: White Start: Begin with a Magic Ring.Instructions: R1: MR 6. (6) R2: inc around. (12) R3: sc around. (12) R4: dec around. (6) Stuff lightly. Fasten off and use the tail to sew the pom-pom securely to the top point of the red Santa hat.
🌸 Face Embroidery
(Apply to ALL 6 Coasters)Placement and Instructions:
- 👀 Eyes: Center the 2 safety eyes horizontally, approximately between R5 and R6 of the Coaster Base. Adjust vertical spacing to your liking. (If embroidering, use Black yarn and satin stitch).
- 🥕 Carrot Nose: Using Orange yarn, make horizontal whip stitches starting just below the eyes (approx. between R6 and R7), creating a triangular point that spans across 2-3 stitches.
- 😊 Smile: Using Black yarn, use a back stitch to create a wide curved line below the nose, spanning 6-8 stitches. Start the curve slightly above the center line and dip it down.
- 😊 Rosy Cheeks: Using Pink yarn, make 2-3 small, horizontal parallel stitches directly to the outer side of each safety eye (or apply actual blush for a softer look).
🎨 L. STYLING / ASSEMBLY / STABILITY / FINAL SHAPING Once all components and facial features are ready, it is time for final assembly and checks.
Head-to-Hat Assembly:
- Alignment: Take the special coaster base (with its completed face) and place the assembled Santa hat onto the top edge of the circle (approx. from R9 onwards), ensuring the hat sits naturally and does not obscure the eyes or face.
- Pinning: Pin the base of the white hat trim securely to the coaster base.
- Sewing: Use the long tail of the hat to sew the front portion of the hat trim firmly to the coaster. To maintain stability, you do not need to sew the back side of the hat completely to the base; allowing it to lift slightly will give it a better shape when on display. Reinforce the attachment points where the hat trim meets the main circle.
Stabilization Check: ✅ Flatness: Ensure all 6 coaster bases lay flat. Steam blocking can help if your cotton yarn is curling at the edges. ✅ Symmetry: Check that all facial features are aligned and centered relative to each other on all coasters. ✅ Secure Attachments: Gently tug on the hat and pom-pom to ensure they are securely fastened and will not detach with use. ✅ Visibility: Verify that the Santa hat is positioned clearly at the top without overlapping the eyes. ✅ Neat Ends: Ensure all yarn tails are woven in and trimmed neatly.
💡 M. HELPFUL CROCHET TIPS Here are some Senior Designer tips to ensure your Snowman Coasters look their absolute best:
- 💡 Cotton is King: For coasters, cotton yarn is essential because it is absorbent, heat-resistant, and holds its shape well. Avoid slippery acrylics for this project.
- 💡 Invisible Increases: Use the invisible increase method to prevent gaps from forming at increase points on the coaster base.
- 💡 Embroidery Thread Alternative: For fine details like the smile, consider using black embroidery thread rather than worsted yarn, which can sometimes look bulky on a small face.
- 💡 Steam Blocking: Lay your finished coasters under a towel and steam them with an iron to flatten out any stitch irregularities and define the edge scallops.
- 💡 Pin Your Features: Always pin your face embroidery in place before sewing. This allows you to step back and check symmetry before making permanent stitches.
- 💡 Add Cheeks with Care: If using real blush, apply it sparingly with a small, dry makeup brush. It is much easier to add more than it is to remove it!
🧼 N. CARE INSTRUCTIONS
- Cleaning: Hand wash your Snowman Coasters gently in cold water with a mild detergent. Spot clean facial features with a damp cloth if necessary.
- Drying: Reshape while damp and lay flat to air dry on a towel. Do not tumble dry, as this can cause cotton to shrink or damage the safety eyes.
- Long-Term Storage: Store in a dry place. If the coasters have safety eyes, store them with care to avoid scratching the plastic.
❓ R. FAQ ❓ What yarn is best for these coasters? For coasters that are truly functional, a cotton or cotton-blend worsted-weight yarn is highly recommended for its excellent absorbency and durability.
❓ Can I make these without safety eyes? Yes, absolutely! For safety if these will be around infants, or just for a different aesthetic, you can easily embroider the eyes using black worsted yarn or embroidery floss in a simple satin stitch or French knot.
❓ How can I make my snowmen look unique? Personalization is the fun part! Consider using a different color for the carrot nose, changing the hat style to a beanie (fewer decrease rounds), adding tiny buttons, or using diverse colors for the cheek blush.
❓ Why is my coaster base curling up at the edges? This is a common issue and is usually caused by having tight tension or a slightly small hook. To fix this, you can try switching to a slightly larger hook, or try steam blocking the finished coaster to flatten it out.
❓ Do the facial features have to be exact? No! While this pattern provides specific guidelines, feel free to give your snowmen their own unique expressions. Moving the smile slightly up or down, or changing the angle of the nose, can change their personality entirely.
❓ How long does it take to make one coaster? These are a quick and satisfying project! A single coaster can usually be completed, including embroidery, in under 45 minutes, making it easy to create a whole set in a few cozy evenings.