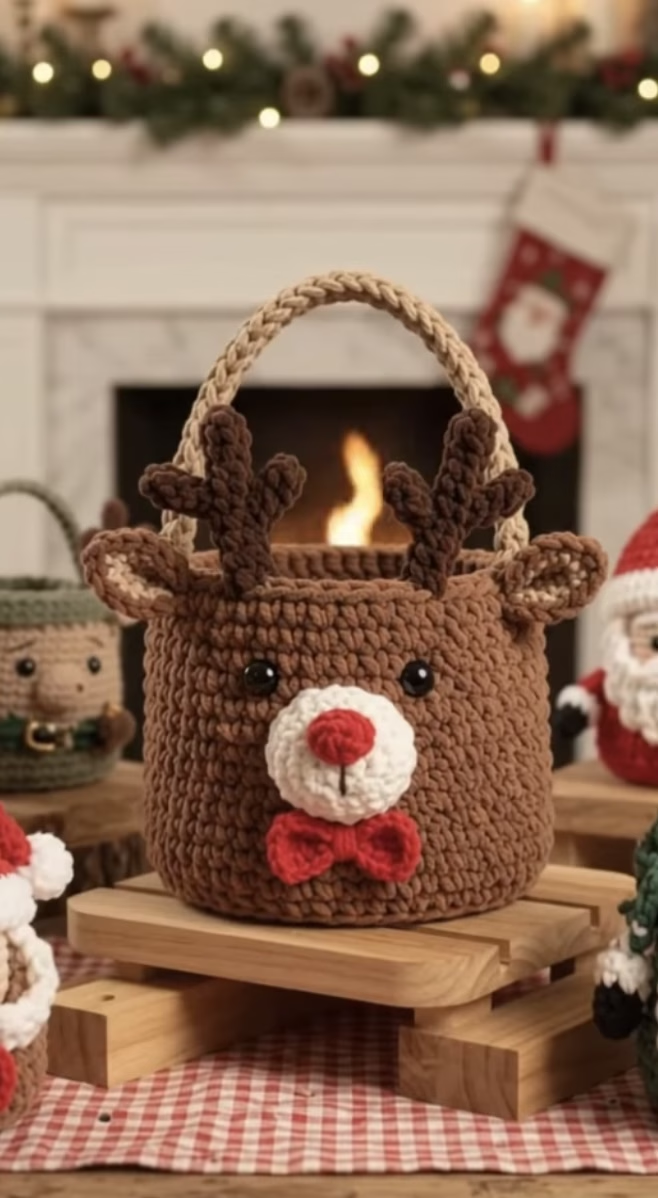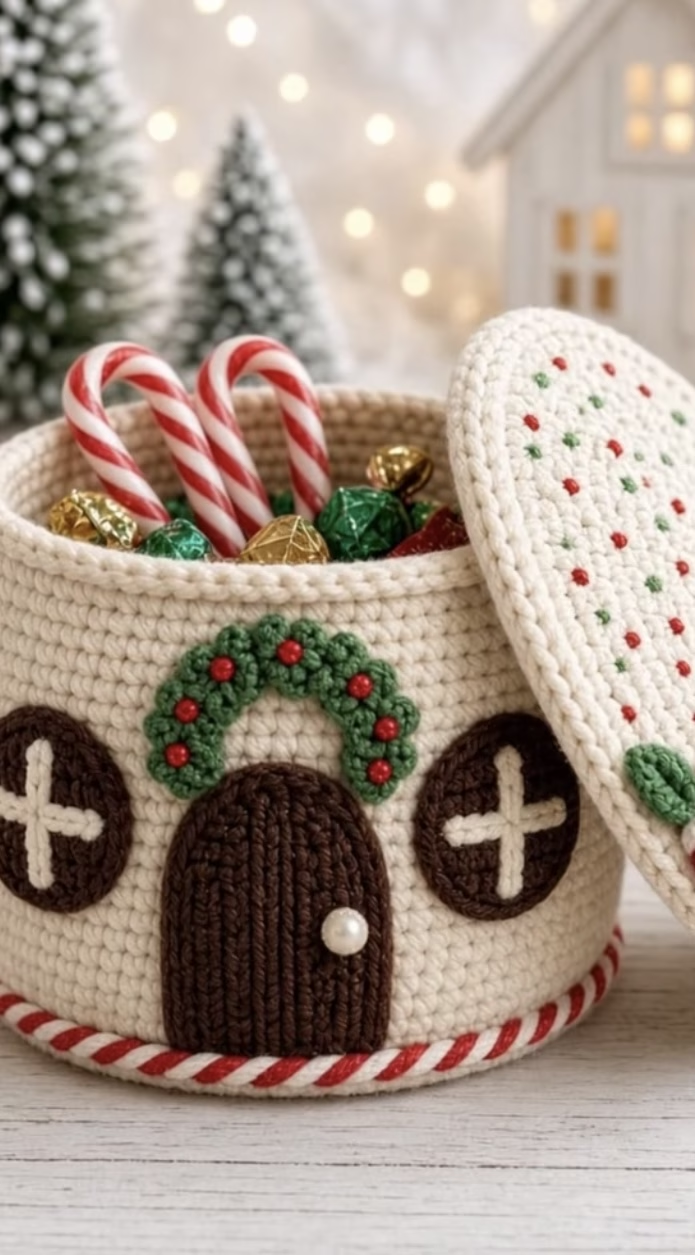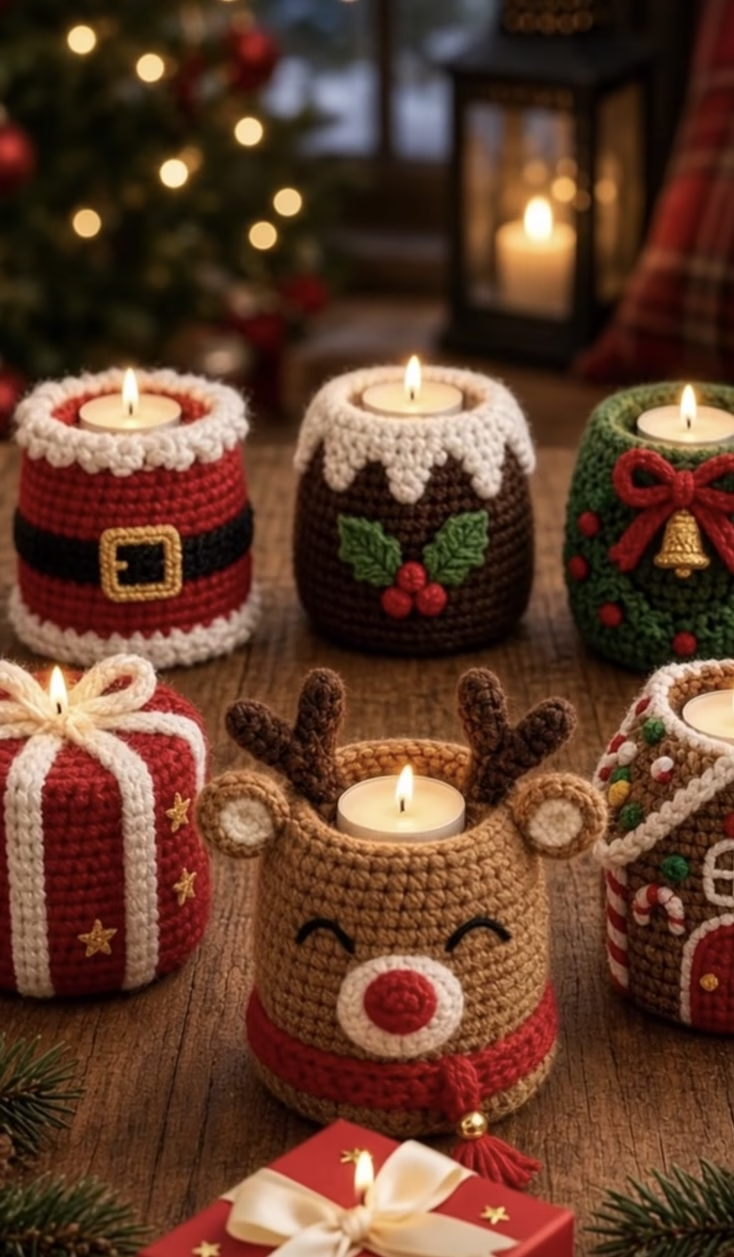
Decorate your home for the holidays with this enchanting set of crochet Christmas tealight candle holders. Each holder is uniquely designed to capture the spirit of the season—there’s a jolly Santa suit, a frosted Christmas pudding, a cozy gingerbread house, a sparkling gift box, a decorated Christmas tree, and an adorable reindeer ready to light up your table. These covers slip over battery-operated tealights, adding warmth, whimsy, and handmade charm to your festivities.
The collection features a mix of classic Christmas colors and motifs: vibrant red and green, snowy white, rich brown, and golden embellishments. Each holder is worked in the round, forming a cylindrical cozy with creative applique and 3D details, using a variety of stitches for texture and character. They are perfect for gifting, table displays, mantle décor, or tree candle ornaments. Making these holiday cozies is fun, satisfying, and a wonderful way to use up scrap yarn.
Project Overview
Each candle holder in this set is crocheted in the round from the base upward. Appliques such as holly leaves, stars, belt buckles, bows, and facial features are made separately and sewn on. 3D elements like the reindeer’s antlers, ears, and scarf, or the gingerbread house’s door and candy canes, are worked separately and attached. The pattern follows a modular approach: make the basic holder, then choose and add embellishments to create your favorite design.
Skill Level
Intermediate: These tealight holders use simple stitches, but working in the round, colorwork, applique creation, and small 3D details require some crochet experience. Basic sewing skills are also needed for neat assembly.
Materials
- Yarn: DK or light worsted weight (category 3–4) in the following approximate amounts:
- Red: 40g
- White: 30g
- Brown (light and dark): 30g each
- Green: 20g
- Black: 10g
- Yellow/gold: 10g
- Other accent colors (pink, cream, etc.): small amounts
- Fiber: Acrylic, cotton, or blends (acrylic is washable and holds shape well; cotton gives a crisp look)
- Crochet hook: US size G/6 (4.0 mm) or size needed for a tight, dense fabric
- Tapestry needle
- Small scissors
- Stitch markers
- Small jingle bells, beads, or buttons for accents (optional)
- Battery-operated tealight candles (never use a real flame with yarn holders)
Finished Size
- Height: approx. 7–9 cm (2.75–3.5 inches)
- Diameter: approx. 6–7 cm (2.25–2.75 inches)
To adjust size: add or subtract initial rounds for a wider or taller holder; use heavier or lighter yarn or a different hook size as needed.
Gauge
Approximately 6 sc = 1 inch (2.5 cm) when worked in the round. The fabric should be tight and sturdy. Small variations won’t affect use but will change the overall size.
Stitches and Abbreviations
- ch – chain
- sl st – slip stitch
- sc – single crochet
- hdc – half double crochet
- dc – double crochet
- tr – treble crochet
- inc – increase (2 sc in same st)
- dec – decrease (single crochet 2 together)
- MR – magic ring
Important Pattern Notes
- The main body is worked in continuous rounds; use a stitch marker to keep track of the first stitch of each round.
- Chains at the beginning of rounds do not count as stitches unless stated.
- Join new colors at the end of a round with a sl st, or use the seamless method if preferred.
- Routinely check fit with your tealight before finishing the last round.
- Work with the right side facing out unless noted otherwise.
- Embellishments are sewn on after the main piece is complete.
Detailed Crochet Pattern
Part 1: Basic Candle Holder Body (Core)
Follow this base for any design. Choose body color as desired (red for Santa, brown for pudding, light brown for reindeer, etc.).
- Round 1: Make a MR, 6 sc into ring. (6 sts)
- Round 2: 2 sc in each st around. (12 sts)
- Round 3: [sc in next st, inc in next st] around. (18 sts)
- Round 4: [sc in next 2 sts, inc in next st] around. (24 sts)
- Round 5: [sc in next 3 sts, inc in next st] around. (30 sts)
- Round 6: [sc in next 4 sts, inc in next st] around. (36 sts)
- Rounds 7-16: sc in each st around. (36 sts per round)
Check height and fit—add more rounds for a taller cover if needed. Fasten off and weave in end if not continuing with the same main color. For pudding, Santa and gingerbread motifs, switch to decorative color for the last 2–3 rounds.
Part 2: Design Variations & Motifs
A. Santa Suit Holder
- Base body: Work Rounds 1–14 in red.
- Rounds 15–16: Change to white. sc around for fluffy trim effect.
- Black Belt: With black, ch 36, sl st to join, sc in each ch around, fasten off. Sew around the body, approx. 3–4 rounds up from the base.
- Belt Buckle: With yellow, ch 8, join with sl st to form ring. Ch 1, work (sc, hdc, sc, ch 2, sl st) 4 times to outline a square. Sew over belt front and center.
- Optional: For a thick trim, use loop stitch or surface slip stitching in white on the top and bottom edge.
B. Christmas Pudding Holder
- Base body: Work Rounds 1–13 in dark brown, Rounds 14–16 in white.
- Drippy Icing Effect (Top):
- With white, sc around as for Round 14. On Round 15, alternate between (sc, hdc, dc) in successive stitches and chaining 1 or 2 and skipping the next st to create an uneven, drippy edge.
- Holly Leaves:
- With green, ch 6. Sc in 2nd ch from hook, hdc in next ch, dc in next 2 ch, hdc in next, turn to work along other side of the ch, mirror stitches. Fasten off, make 2 leaves.
- Berries:
- With red, make a MR, 4 sc in ring, sl st to first sc, pull tight, fasten off. Make 3. Sew holly and berries to the side.
C. Christmas Gift Box Holder
- Base body: Work Rounds 1–16 in red (or green as desired).
- White Ribbon:
- With white, surface slip stitch 2 parallel vertical stripes down opposite sides, and 1–2 horizontal bands across (as if wrapping a box). Or, sew on crocheted chains.
- Bow: With white, ch 28, sc in 2nd ch from hook and across. Fasten off, form a loop and wrap yarn around center for a bow. Sew at crossing point of surface stripes.
- Optional: Sew star sequins or embroider stars on side.
D. Reindeer Holder
- Base body: Work Rounds 1–14 in light brown.
- Round 15: Optional, with red, sc around to form a scarf edge. Fasten off, fringe or tie a small piece to hang as scarf tails.
- Ears (Make 2):
- With light brown, ch 6. Row 1: sc in 2nd ch from hook and next 4, turn (5 st). Row 2: dec over first 2 st, sc in next, dec over last 2 st (3). Row 3: dec over first 2 st, sc in last (2). Fasten off. Sew to sides near top.
- Antlers (Make 2):
- With dark brown, ch 10, sl st in 2nd ch and next 3 ch, ch 4, sl st in each ch, return to main stem, sl st to end. Fasten off. Sew above ears.
- Muzzle:
- With white, make a MR, 6 sc in ring, inc in each (12), fasten off. With red, MR, 4 sc, pull tight, fasten, sew to center of muzzle. Attach at lower center front. Embroider eyes with black yarn or thread, as shown.
- Scarf:
- With red, ch enough for desired length (~20), sc back. Wrap and tie to finish.
E. Gingerbread House Holder
- Base body: Work Rounds 1–13 in brown, Rounds 14–16 in white (for icing roof effect).
- Roof: Use similar ‘drip’ effect as for pudding—but add slightly longer chains to form icicle look.
- Windows & Door:
- With red or yellow, embroider or crochet small rectangles/arches. Sew on.
- Candy Canes:
- With white and red, ch 8–10, hold yarns together, twist, sew to sides to form a J shape.
- Decorations:
- With green, embroider vines; with small amounts of other colors, sew ‘gumdrop’ dots on for candy effect.
F. Christmas Tree Holder
- Base body: Work Rounds 1–16 in green.
- Decorate with surface slip stitching or sew on chains of ‘garland’ in gold/yellow.
- Sew on small beads, embroidery floss, or circles of various colors for ornaments.
- Add a small crocheted bow and bell appliqué (ch 8, sc back, wrap for bow; yellow circle stitched to shape for bell).
Part 3: Border Edging (Optional)
- For a fluffy border (Santa, pudding, gingerbread): With white, attach yarn to top edge, [sc, ch 2, sc] in each 2nd stitch, skip 1 st, repeat around for a slightly ruffled, ‘frosty’ look.
- Finish off, weave in ends.
Part 4: Assembly & Decorative Appliqué Attaching
- Sew all appliqué and 3D pieces (ears, antlers, bows, doors, berries, etc.) securely using tapestry needle.
- Weave in all loose ends neatly inside the holder.
- Slip the finished piece over a tealight or tealight holder to ensure fit. Adjust as necessary.
Assembly and Finishing
- Place the finished cozy over your battery tealight holder. It should fit snugly—stretch gently if needed.
- Double-check that decorative pieces are well anchored and not loose.
- Weave in all excess yarn on the inside to avoid lumps and neaten the finish.
- Gently steam block the cozies if desired (avoid direct contact with hot iron).
- If holders lean or curl, reshape while slightly damp and allow to air dry over a cylindrical object.
Customization Ideas
- Use metallic or sparkly yarn for accents.
- Switch main colors: try blue and silver for a snow/ice theme, or pastels for a softer look.
- Use thicker yarn for larger tealights or to make jar cozies.
- Embroider festive messages, initials, or the year.
- Attach a hanging loop to use as an ornament or tree decoration.
- Join squared-off versions into a blanket or pillow top for a patchwork Christmas effect.
- Fill with potpourri or small gifts for a multipurpose holiday container.
Troubleshooting Tips
- Curling Bottom: Add or subtract increase rounds. Block gently over a glass or mug.
- Loose Color Changes: Pull tails tight, weave ends along the line, or use invisible join technique.
- Holder Too Large: Drop a hook size or reduce initial increase rounds.
- Holder Too Small: Up a hook size, add one extra increase round, or use slightly heavier yarn.
- Uneven Edges: Check stitch count each round; avoid skipping stitches when joining new colors.
- Tension Problems: Be consistent and use a tight stitch for structure.
Care Instructions
- Hand wash gently in cold water with mild soap; blot excess water with towel.
- Reshape and dry flat.
- Do not bleach; do not tumble dry.
- Always use with battery tealights only—never expose to real flame.
- Store flat in a cool, dry area to maintain shape.
Final Notes
Count your stitches frequently and check fit often as you crochet. Adjust hook size or yarn weight as needed for your preferred tension. Use the photo as inspiration for color placement and arrangement of decorative details. Have fun personalizing your Christmas candle holders—and may your holidays glow with handmade warmth!