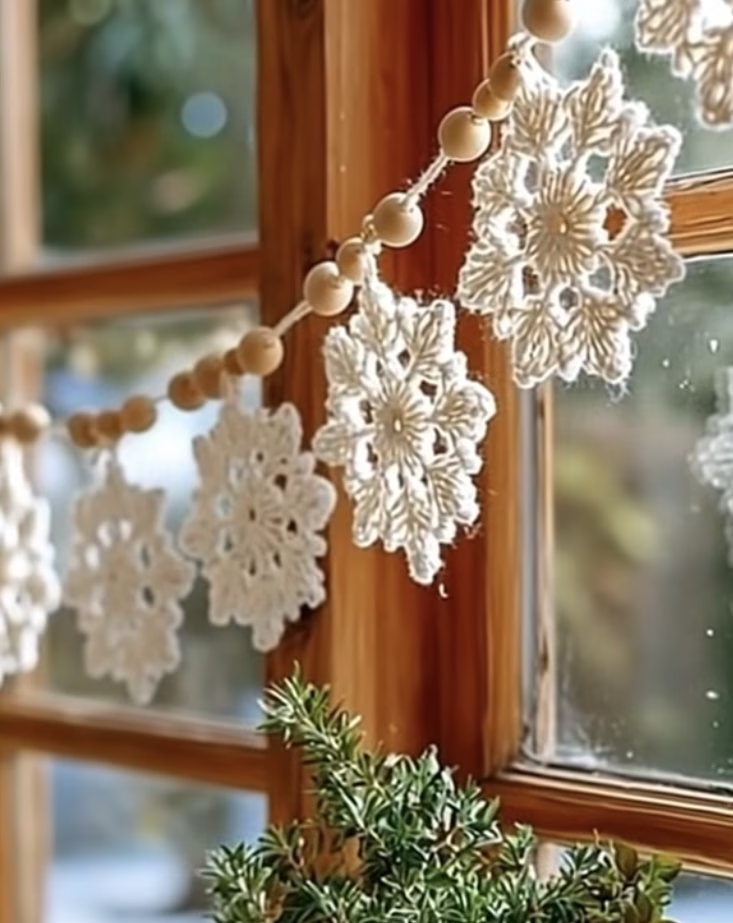
If you’re searching for a cozy and visually captivating handmade decor piece this winter, a crochet snowflake garland is a wonderful project to tackle. This stunning piece features detailed, lacy white snowflakes made out of soft yarn, each one strung elegantly along a cord and separated by rustic wooden beads. The airy snowflakes create a delicate frosted effect when hung in a window, beautifully letting in light while providing a festive, handcrafted touch that’s perfect for the season. Whether you use it as winter holiday decor or as a year-round accent, the charm of these hanging motifs makes any space feel magical and warm.
The garland showcases a classic snowflake design: each motif is worked in the round, radiating out from a neat center into eye-catching points that resemble crystalline flakes. The chunky, natural yarn emphasizes the definition and texture of each motif, and the spacing between snowflakes offers an elegant transparency. Stringing the snowflakes together with natural wood beads adds a touch of Scandinavian decor style, giving depth and earthy contrast to the soft crochet. This project is not only beautiful but endlessly useful: it can bring a winter wonderland look to windows, doors, mantels, or even festive tablescapes.
Project Overview
This crochet snowflake garland is made by first creating individual snowflake motifs, each worked in the round. The snowflakes are crocheted separately, then blocked for shape and structure. Once prepared, the motifs are strung together on a cord or chain, spaced apart with natural wooden beads for a visually balanced effect. The finished garland can be customized to any length, depending on how many motifs you create and the desired window or mantle span. All motifs are identical, so you can work them in batches for efficiency.
Skill Level
Intermediate. This project includes working in the round, reading increases with chains, forming picots, and learning how to block lace motifs for crisp points. Some experience with decorative motifs and color changes (if desired) is helpful for consistent results. The project is a great opportunity for those looking to challenge themselves beyond basic squares or flat panels.
Materials
- Yarn: Worsted weight (category 4) 100% cotton, or any sturdy plant-fiber yarn for crisp stitch definition. Approx. 120g (4.2 oz) white or cream for 8-10 snowflakes.
- Crochet hook: Size H/8 (5.0 mm) or size needed to achieve gauge.
- Wooden beads: 16-20 beads, 16 mm diameter (optional, for spacing snowflakes).
- Cotton string or strong yarn: For stringing the garland, 1.5–2 meters (60–80 inches) length recommended.
- Tapestry needle: For weaving in ends and threading snowflakes and beads onto cord.
- Scissors
- Stitch markers: For marking rounds or points if needed.
- Rust-proof pins & blocking mat: To shape the finished snowflakes.
- Light fabric spray starch (optional): For extra crispness.
Finished Size
Each individual snowflake motif measures approximately 12 cm (4.75 inches) across tip-to-tip after blocking.
The garland length can be customized, but a standard set of 8 motifs will yield a finished garland (with beads and space between) of about 1.3–1.5 meters (51–59 inches). Adjust the quantity for your desired span.
Gauge
Gauge is not crucial for this decorative item. For reference: 8 rounds in double crochet motif = approx. 12 cm (4.75 in) diameter after blocking. Small differences in gauge will only slightly affect snowflake dimensions and string length.
Stitches and Abbreviations
- ch – chain
- sl st – slip stitch
- sc – single crochet
- hdc – half double crochet
- dc – double crochet
- tr – treble crochet
- picot – chain 3, slip stitch in first chain
- MR – magic ring
- inc – increase (2 stitches in same stitch)
Important Pattern Notes
- Chains at the beginning of rounds generally count as a stitch unless otherwise noted.
- Rounds are joined with a slip stitch in the top of the beginning chain or first stitch unless specified.
- Work snowflakes with right side facing out throughout; no turning.
- Use a stitch marker at the beginning of the round if you have trouble finding your join point.
- If you wish to change yarn color, do so at a slip stitch and pull new color through.
- For the crispest points, block and (optionally) starch snowflakes after finishing.
Detailed Crochet Pattern
Part 1: Center of Snowflake
- Round 1: Make a MR, ch 3 (counts as dc), 11 dc in ring, join with sl st to top of ch-3. (12 dc)
- Round 2: Ch 2 (does not count as a st), *dc, ch 1* in each dc around, join with sl st to first dc. (12 dc, 12 ch-1 spaces)
- Round 3: Sl st into first ch-1 sp, ch 3 (counts as dc), (dc, ch 2, 2 dc) in same sp, *skip next dc, (2 dc, ch 2, 2 dc) in next ch-1 sp* around, join. (6 clusters, 6 ch-2 sps)
Part 2: Main Motif Expansion
- Round 4: Sl st into next dc, sl st into ch-2 sp, ch 1, (sc, ch 4, sc) in each ch-2 sp around, join with sl st to first sc. (6 ch-4 loops, 12 sc)
- Round 5: Sl st into first ch-4 loop, *(sc, hdc, dc, ch 2, dc, hdc, sc) in next ch-4 loop* around, join. (7 sts per loop x 6 = 42 sts)
- Round 6: Sl st to next ch-2 sp (in center of point), ch 1, (sc, ch 3, sc) in each ch-2 sp around, join. (6 ch-3 loops, 12 sc)
- Round 7: Sl st to first ch-3 sp, *(sc, hdc, dc, ch 3, dc, hdc, sc) in each ch-3 sp* around, join. (7 sts per loop x 6 = 42 sts)
Part 3: Pointed Snowflake Tips
- Round 8: Sl st to tip of first point, ch 1, *in ch-3 sp work: (sc, hdc, dc, tr, picot, tr, dc, hdc, sc)*; sl st into space between points, repeat around. Join and fasten off. (Each tip has 1 picot; 6 tips)
Tip: Count your stitches to ensure each point is even and crisp. The picot at tip gives the snowflake a frosted appearance.
Part 4: Blocking and Shaping
Block each snowflake individually to sharpen the points:
- Soak snowflakes in lukewarm water, press out excess moisture.
- Pin each snowflake flat to a blocking mat, stretching tips outward symmetrically.
- Allow to air dry completely. Lightly spray with starch for extra crispness if desired.
Part 5: Assembly – Making the Garland
- With cotton string or strong yarn, thread the tapestry needle and insert through the top tip of each snowflake (between tr and picot) for stable hanging.
- After each snowflake, thread a wooden bead onto the cord (or space as preferred).
- Continue alternating snowflakes and beads until all are attached.
- Knot both ends of the cord to prevent shifting. Leave 10–15 cm (4–6 in) tail at each end for tying up.
- Hang with light tension, ensuring each motif faces forward and beads are evenly spaced.
Your garland is now ready to display!
Assembly and Finishing
- Weave in all yarn ends on the back of the snowflakes before blocking.
- Ensure each motif is blocked to the same size for best uniform look.
- To attach motifs, use a strong, durable cord or a crocheted chain if desired for a softer look.
- Adjust positioning as you string for even spacing; use a ruler if needed for precision.
- Hang the garland in your window, doorway, or along a wall, smoothing each snowflake into place.
Customization Ideas
- Colors: Use silvery, pale blue, or icy variegated yarn for a wintry effect.
- Yarn Weight: Try fingering yarn for mini snowflakes or chunky yarn for oversized motifs.
- Pillow or Blanket Square: Sew several motifs onto fabric or join at outer points for a festive pillow cover or blanket.
- Wall Hanging: Attach to a wooden dowel for a vertical snowflake display.
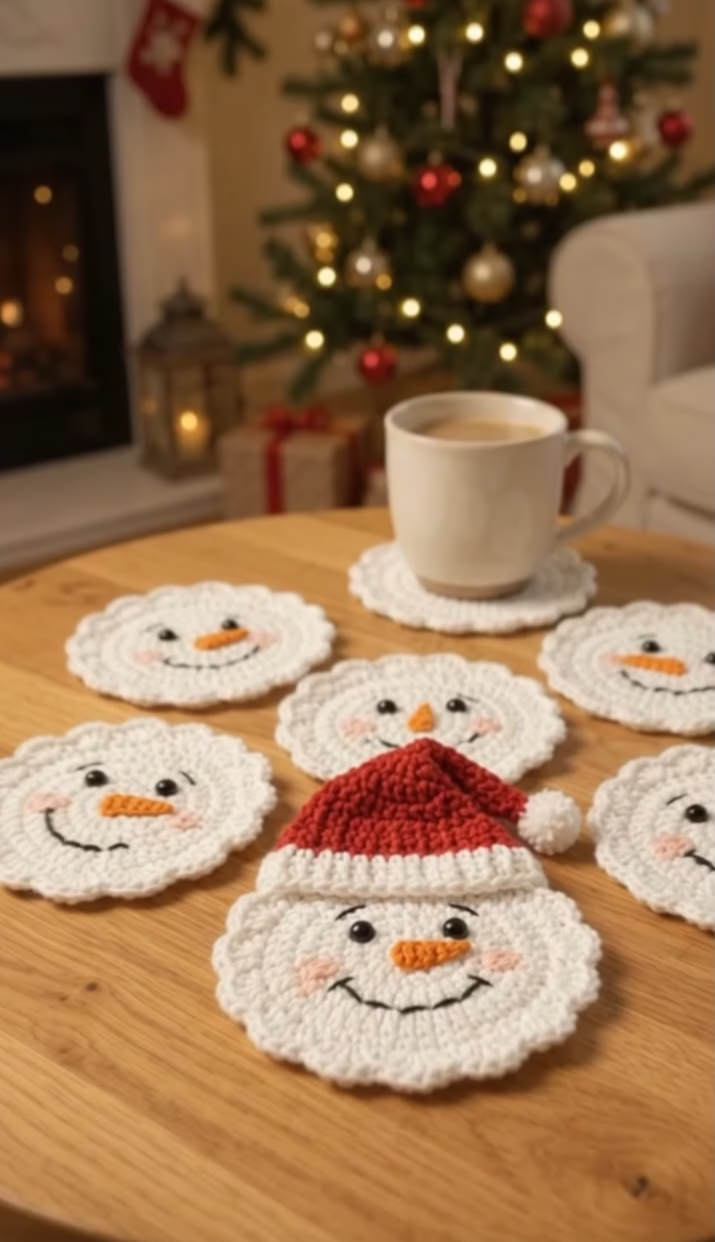
- Coasters: Make sturdier snowflakes (using double yarn or tighter stitches) for winter drinks coasters.
- Tree Ornaments: Attach individual motifs to thread for classic hanging ornaments.
Troubleshooting Tips
- Curling: Snowflakes may curl before blocking; stretch and pin into shape for a flat finish.
- Uneven Edges: Consistent tension on points and picots is key. If a tip loses shape, spray and re-block.
- Motif Sizing: If snowflakes are too large or small, switch hook sizes up or down accordingly.
- Loose Color Changes: Always join new yarn at a slip stitch, securing tails firmly on the back.
- Tension Issues: Practice consistent tension, especially on chain loops and picots, for uniformity.
Care Instructions
- Hand wash in lukewarm water with gentle soap if needed.
- Do not wring; squeeze gently and shape while damp.
- Lay flat to dry, re-pin to blocking mat if the shape loosens.
- If using starch, reapply lightly after each wash for crispness.
Final Notes
Careful attention to stitch count on each round and even blocking will result in snowflakes that look both uniform and delicate. Take your time shaping each tip, and use the photo as inspiration for achieving the lacy, airy effect. Adjust the number of motifs and beads to fit your personal space and style. This project adds a beautiful, handmade touch wherever you hang it – enjoy your elegant winter garland!