📖 B. INTRODUCTION
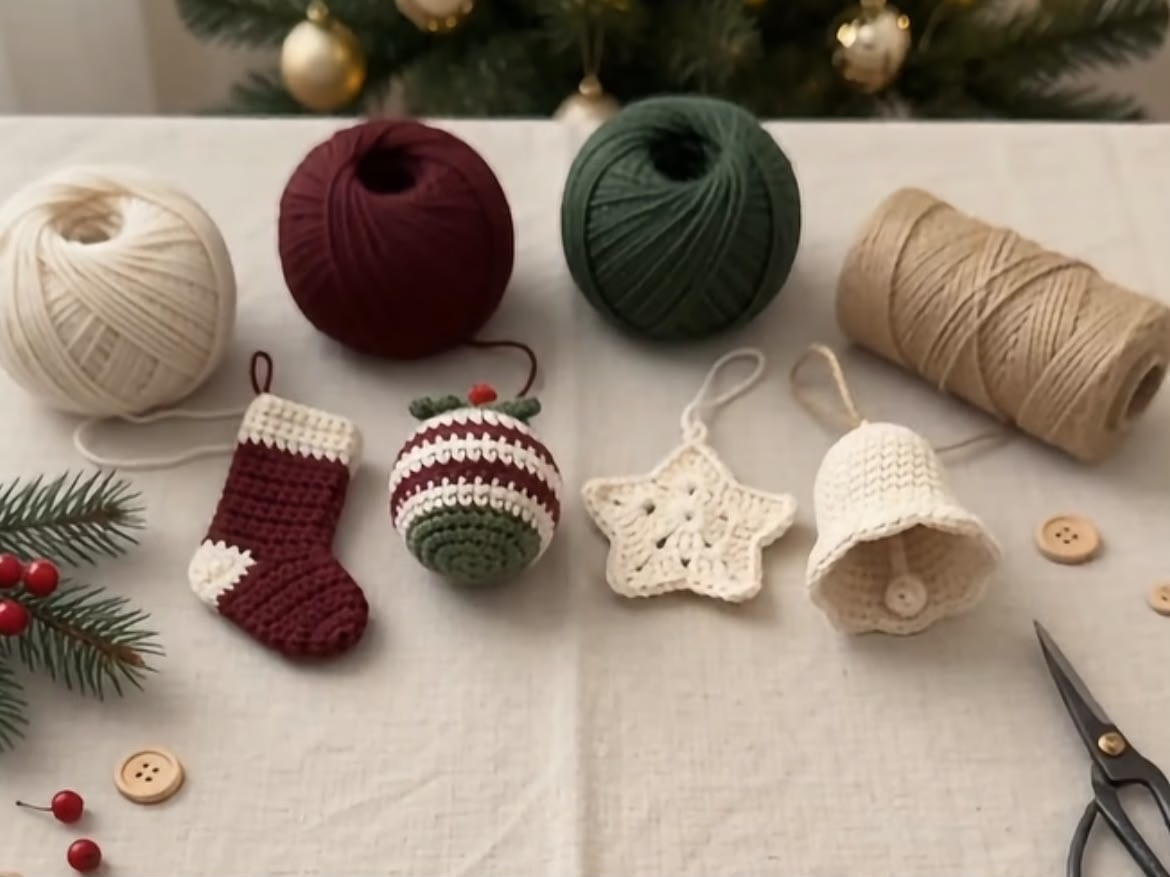
Capture the heartwarming simplicity of a cozy Scandinavian holiday with this Rustic Nordic Christmas Ornament Collection. Styled in a natural winter palette of deep burgundy, forest green, natural cream, and earthy jute twine, this set of four coordinating ornaments brings timeless handmade charm to your Christmas tree, holiday garland, or gift wrapping.
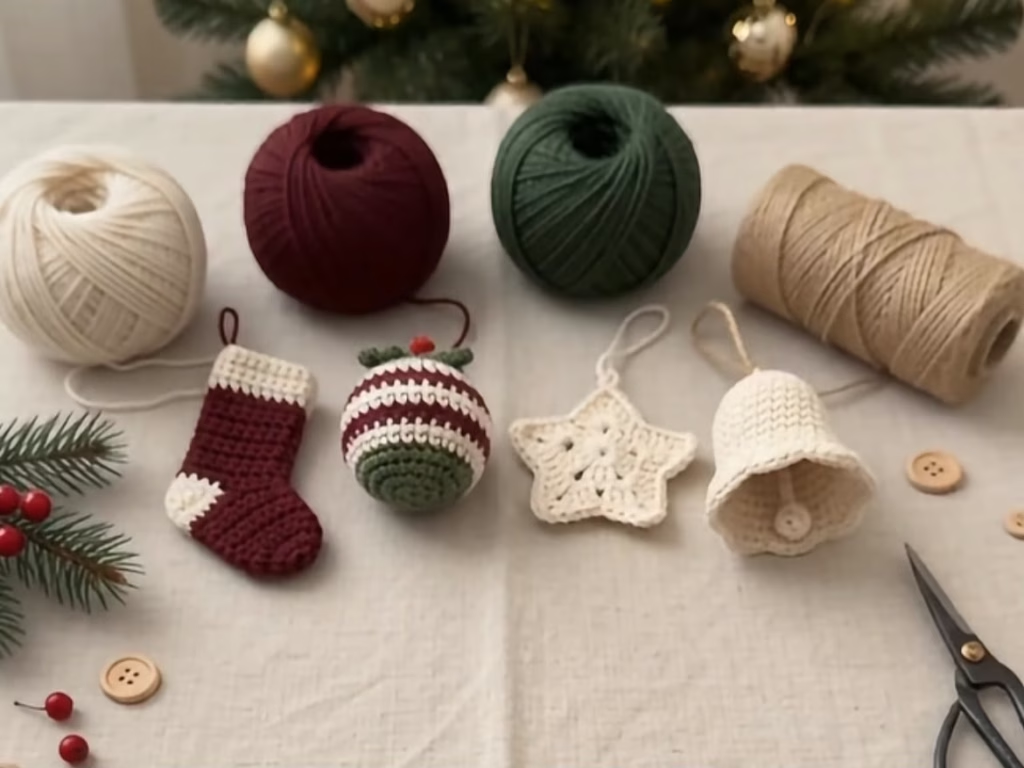
This comprehensive pattern collection includes four individual rustic designs: a Mini Heel-Turn Stocking, a Striped Amigurumi Bauble, a Flat Lace Star Motif, and a Flared Bell Ornament with a Wooden Button Clapper. Each piece relies on foundational stitches combined with thoughtful construction techniques, making them quick, satisfying projects for festive stash-busting.
Whether you are crafting an entire set to dress your tree in unified Nordic style, making handmade stocking stuffers, or attaching a small motif to a wrapped parcel as a decorative keepsake, these pieces stitch up quickly. Using sturdy worsted or DK weight yarn, the ornaments maintain crisp structural integrity year after year.
🔍 C. MAIN PATTERN OVERVIEW
This pattern collection contains instructions for four distinct holiday ornaments designed to be displayed together as a harmonious set:
   [🧦 Mini Stocking]       [🔮 Striped Bauble]       [⭐ Lace Star]       [🔔 Rustic Bell]
  Cream Cuff & Toe     Multi-Color Rows      5-Point Motif     Flared Rim & Button
  Burgundy Leg/Foot   Fiberfill Stuffed    Jute Twine Loop   Jute Cord Clapper
- 🧦 Mini Stocking: A classic mini sock with a contrasting cream heel, toe, and folded cuff.
- 🔮 Striped Bauble: A dense amigurumi sphere featuring clean horizontal stripe transitions and a bead-accented hanging loop.
- ⭐ Lace Star Motif: A flat, structural 5-pointed star featuring crisp lace points and a rustic jute cord hanger.
- 🔔 Rustic Bell Ornament: A flared 3D bell structure topped with a jute hanging loop and fitted with a suspended wooden button clapper.
🎯 D. SKILL LEVEL
Easy to Intermediate
This set offers a rewarding progression of techniques suitable for confident beginners and intermediate crocheters alike:
- 🧶 Basic Stitches: Single crochet, half double crochet, double crochet, slip stitches.
- 🪡 Shaping Techniques: Continuous round increases/decreases, short row heel turning, flared brim increases.
- 🎨 Finishing Skills: Clean color changing, steam blocking, mounting wooden buttons on cord.
📏 E. FINISHED SIZE
- 🧦 Mini Stocking: 3.5 inches tall x 2.0 inches wide (9 cm x 5 cm).
- 🔮 Striped Bauble: 2.5 inches in diameter (6.5 cm).
- ⭐ Lace Star Motif: 3.0 inches point-to-point (7.5 cm).
- 🔔 Rustic Bell: 3.0 inches tall x 2.5 inches base diameter (7.5 cm x 6.5 cm).
🧮 F. GAUGE
- 🧶 3D Stuffed Items (Bauble & Bell): 20 sc x 22 rnds = 4 inches (10 cm) using a 3.0 mm hook. Stitches must be firm to contain stuffing and hold bell shape.
- 🧶 Flat Items (Star & Stocking): Gauge is flexible; aim for consistent tension so flat motifs remain planar.
🧶 G. REQUIRED YARN AMOUNTS
- 🍦 Natural Cream Yarn (DK/Worsted #3 or #4): Approx. 65 yards (59 m).
- 🍷 Deep Burgundy Yarn (DK/Worsted #3 or #4): Approx. 45 yards (41 m).
- 🌲 Forest Green Yarn (DK/Worsted #3 or #4): Approx. 35 yards (32 m).
- 🪵 Natural Jute Twine / Tan Linen Cord: Approx. 15 yards (14 m).
🧰 H. MATERIALS
- 🪡 Crochet Hooks: 3.0 mm (US C-2 or D-3) for amigurumi/bell; 3.5 mm (US E-4) for flat star motif.
- ☁️ Stuffing: Premium polyester fiberfill (small amount for bauble).
- 🔘 Wooden Buttons: 2 natural 4-hole wooden buttons (18 mm – 20 mm diameter) for bell clappers and accents.
- 🔴 Beads / Accent: 1 small red wooden bead or faux berry (optional for bauble top loop).
- ✂️ Tools: Tapestry needle, sharp scissors, stitch markers, blocking board, pins, fabric stiffener spray (optional).
🔤 I. ABBREVIATIONS – US TERMS
- ch: chain
- sl st: slip stitch
- sc: single crochet
- hdc: half double crochet
- dc: double crochet
- inc: single crochet increase (2 sc in same st)
- dec: single crochet decrease (sc2tog)
- BLO: back loop only
- FLO: front loop only
- MR: magic ring
- st(s): stitch(es)
- rnd(s): round(s)
📝 J. NOTES BEFORE YOU BEGIN
- 📌 Seamless Color Changes: On the striped bauble, complete the final yarn over of the last stitch in a round using the new color to achieve crisp stripe lines.
- 📌 Continuous vs Joined Rounds: The bauble and bell are worked in continuous spiral rounds without joining, unless explicitly stated. Use a stitch marker.
- 📌 Twine Working Note: Jute twine can feel stiff; relax your hands and maintain gentle, smooth tension when forming hanging loops.
🪡 K. COMPLETE PATTERN
🧦 MODULE 1: RUSTIC MINI STOCKING
Worked from toe up to cuff using 3.0 mm hook.
                     [ Cream Folded Cuff ]
                            ||
                     [ Burgundy Leg ]
                            ||
                     [ Cream Heel Turn ]
                            ||
                     [ Burgundy Foot ]
                            ||
                     [ Cream Toe Cap ]
Toe Cap (Cream Yarn)
- Rnd 1: In a MR, ch 1, work 6 sc. Do not join (work in spiral). (6 sts)
- Rnd 2: Inc in each st around. (12 sts)
- Rnd 3: Sc around. (12 sts)Fasten off Cream yarn.
Foot Section (Burgundy Yarn)
- Rnd 4: Attach Burgundy yarn to any st. Sc around. (12 sts)
- Rnds 5–7: Sc around (3 rnds). (12 sts)Do not cut Burgundy yarn; drop to back while working heel flap.
Heel Flap & Turn (Cream Yarn)
Worked flat in short rows across 6 stitches.
- Row 1: Attach Cream yarn to next st. Sc in same st and next 5 sts, ch 1, turn. (6 sts)
- Row 2: Sc across 6 sts, ch 1, turn. (6 sts)
- Row 3 (Decrease): Dec, sc in next 2 sts, dec, ch 1, turn. (4 sts)
- Row 4 (Increase): Inc, sc in next 2 sts, inc, ch 1, turn. (6 sts)Fasten off Cream yarn. Fold heel flap in half and seam sides to create heel pocket.
Leg & Ankle (Burgundy Yarn)
- Rnd 8: Pick up dropped Burgundy yarn. Sc evenly around opening: 6 sts across unworked foot front, 6 sts evenly across sides and edge of Cream heel. (12 sts)
- Rnds 9–14: Sc around (6 rnds). (12 sts)Fasten off Burgundy yarn.
Folded Cuff (Cream Yarn)
- Rnd 15: In FLO of Rnd 14, attach Cream yarn. Sc around. (12 sts)
- Rnds 16–18: Sc around (3 rnds). (12 sts)
- Rnd 19: Sl st around. Fasten off and weave in ends. Fold cuff downward over Rnd 14.
- Hanging Loop: Attach a 5-inch length of Cream yarn or Jute twine at the back inner cuff edge to form a hanging loop.
🔮 MODULE 2: STRIPED BAUBLE ORNAMENT
Worked in continuous rounds from top to bottom using 3.0 mm hook.
                       [ Jute Loop + Berry Bead ]
                                   ||
                          /-----------------\
                         |  R1-3: Green     |
                         |  R4-5: Burgundy  |
                         |  R6-7: Cream     |
                         |  R8-9: Green     |
                         |  R10-11: Cream   |
                          \-----------------/
- Rnd 1 (Forest Green): In MR, ch 1, 6 sc. (6 sts)
- Rnd 2 (Forest Green): Inc in each st around. (12 sts)
- Rnd 3 (Forest Green): (1 sc, inc) x 6. (18 sts)
- Rnd 4 (Cream): (2 sc, inc) x 6. (24 sts)
- Rnd 5 (Burgundy): Sc around. (24 sts)
- Rnd 6 (Burgundy): Sc around. (24 sts)
- Rnd 7 (Cream): Sc around. (24 sts)
- Rnd 8 (Forest Green): Sc around. (24 sts)
- Rnd 9 (Forest Green): (2 sc, dec) x 6. (18 sts)
- Rnd 10 (Cream): (1 sc, dec) x 6. (12 sts)Stuff ball firmly with fiberfill.
- Rnd 11 (Burgundy): (Dec) x 6. (6 sts) Fasten off, weave tail through front loops of remaining 6 sts, pull tight to close bottom.
- Top Accent: Thread Jute twine through top center (Rnd 1), slide on optional red bead, and tie into a secure hanging loop.
⭐ MODULE 3: LACE STAR MOTIF
Worked flat in joined rounds using Natural Cream yarn and 3.5 mm hook.
                              ★ (Tip 1)
                             / \
                       (Tip 5)★   ★ (Tip 2)
                            \ / \ /
                            ★     ★
                         (Tip 4) (Tip 3)
- Rnd 1: In MR, ch 3 (counts as 1 dc), work 14 dc into ring. Sl st to top of starting ch-3 to join. (15 sts)
- Rnd 2 (Forming Point Bases): (Ch 1, skip 2 sts on Rnd 1 ring, in next st work: [2 dc, ch 3, 2 dc]) x 5 times. Sl st to 1st st to join. (5 point clusters)
- Rnd 3 (Lace Point Edging):Into each ch-3 space around, work:(2 sc, hdc, 1 dc, ch 2, sl st into 1st ch [picot], 1 dc, hdc, 2 sc).In the gap between clusters, work 1 sl st down into the Rnd 1 surface to keep valleys deep.
- Repeat around all 5 points. Sl st to join. Fasten off.
- Hanger: Attach a 6-inch loop of Jute twine through the picot of top star point.
🔔 MODULE 4: RUSTIC BELL ORNAMENT
Worked top-down in continuous rounds using Cream yarn and 3.0 mm hook.
                          [ Jute Top Loop ]
                                ||
                        /-----------------\
                       |   Crown (Narrow)  |
                       |                   |
                       |  Flared Brim Base |
                        \-----------------/
                                ||
                       [ Wooden Button Clapper ]
- Rnd 1: In MR, ch 1, work 6 sc. (6 sts)
- Rnd 2: (1 sc, inc) x 3. (9 sts)
- Rnd 3: Sc around. (9 sts)
- Rnd 4: (2 sc, inc) x 3. (12 sts)
- Rnd 5: Sc around. (12 sts)
- Rnd 6: (3 sc, inc) x 3. (15 sts)
- Rnd 7: Sc around. (15 sts)
- Rnd 8: (4 sc, inc) x 3. (18 sts)
- Rnd 9: Sc around. (18 sts)
- Rnd 10: (2 sc, inc) x 6. (24 sts)
- Rnd 11 (Flared Brim): (3 sc, inc) x 6. (30 sts)[cite: 3]
- Rnd 12: In FLO, sl st in each st around to create a raised rim edge. (30 sts)[cite: 3] Fasten off and weave in ends.
Clapper Assembly
- Cut an 8-inch length of Jute twine[cite: 3].
- Thread one end through two holes of an 18 mm wooden button and knot securely on bottom side[cite: 3].
- Pass the open ends of the twine upward through the inside center of the bell crown (Rnd 1)[cite: 3].
- Adjust length so the wooden button hangs centered inside the bell brim, then tie top ends into a hanging loop[cite: 3].
🎨 L. STYLING / ASSEMBLY / STABILITY / FINAL SHAPING
                                [ TREE BRANCH ]
                                 /   |   |   \
                                /    |   |    \
                               🧦    🔮  ⭐    🔔[cite: 3]
- Star Blocking: Pin out the 5 points of the Lace Star onto a foam blocking mat[cite: 3]. Mist generously with water or fabric stiffener spray and leave to dry flat overnight to maintain crisp points[cite: 3].
- Bell Shaping: Lightly steam the bell body while molding over a small conical object (like a wooden craft cone or thimble) to ensure the flared brim opens evenly[cite: 3].
- Consistency Check: Ensure all four ornaments use matching Jute twine hanging loops for visual cohesion across the set[cite: 3].
💡 M. HELPFUL CROCHET TIPS
- 💡 Color Cleanliness: Carry non-working yarn loosely inside the bauble during multi-color rows to minimize ends.
- 💡 Stiffening Bell Rims: A quick coat of diluted PVA glue (50/50 glue and water) inside the bell interior helps it keep its flared shape permanently[cite: 3].
- 💡 Stocking Heel Placement: Make sure to seam the short row heel flap on the wrong side so the seam remains invisible inside[cite: 3].
- 💡 Twine Knots: Apply a tiny drop of clear craft glue to jute twine knot knots to prevent unravelling over time[cite: 3].
- 💡 Bead Threading: Wet the end of jute cord or thread through a yarn needle when stringing wooden beads[cite: 3].
- 💡 Consistent Hanging Lengths: Keep hanging loops uniform (approx. 3 inches / 7.5 cm folded) so ornaments line up neatly on tree branches[cite: 3].
🧼 N. CARE INSTRUCTIONS
- 🧼 Dusting: Gently brush with a dry soft-bristle brush to remove surface dust.
- 🧼 Spot Cleaning: Spot clean with cold water and mild liquid soap if necessary; do not wring or tumble dry[cite: 3].
- 🧼 Off-Season Storage: Store flat in a breathable cardboard box lined with tissue paper. Keep in a cool, dry location to preserve natural jute fibers[cite: 3].
❓ R. FAQ
❓ Can I substitute cotton yarn for acrylic?
Yes! Cotton yarn provides crisp stitch definition and natural stiffness that suits rustic ornaments, but acrylic yarn works well too[cite: 3].
❓ Do I need to stuff the bell ornament?
No, the bell is un-stuffed so that the wooden button clapper can move freely inside and produce a soft wooden clack[cite: 3].
❓ How do I make my star points stiffer?
Spray the blocked star with heavy starch or a 50/50 mixture of white craft glue and water, then let it dry completely on pins[cite: 3].
❓ Can these ornaments be made larger?
Yes! Use bulky weight yarn with a 5.0 mm hook to create oversized decor pieces suitable for wreaths or door hangers[cite: 3].
❓ What size wooden button works best for the bell?
An 18 mm to 20 mm 4-hole wooden button is ideal for proportion and sound against the inner bell wall[cite: 3].
❓ How long does it take to make the whole set?
An experienced crocheter can complete all four ornaments in approximately 2 to 3 hours, making this an ideal weekend craft project