Introduction
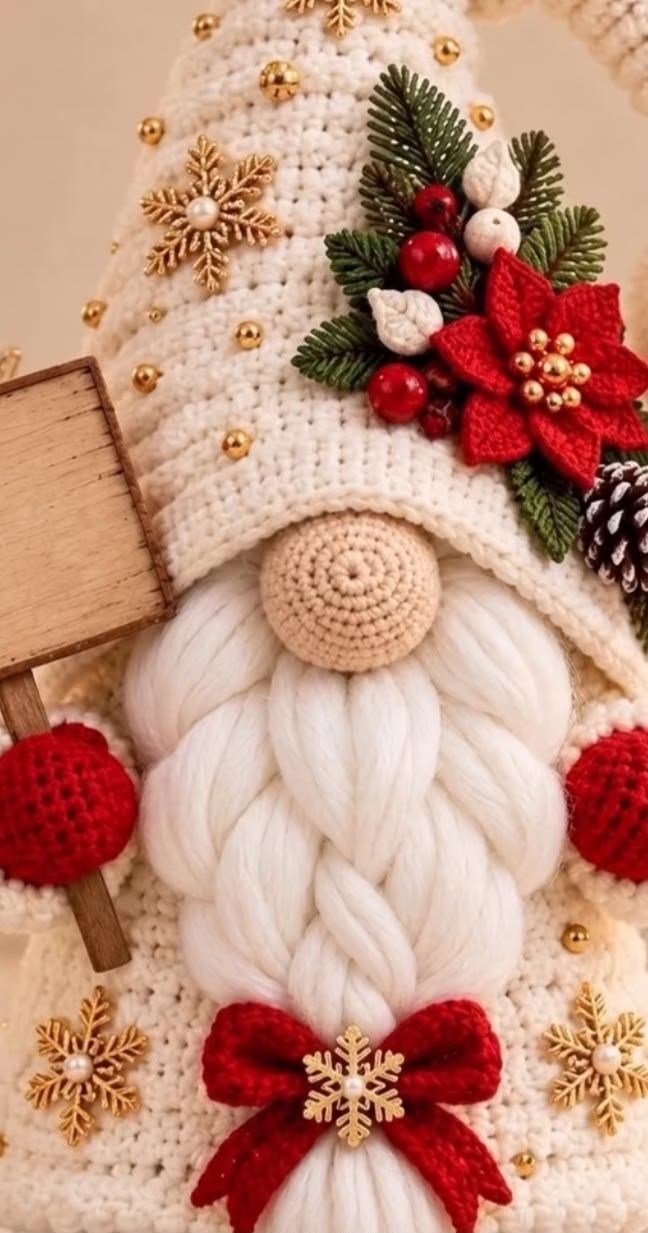
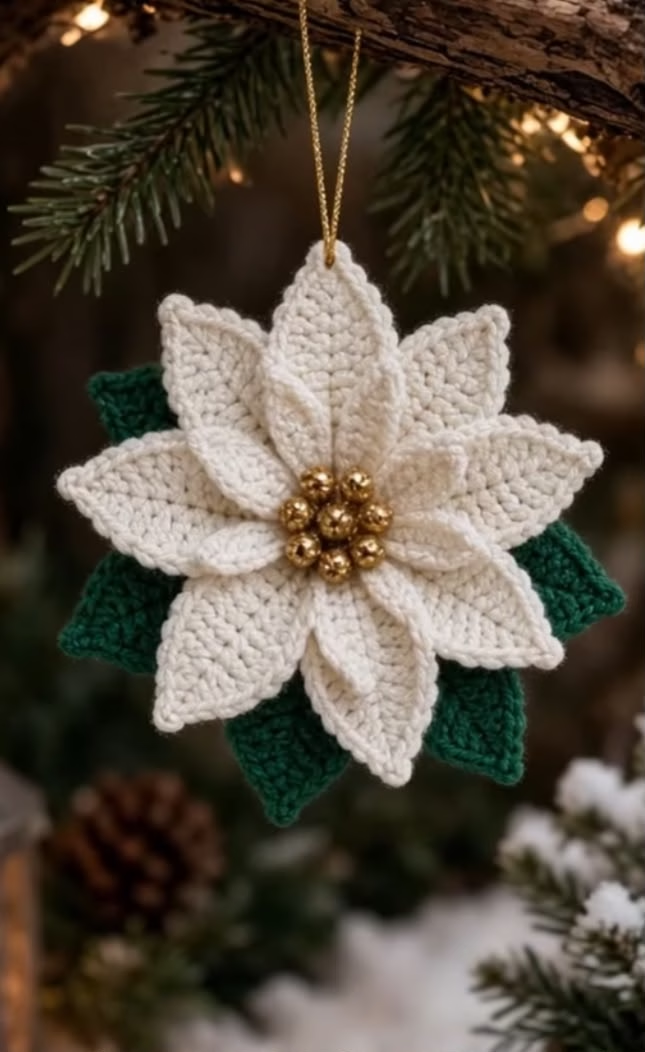
This crochet poinsettia ornament encapsulates the beauty of the holidays with its delicately layered petals, vibrant white and green color scheme, and shimmering gold bead center. The ornament features two striking layers of creamy white petals, arranged in a radiating pattern that closely mirrors the natural effect of a real poinsettia flower. Behind them, rich green leaves offer a lush, cheerful backdrop. At the core, a small cluster of gold beads mimics the signature center of poinsettias, adding dimension and elegance. This piece hangs beautifully as a seasonal ornament and can serve as a festive gift embellishment or centerpiece for your holiday displays.
Adding this ornament to your holiday projects invites texture, sparkle, and a traditional floral motif that’s always in style. The project is both approachable and visually impactful, allowing crocheters to explore shaping, layering, and mixed media embellishment. It’s an engaging way to showcase your skills while creating cherished handmade decor.
Project Overview
The poinsettia ornament is made by crocheting individual petals and leaves, which are then sewn together to create a three-dimensional layered flower. There are two distinct petal layers (an inner small set and an outer large set), plus a set of green leaves at the back. The gold bead center is sewn on last, and a hanging loop completes the piece. All elements are crocheted separately and assembled at the end for maximum shape and texture.
Skill Level
Intermediate. The pattern requires familiarity with shaping (increases and decreases), working in rows, creating pointed leaf tips, sewing pieces neatly, and making color changes. Experience with small motif assembly and tidy finishing is helpful. Ambitious advanced beginners may also succeed with patience.
Materials
- Worsted weight (4/medium) cotton or acrylic yarn:
- White or off-white – approx. 40 g (main color for petals)
- Green – approx. 15 g (for leaves)
- Gold acrylic beads (8–10 mm diameter, 7-9 pieces for center cluster)
- Crochet hook size G/6 (4.0 mm) or size needed for a firm fabric
- Tapestry needle (blunt tip)
- Small sewing needle (for beads and gold thread)
- Gold embroidery floss or thin metallic cord (for hanging loop)
- Stitch markers (optional, for marking rows and centers)
- Sharp scissors
- Clear-drying craft glue (optional, for bead security)
Finished Size
- Approximately 13 cm (5 inches) in diameter from tip to tip when assembled and lightly blocked.
To adjust size, use thicker/thinner yarn and a correspondingly sized hook; work with more or fewer petals or leaves if desired.
Gauge
- Gauge is not critical, but for reference: 10 sc x 10 rows = 5 cm x 5 cm (2″ x 2″)
A firm fabric helps maintain crisp petal and leaf points. Minor gauge variances only slightly impact finished size.
Stitches and Abbreviations
- ch – chain
- sl st – slip stitch
- sc – single crochet
- hdc – half double crochet
- dc – double crochet
- tr – treble crochet
- sc2tog – single crochet two together (decrease)
- st(s) – stitch(es)
- fo – fasten off
Important Pattern Notes
- Petals and leaves are worked flat in rows, not in rounds.
- Each petal/leaf is started from the base and worked to the tip, using strategic increases and decreases for shaping.
- Leave long tails for sewing petals and leaves onto the flower base.
- Color changes are not required within petals/leaves; use separate yarn for each element.
- Rows start with a turning chain, which does not count as a stitch unless specified.
- Stitch markers help align layers and centers when assembling.
- Work with a tight tension so petals and leaves hold their shape well.
Detailed Crochet Pattern
Part 1: Large White Petals (Make 6)
(These form the outer layer of the flower.)
- With white yarn, ch 12.
- Row 1: Sc in 2nd ch from hook, sc in each st across. (11 sts) Turn.
- Row 2: Ch 1, sc2tog, sc in next 7 sts, sc2tog. (9 sts) Turn.
- Row 3: Ch 1, sc2tog, sc in next 5 sts, sc2tog. (7 sts) Turn.
- Row 4: Ch 1, sc2tog, sc in next 3 sts, sc2tog. (5 sts) Turn.
- Row 5: Ch 1, sc2tog, sc in next st, sc2tog. (3 sts) Turn.
- Row 6: Ch 1, sc3tog (all 3 sts together); do not turn. (1 st)
- Edge: Ch 1, work 1 sc evenly down first side of petal, 2 sc at tip, 1 sc evenly up other side; sl st to base. Fo, leaving a long tail for sewing.
Part 2: Small White Petals (Make 6)
(These form the inner layer.)
- With white yarn, ch 9.
- Row 1: Sc in 2nd ch from hook, sc in each st across. (8 sts) Turn.
- Row 2: Ch 1, sc2tog, sc in next 4 sts, sc2tog. (6 sts) Turn.
- Row 3: Ch 1, sc2tog, sc in next 2 sts, sc2tog. (4 sts) Turn.
- Row 4: Ch 1, sc2tog twice. (2 sts) Turn.
- Row 5: Ch 1, sc2tog (1 st).
- Edge: Ch 1, sc evenly down side, 2 sc at tip, sc up other side; sl st to base. Fo, leaving a tail for assembly.
Part 3: Green Leaves (Make 6)
(These are slightly larger and pointed for a leafy effect.)
- With green yarn, ch 13.
- Row 1: Sc in 2nd ch from hook, sc in next 2, hdc in next 2, dc in next 4, hdc in next 2, sc in last. (12 sts) Turn.
- Row 2: Ch 1, sc2tog, sc, hdc, dc in next 4, hdc, sc, sc2tog. (10 sts) Turn.
- Row 3: Ch 1, sc2tog, hdc, dc in next 4, hdc, sc2tog. (8 sts) Turn.
- Row 4: Ch 1, sc2tog, hdc, dc in next 2, hdc, sc2tog. (6 sts) Turn.
- Row 5: Ch 1, sc2tog, hdc, hdc, sc2tog. (4 sts) Turn.
- Row 6: Ch 1, sc4tog (1 st).
- Edge: Ch 1, work 1 sc evenly down one side, 2 sc at point, sc up the opposite side; sl st to base. Fo, leaving a long tail.
Part 4: Flower Base (Round Center Disk)
- With white or green yarn, create a magic ring (MR).
- Rnd 1: Ch 1, 6 sc in MR. Join with sl st. (6 sts)
- Rnd 2: Ch 1, 2 sc in each st around. Join. (12 sts)
- Fo, leaving a tail for sewing. This base will anchor the petals and leaves.
Part 5: Gold Bead Center Cluster
- Using sewing needle and gold thread, thread 7 to 9 gold beads together, arranging so they form a tight round cluster.
- Securely tie off ends, leaving long tails if necessary.
Part 6: Assembly
- With tapestry needle:
- Step 1: Lay the round base flat. Arrange the 6 large leaves evenly spaced and sew each to the back of the base, long tails facing inward.
- Step 2: Flip to RS up. Evenly space and sew the 6 large white petals in a ring on the front of the base, covering the leaf joins.
- Step 3: Lay the 6 small petals in a second, offset ring atop the larger petals. Stitch securely, pulling just enough to gently curve the petals for depth.
- Step 4: Sew or glue the gold bead cluster into the very center, hiding all central joins. For extra security, stitch through beads and the base several times.
- Step 5: Attach gold cord or embroidery floss at the top for a loop, weaving it through the back of the flower base.
Assembly and Finishing
- Weave in all yarn ends on the WS as neatly as possible.
- Block pieces individually if desired by gently pinning petals/leaves and spraying with water or steam. Allow to dry completely.
- After blocking, ensure all petals and leaves radiate symmetrically. Adjust curves for a full, lifelike look.
- Reinforce petals and leaves with light spray starch if extra firmness is wanted.
- Ensure the motif lays flat and does not twist around the cord.
Customization Ideas
- Switch petal colors to classic red or soft pink for a traditional or modern spin.
- Use metallic yarn for petals for a dazzling effect.
- Try chunky yarn for a larger statement flower, or sport/light yarn for a dainty version.
- Add more petals or leaves for extra fullness, or reduce layers for a simpler ornament.
- Omit the hanging loop to use this as a table centerpiece or wreath embellishment.
- Join multiple flowers as a festive garland, or attach to gift wrapping, hats, or blankets as an applique.
- Stitch to a plain square as a decorative pillow front or blanket block.
Troubleshooting Tips
- Curling: Block petals/leaves before assembly; use slightly larger hook if curling persists.
- Uneven Edges: Be sure not to skip side stitches when edging; count carefully.
- Motif Too Large/Small: Adjust hook/yarn size or number of starting chains in petal base for size tweaks.
- Loose Color Changes: Tighten first stitch after switch, or use an invisible join when attaching pieces.
- Uneven Tension: Pause to check after a few rows; crochet with a relaxed wrist, and block as needed.
Care Instructions
- Hand wash gently in cool water for best results.
- Lay flat to dry. Shape petals and leaves by hand while damp.
- Avoid wringing or tumble drying to preserve form.
- If beads are glued, avoid submerging center in water.
Final Notes
Take the time to count stitches carefully for uniform petals and leaves, and use blocking to enhance their crisp shape and symmetry. Adjust your tension for your preferred fabric firmness, and let the finished ornament guide any final shaping. Use the photo as a visual template and enjoy creating a unique, timeless holiday decoration that brings handmade wonder to your celebrations!