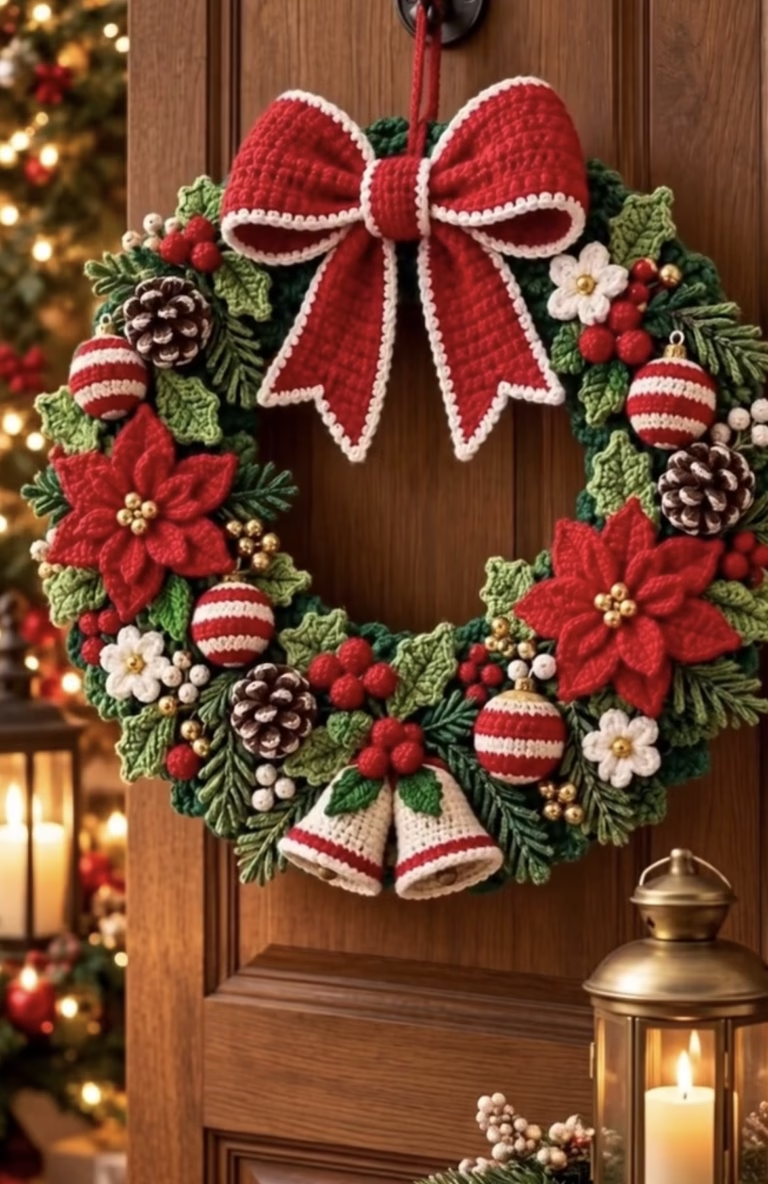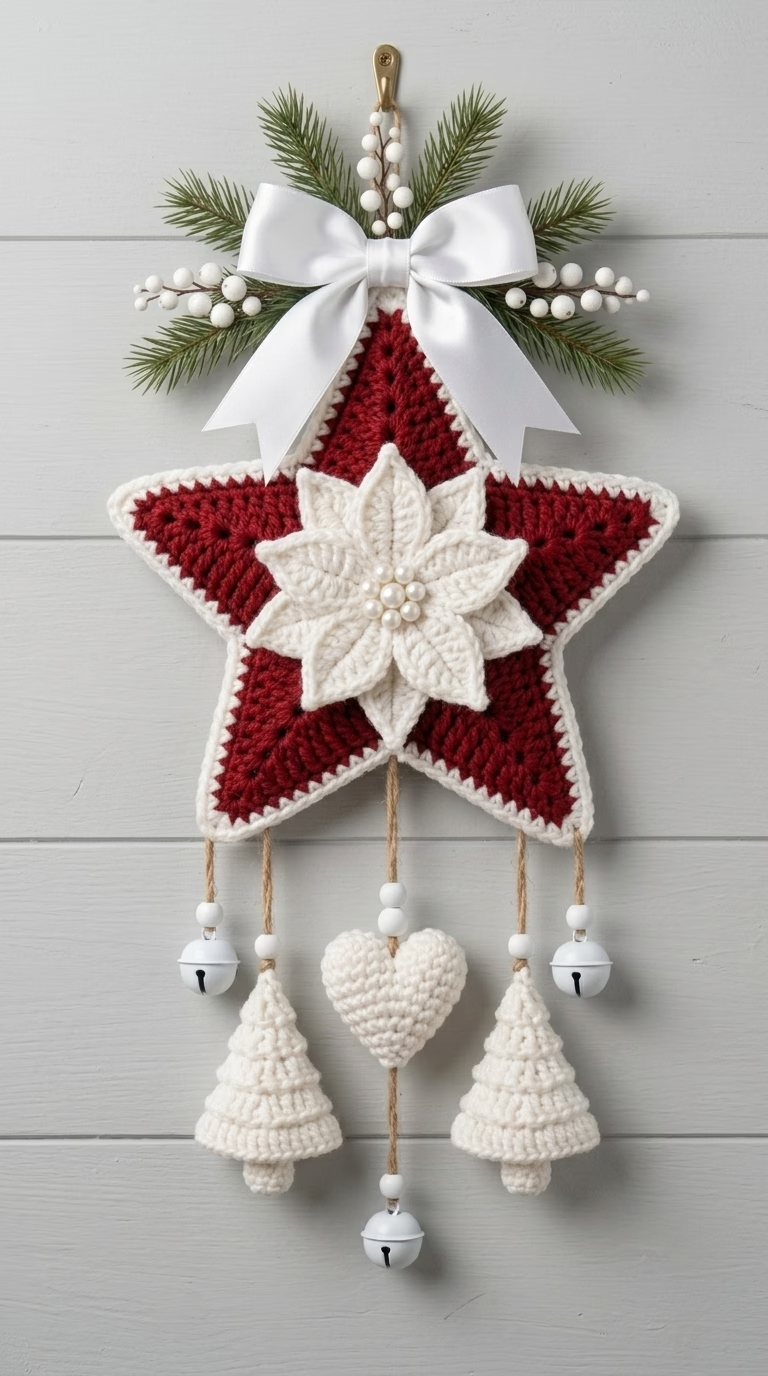
Bring the magic of winter into your home with this detailed crochet project—a beautiful festive wall hanging featuring a bold red five-point star, elegantly bordered in white, accented at its center with a dimensional white poinsettia. Luxurious white crochet trees, a plush heart, and jingle bells dangle beneath, all tied together with rustic twine and classic white wooden beads. The piece is finished with a crisp white bow, sprigs of artificial greenery and berries for a professional, festive look. This design is perfect for Christmas, winter celebrations, or giving your space a touch of cozy, handmade charm.
The star has a rich, textured surface with generous petal overlays and soft 3D elements hanging below—making it both eye-catching and full of tactile interest. The classic color scheme of deep red and winter white will suit most modern or rustic decor. Hang it on your door, above the mantle, or as a statement piece anywhere that needs a touch of warmth and seasonal spirit. It’s a rewarding project to make and a delightful gift to give!
Project Overview
This crochet wall hanging is constructed in several parts:
- The large five-point crochet star forms the main base, worked in rounds and rows and edged in white.
- A separate 3D poinsettia motif with layered petals is crocheted and sewn to the center.
- Three separate hanging elements—two trees and one heart—are made individually and attached with lengths of twine or yarn.
- Beads and bells are threaded onto the hanging cords.
- The entire piece is finished with a bow and some faux greenery, attached at the top for extra style.
The construction features modular, mostly-separate motifs assembled at the end, giving you the flexibility to customize your wall hanging while following the general template.
Skill Level
Intermediate. You will need to be comfortable with working in both rounds and rows, shaping, color changes, working in the round with increases and decreases, making 3D motifs, and some light sewing for assembly. The most intricate section is the layered poinsettia flower, which uses basic stitches worked cleverly for a 3D effect. The rest of the project uses simple stitches but benefits from experience with changing colors neatly and sewing amigurumi-style shapes together.
Materials
- Yarn:
- Worsted weight (category #4) yarn
- Red – approx. 50 g (main star body)
- White or cream – approx. 75 g (star border, poinsettia, trees, heart, and decorative elements)
- Crochet hook: 4.0 mm (G-6) or suitable size for your chosen yarn
- Tapestry needle – for sewing and weaving ends
- Sharp scissors
- Stitch markers – to mark star points and motif centers if needed
- Twine or sturdy yarn (for hanging motifs, about 60-80 cm / 24-30” total)
- White wooden beads (at least 3–4, about 1–1.5 cm in diameter), optional
- Jingle bells (3–4, optional, about 3 cm wide)
- Thin floral wire or pipe cleaner (optional, for shaping bow)
- White faux pearls (5–7 medium/small, for flower center, optional)
- Artificial greenery/berries for accent (optional)
- Wide white satin ribbon (about 2.5–3.5 cm width, 60 cm/24” length, for bow)
- Glue gun or strong craft glue (for attaching non-crochet decorative elements)
Finished Size
- Approximate size of main star: 28 cm wide x 28 cm tall (11” x 11”)
- Total hanging length including dangles: Approximately 48 cm (19”)
To adjust size, use lighter/heavier yarn, a different hook, or add/remove rounds. The motifs scale proportionately.
Gauge
Approximate gauge: 16 sc x 18 rows = 10 cm (4”) square. Gauge is not crucial, but try to keep your stitching consistent. Slight gauge differences will affect final size (and how taut/apply the motifs feel). Adjust your hook as needed for a neat, firm fabric.
Stitches and Abbreviations
- ch – chain
- sl st – slip stitch
- sc – single crochet
- hdc – half double crochet
- dc – double crochet
- tr – treble crochet
- MR – magic ring
- inc – increase (2 sc in same st)
- dec – decrease (single crochet two together)
- st(s) – stitch(es)
- FO – fasten off
Important Pattern Notes
- Rounds and rows: The star is worked as a flat motif in rounds/sections. Trees and heart are worked separately in the round or in rows and sewn.
- Chains on corners/points: Chains made at star points count as stitches in edging rounds.
- Color changes: Change colors as indicated by finishing last stitch of old color, then drawing new color through last loop. Weave ends as you go for neatness.
- Right/wrong side: For best texture, keep the RS of all motifs facing out when assembling.
- Joining rounds: Join with sl st unless otherwise indicated. Move up with a ch 1 (or ch 2 for dc/tr rounds) at the start of each new round/row.
- Stitch markers: Optional but helpful for marking center points and corners, especially on the star.
Detailed Crochet Pattern
Part 1: Large 5-Point Star (Main Base)
With red yarn:
- MR, ch 2 (does not count as dc). 10 dc in ring, join with sl st to first dc (10 sts).
- Ch 2, 2 dc in each st around. Join (20 sts).
- Ch 2, *dc in next st, 2 dc in next st* repeat around. Join (30 sts).
- Ch 2, dc in next st, 2 dc in next st, *dc in next 2 sts, 2 dc in next* repeat to end. Join (40 sts).
- Begin forming the 5 points:
There are now 40 sts. Divide them into 8 sts per point (five points).
- Ch 2, [work only in next 8 sts] dc2tog, dc in next 4 sts, dc2tog. Ch 2, turn (6 dc, ch 2 on end for point tip). Repeat this small section around 5 times, working back and forth to form each star arm, always beginning with the stitch after the last point ended. (Each point is worked back and forth as a short row off the circle edge.)
- Shaping each point:
- Row 1 (already done in step 5): 8 sts per point, as above.
- Row 2: Ch 2, turn, dc2tog, dc in next 2 sts, dc2tog (4 sts), ch 2, turn.
- Row 3: Ch 2, turn. dc2tog twice (2 sts), ch 2, FO, leave yarn tail to sew tip closed if needed.
Repeat for all 5 points. (You’ll have a rounded pentagon center with 5 points.)
Border (with white yarn):
- Attach white yarn at any inner valley between points.
- Ch 1, sc evenly around the edge, working 2 sc in each point tip (into the ch2 tips), and 1 sc in each end of rows/side stitch around. Join to first sc and FO.
(You may need to fudge a stitch here or there for a neat edge. The border is meant to accentuate the star and make it stand out against the wall.)
Part 2: Dimensional Poinsettia Flower
With white yarn:
- MR, ch 1, 10 sc in ring, join with sl st.
- Ch 7, sc in 2nd ch from hook, hdc in next, dc in next 2, hdc in next, sc in last, sl st in next st of center ring. Repeat this petal sequence a total of 7 times for 7 petals around (or 8 petals for fuller flower). Join and FO first layer.
- Second petal layer (for extra fullness): Join yarn at space between any two petals. Repeat petal instructions above (but with ch 6 for slightly smaller petals)—work 7 small petals behind/between each large petal. Join and FO, weave in ends.
- Sew or glue 5–7 medium/small faux pearls in the very center for texture and shine.
Stiffen petals gently with spray starch if you want a crisper look.
Part 3: Stuffed Hanging Elements (Heart and Trees)
A. Heart (make 2 pieces and join)
- With white yarn, ch 10.
- Row 1: Sc in 2nd ch from hook and in every ch across (9 sts), ch 1, turn.
- Rows 2–5: Sc across, ch 1, turn (9 sts).
- Do not FO. Begin working around entire rectangle:
- 1 sc in each st down first short edge, 1 sc in each ch on foundation chain, 1 sc in each st up the other side, 1 sc in each st across top edge. Join to first sc. Place marker at each top corner.
- You will now make the two rounded heart ‘lobes.’ From marker on first corner, join yarn, ch 1, sc in next 4 sts, hdc in next 2, dc in last (7 total), sl st into side of next sc (center valley). FO.
- Repeat for the second lobe on opposite corner. FO.
- Make a second piece the same way. Place wrong sides together, stuff lightly, and whip stitch around all edges.
B. Christmas Trees (make 2)
- With white yarn, MR, ch 1, 6 sc in ring, join. (6 sts).
- Round 2: 2 sc in each st around (12 sts).
- Round 3: *sc in next, 2 sc in next* around (18 sts).
- Round 4: sc in each st around (18 sts).
- Round 5: *dec, sc in next 1* around (12 sts).
- Rounds 6–7: sc in each st around.
- For first tree tier: work a round of (hdc, sc, hdc in next st) in each st; this creates a ruffled, full look. Sl st to finish.
- Work another tier: *inc, sc in next 1*, repeat around. (18 sts). Work 2-3 more rounds in same manner, then repeat ruffle round (hdc, sc, hdc in each st).
- For tree trunk: Attach yarn with brown or white (same as tree), ch 1, work 6 sc into center underside of tree. Work 2 more rounds sc evenly, FO. Lightly stuff as you go before closing.
Repeat for a second tree. Sew up trunk end. Fluff tiers for definition.
Part 4: Assembly
- Place the large star with RS up.
- Sew poinsettia securely to the center point of the star, using white thread or yarn for neatness.
- Thread twine/yarn through the bottom three star points. Cut 3 equal lengths, about 25 cm (10 inches) each.
- Thread on a white bead, then sew or tie a tree to the left and right cords and the heart to the center cord.
- Optionally, thread another bead below each shape, then knot twine tightly, securing a jingle bell on each hanging cord just below bead. (Secure knots with a dab of glue for extra strength.)
- Using the glue gun, attach artificial greenery and berries to back/top of star evenly. Tie a white satin bow and glue to cover greenery base at the top center.
- For neatness, cover the back with a felt star, if desired. Weave in or secure any loose ends inside the layers.
- Attach a hanging loop (twine or ribbon) to back of bow for easy display.
Assembly and Finishing
- Weave in all yarn ends securely on WS with tapestry needle.
- Sew applique pieces and stuffed motifs firmly in place.
- Lightly block star and flower, pinning to shape and misting with water (or use spray starch on petals).
- If your star curls or goes wavy, pin flat and press gently with steam.
- Keep the motif aligned by pinning and checking symmetry as you sew.
- Let all glue/attachments dry fully before hanging.
Customization Ideas
- Color Variations: Try gold, silver, green, or blue for the background or border; pale pink or deep crimson for the flower; metallic yarns for shimmer.
- Alternative Shapes: Replace heart with a star, snowflake, or bell for variety.
- Uses: Omit the dangles to use the star as a blanket or pillow motif. Make several for a garland or use individually as wall decor or ornaments. Stitch to a cushion cover, frame in a hoop as a wall hanging, or scale down to coaster size.
- Different Yarn: Use DK or sport weight for a smaller, more delicate look; bulky yarn for extra snuggly style.
- Personalization: Add felt, more beads, sequins, or embroidered details.
Troubleshooting Tips
- If your star puckers or curls, block it thoroughly. Slightly increase hook size or work more loosely.
- If the edges are uneven, steam and pin flat to shape.
- If motifs are too large/small, adjust hook or yarn to get a better gauge (always check after a few rounds).
- For loose color changes, pull tails tightly into back and weave them under several stitches before trimming.
- Check tension often, especially when working with both flat and 3D elements (the tree/heart shapes).
- Double-check symmetry of points; tweak border round for even spacing.
Care Instructions
- Hand wash gently in cool water with mild soap.
- Squeeze out excess water, reshape, and lay flat to dry.
- Avoid wringing or twisting.
- Do not bleach.
- Optional: Store flat or hang from the loop to maintain shape when not in use.
Final Notes
Take your time to count stitches, especially on the star points and layered flower, for crisp, clean results. Adjust tension as needed for uniform fabric. Use the original photo as your visual guide, and enjoy experimenting with color combinations and embellishments for a unique holiday heirloom!