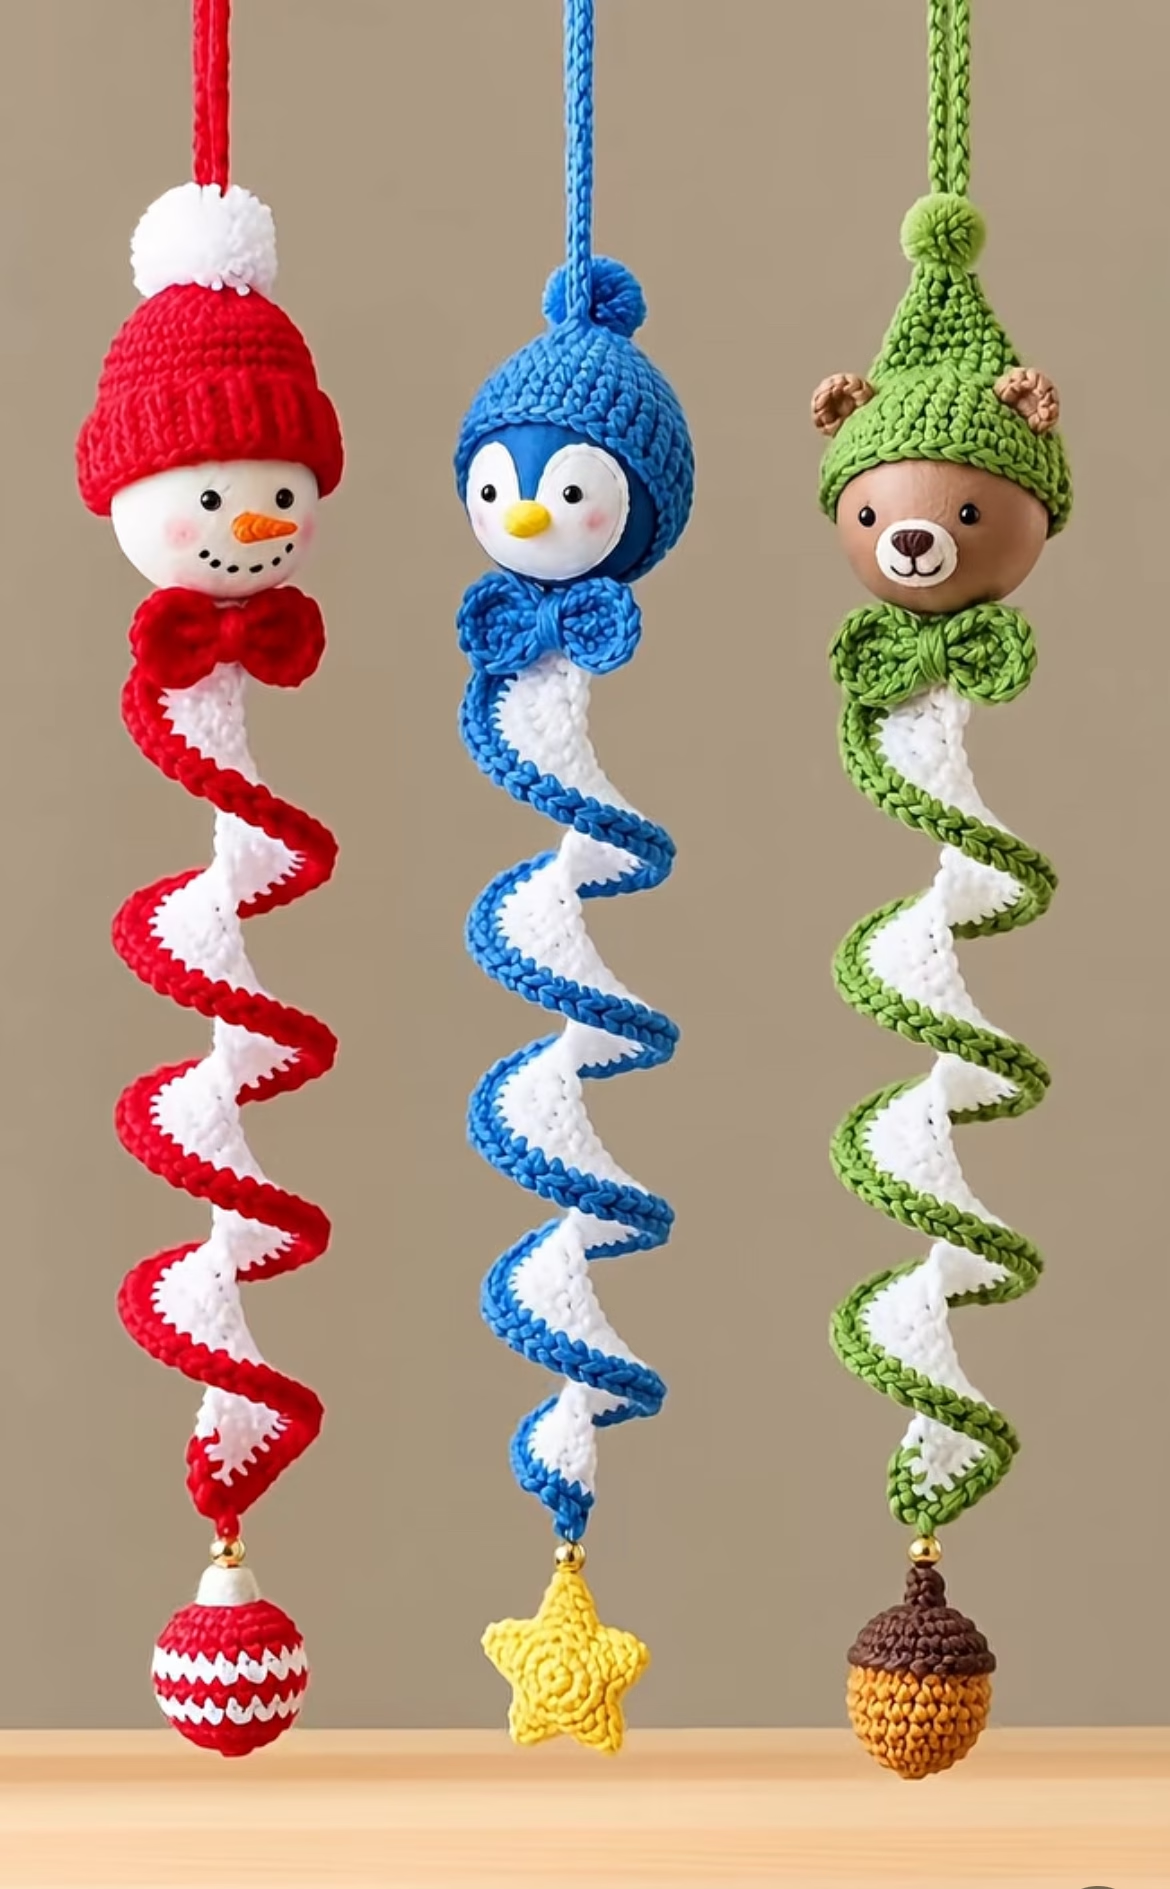
If you’re looking for a whimsical crochet project that merges character amigurumi with playful movement, these Spiraling Holiday Character Dangles are sure to charm! Featuring three endearing designs—a snowman, a penguin, and a bear—these ornaments each boast a coiled spiral body, an expressive head with cheerful facial features, a festive hat with pom-pom, and a sweet bow under the chin. At the bottom, a small themed charm completes each look—a Christmas bauble, a star, or an acorn. With vibrant, holiday-inspired color schemes, these spirals make striking decorative hangings for your tree, window, or even as a playful addition to a child’s room.
The combination of bold, contrasting spiral stripes (red and white, blue and white, or green and white) against the soft, rounded character faces creates visual delight. Each ornament moves gently, twisting and turning, catching the eye with its playful corkscrew shape and three-dimensional features. These dangles make perfect seasonal gifts, unique tree ornaments, or eye-catching window decorations. The satisfying interplay of flat shapes, amigurumi-style heads, and tiny but impactful accessories ensures every stitch brings you creative joy.
Project Overview
Each dangle is constructed in several parts: a coiled spiral body worked in rows and edged for structure, a round amigurumi-style head, a small crocheted hat with a pom-pom, a bow tie, and a matching bottom charm. The spiral is worked flat and then edged, causing it to twist naturally; the head and hats are worked in the round. Small facial details are sewn or crocheted separately and attached. Final assembly brings all elements together for a sweet, cohesive decoration.
Skill Level
Advanced Beginner to Intermediate. This project is suitable for those comfortable with making flat pieces and basic amigurumi spheres. You’ll use increases, decreases, seamless rounds, and simple hand-sewing. The project involves color changes and some small parts, but is manageable for crocheters familiar with toys and ornaments.
Materials
- DK (Light worsted, #3) weight cotton or soft acrylic yarn in the following colors:
- White – approx. 30g (body and face)
- Color 1 (Red, Blue, Green) – approx. 20g (spiral, hat, bow tie)
- Brown – small amount (bear face, acorn)
- Black – small amount (eyes, snowman face, bear nose)
- Orange or yellow – small amount (penguin/snowman beak, star)
- Other accent colors as desired
- 2.75 mm (C) and 3.25 mm (D) crochet hooks
- Polyester fiberfill for stuffing heads
- Stitch markers
- Tapestry needle
- Scissors
- Small pom-pom maker (or fork)
- Small jingle bells or wooden beads (optional for baubles)
- Black embroidery floss for facial features (optional)
- Safety eyes or 6mm black beads (optional)
Finished Size
Each ornament measures approximately 26-30 cm (10-12 inches) from hanging loop to bottom of spiral, with the spiral itself about 22 cm (8.5 inches) long and the head about 5 cm (2 inches) in diameter. Size can be adjusted by changing yarn weight, hook size, or working fewer/more spiral rows.
Gauge
Approximately 22 stitches and 24 rows = 10 cm (4 inches) in single crochet worked flat. Gauge is not critical, but keep tension firm (especially for amigurumi heads) to avoid stuffing showing through. Small gauge changes may slightly alter finished dimensions.
Stitches and Abbreviations
- ch – chain
- sl st – slip stitch
- sc – single crochet
- hdc – half double crochet
- dc – double crochet
- inc – increase (2 sts in next st)
- dec – decrease (sc 2 sts together)
- MR – magic ring
- FLO – front loop only
- BLO – back loop only
- st(s) – stitch(es)
- rep – repeat
Important Pattern Notes
- Ch 1 at row/round beginnings does not count as a stitch unless specified.
- Work the spiral flat and edge to achieve the corkscrew; do not block flat.
- For best spiraling, ensure even tension and count rows accurately.
- Color changes: Finish the last pull-through of previous stitch with new color for neat transitions.
- Heads and hats are worked in continuous rounds; use a stitch marker to keep track.
- Stuff heads firmly but evenly.
- Right side faces out for all pieces unless otherwise noted.
- Embroider or sew features securely, especially if giving to children.
Detailed Crochet Pattern
Part 1: Spiral Body
Using white and main accent color (red, blue, or green):
- With white and 3.25mm hook, ch 51.
- For a longer spiral, increase in multiples of 10.
- Row 1: Sc in 2nd ch from hook and next 49 sts. (50 sts)
- Row 2: Ch 1, turn, inc (2 sc) in each st across. (100 sts)
This heavy increase provides the curling spiral shape. - Row 3: Ch 1, turn, sc in each st across. (100 sts)
- Do not fasten off. Change to accent color on last white st.
- Border: Ch 1, rotate work so you’re working along the 100-st row edge. Place 1 sc in each st across, spiraling naturally as you go to encourage curl. Fasten off. Weave in ends.
Note: For an extra bold spiral stripe, you may choose to edge with a round of hdc instead of sc.
Part 2: Amigurumi Head
With 2.75mm hook, work in continuous rounds.
Snowman (White):
- MR, 6 sc in ring. (6)
- Rnd 2: Inc around (12)
- Rnd 3: (Sc, inc) around (18)
- Rnd 4: (2 sc, inc) around (24)
- Rnd 5: (3 sc, inc) around (30)
- Rnd 6-10: Sc in each st around (30)
- Rnd 11: (3 sc, dec) around (24)
- Rnd 12: (2 sc, dec) around (18)
Stuff head firmly with fiberfill. - Rnd 13: (Sc, dec) around (12)
- Rnd 14: Dec around (6). Fasten off, close hole.
Penguin (Blue, White, Yellow):
- With blue, repeat steps 1-9 as for snowman.
- Change to white (for tummy marking—optional):
- Rnd 10: Sc in next 10 sts in blue, switch to white and sc in next 8 sts, switch back to blue for last 12 sts. (30)
- Rnd 11: Repeat as above, matching color placement for a semi-circle tummy on face if desired, or simply keep all blue for a round head.
- Finish as for snowman, stuff firmly, close hole, and fasten off.
Bear (Tan/Brown):
- With tan or light brown, repeat snowman head instructions.
Part 3: Character Hats
Work in accent color, 2.75mm hook, continuous rounds.
- MR, 6 sc in ring.
- Rnd 2: Inc around (12)
- Rnd 3: (Sc, inc) around (18)
- Rnd 4: (2 sc, inc) around (24)
- Rnd 5: (3 sc, inc) around (30)
- Rnd 6-8: Sc around (30)
- Rnd 9: (3 sc, dec) around (24) for slight shaping
- Rnd 10: Sc around (24). Sl st to finish, leaving long tail for sewing.
Add a pom-pom: Wrap matching yarn around fork or pom-pom maker, tie, trim until fluffy and about 1.5 cm (½ in) in diameter. Sew securely to hat’s tip.
Bear ears (make 2): MR, 5 sc in ring, join with sl st. Leave tail for sewing. Flatten and sew to sides of hat.
Part 4: Bow Tie
With accent color and 3.25mm hook:
- Ch 15.
- Row 1: Sc in 2nd ch from hook and across (14 sts). Ch 1, turn.
- Rows 2-4: Sc in each st, ch 1, turn. (14 sts)
- Fasten off, weave in ends. With yarn tail, wrap center several times and secure tightly to form bow shape.
- Sew beneath head/at top of spiral body later (see assembly).
Part 5: Bottom Charms
Bauble (Snowman):
- MR, 6 sc in ring (red).
- Rnd 2: Inc in each st (12).
- Rnd 3: (Sc, inc) around (18).
- Rnds 4-5: Sc around.
- Change to white, sc around (optional, for stripes).
- Rnd 6: (Sc, dec) around (12).
- Stuff firmly. Rnd 7: Dec around (6). Fasten off and close.
- Optionally embroider stripes and add a gold/yellow cap.
Star (Penguin):
- MR, 10 sc in ring (yellow), sl st to join.
- Ch 4, sl st in 2nd ch from hook, sc in next ch, hdc in next ch. Sl st in next sc on circle. Repeat for 4 more points. Fasten off, weave in ends.
Acorn (Bear):
- MR, 6 sc in ring (brown).
- Rnd 2: Inc in each st (12).
- Rnd 3: (Sc, inc) around (18).
- Rnd 4: Change to tan/gold, sc around (18).
- Rnd 5: Sc around (18).
- Rnd 6: (Sc, dec) around (12).
- Stuff lightly. Rnd 7: Dec around (6). Fasten off. Weave in.
Part 6: Hanging Loop
With accent color and 3.25mm hook: Ch 50. Sl st to first ch to form loop. Fasten off. Sew to tip of hat.
Part 7: Facial Features
- Eyes: Sew or glue 6mm black safety eyes or embroider French knots about halfway down head, evenly spaced.
- Snowman nose: With orange yarn, embroider a tiny carrot shape above center of mouth.
- Penguin beak: Ch 2, sc in 2nd ch, fasten off; sew (yellow) between eyes.
- Bear nose: With brown yarn, embroider triangular nose, working over small area, outline with black floss for mouth.
- Mouths: Embroider gently curved smile for snowman (black), bear (black), and small blush circles with pink thread (optional).
Assembly and Finishing
- Sew hat to head: Place hat on head, covering about 1/3 from the top, sew around the edge securely using matching yarn.
- Attach hanging loop: Pull through top of hat before sewing down, double-knot inside for strength.
- Sew or embroider all facial features before attaching head to spiral.
- Sew head to spiral: Flatten the top of the spiral, position head centered, and sew securely around using matching thread/yarn.
- Bow tie: Sew center of bow to bottom edge of head, with tails lying flat over the spiral’s top coil.
- Bottom charm: Sew or attach charm firmly to the very end tip of the spiral, hiding any ends.
- Weave in all loose ends. Lightly steam block spiral only if needed, but avoid flattening—it should keep its natural coil.
Customization Ideas
- Change character types (reindeer, elf, Santa head, fox, bunny, etc.)
- Use neutral or pastel colors for non-holiday decor
- Add sequins, beads, or tiny bells to the spiral for extra sparkle
- Instead of a hanging ornament, sew to a long ribbon for a garland
- Make a giant version with bulky yarn as a whimsical doorknob hanger or child’s room accent
- Reduce size for keychains or gift toppers
- Omit the hanging loop and use as a curtain tieback, bag charm, or desk decoration
Troubleshooting Tips
- If your spiral is too loose, check that increases are worked tightly and count stitches regularly
- If edges curl unevenly, try working your border with a slightly smaller hook
- If head appears misshapen, stuff more firmly and shape before closing
- If color changes are messy, pull new color through on the last yarn-over before color change, and weave in ends securely
- For uneven spirals, gently pull and twist into shape, or re-block lightly
- For visible knots or bulky joins, split yarn thinner for sewing details
Care Instructions
Lightly spot-clean with cold water and mild soap. Hand-wash only if necessary. Reshape spiral and lay flat or hang to dry. Avoid harsh wringing or bleaching to preserve texture and color. If made in acrylic, can be refreshed with light steaming from a distance.
Final Notes
Check your stitch counts, keep tension firm for amigurumi parts, and use the photo as a visual guide for placement and color. Don’t rush the assembly—neat sewing ensures the faces and details shine. Adjust size by changing yarn and hook, and experiment with personal color schemes for a collection of unique spiraling dangles. Happy crocheting!