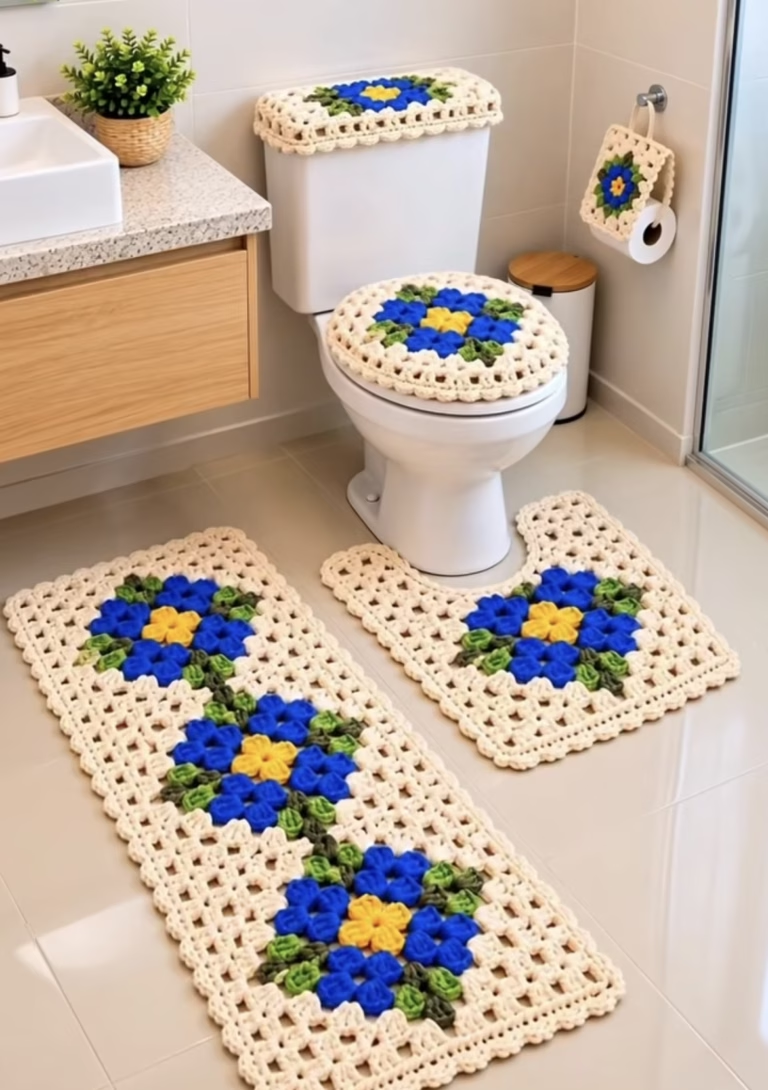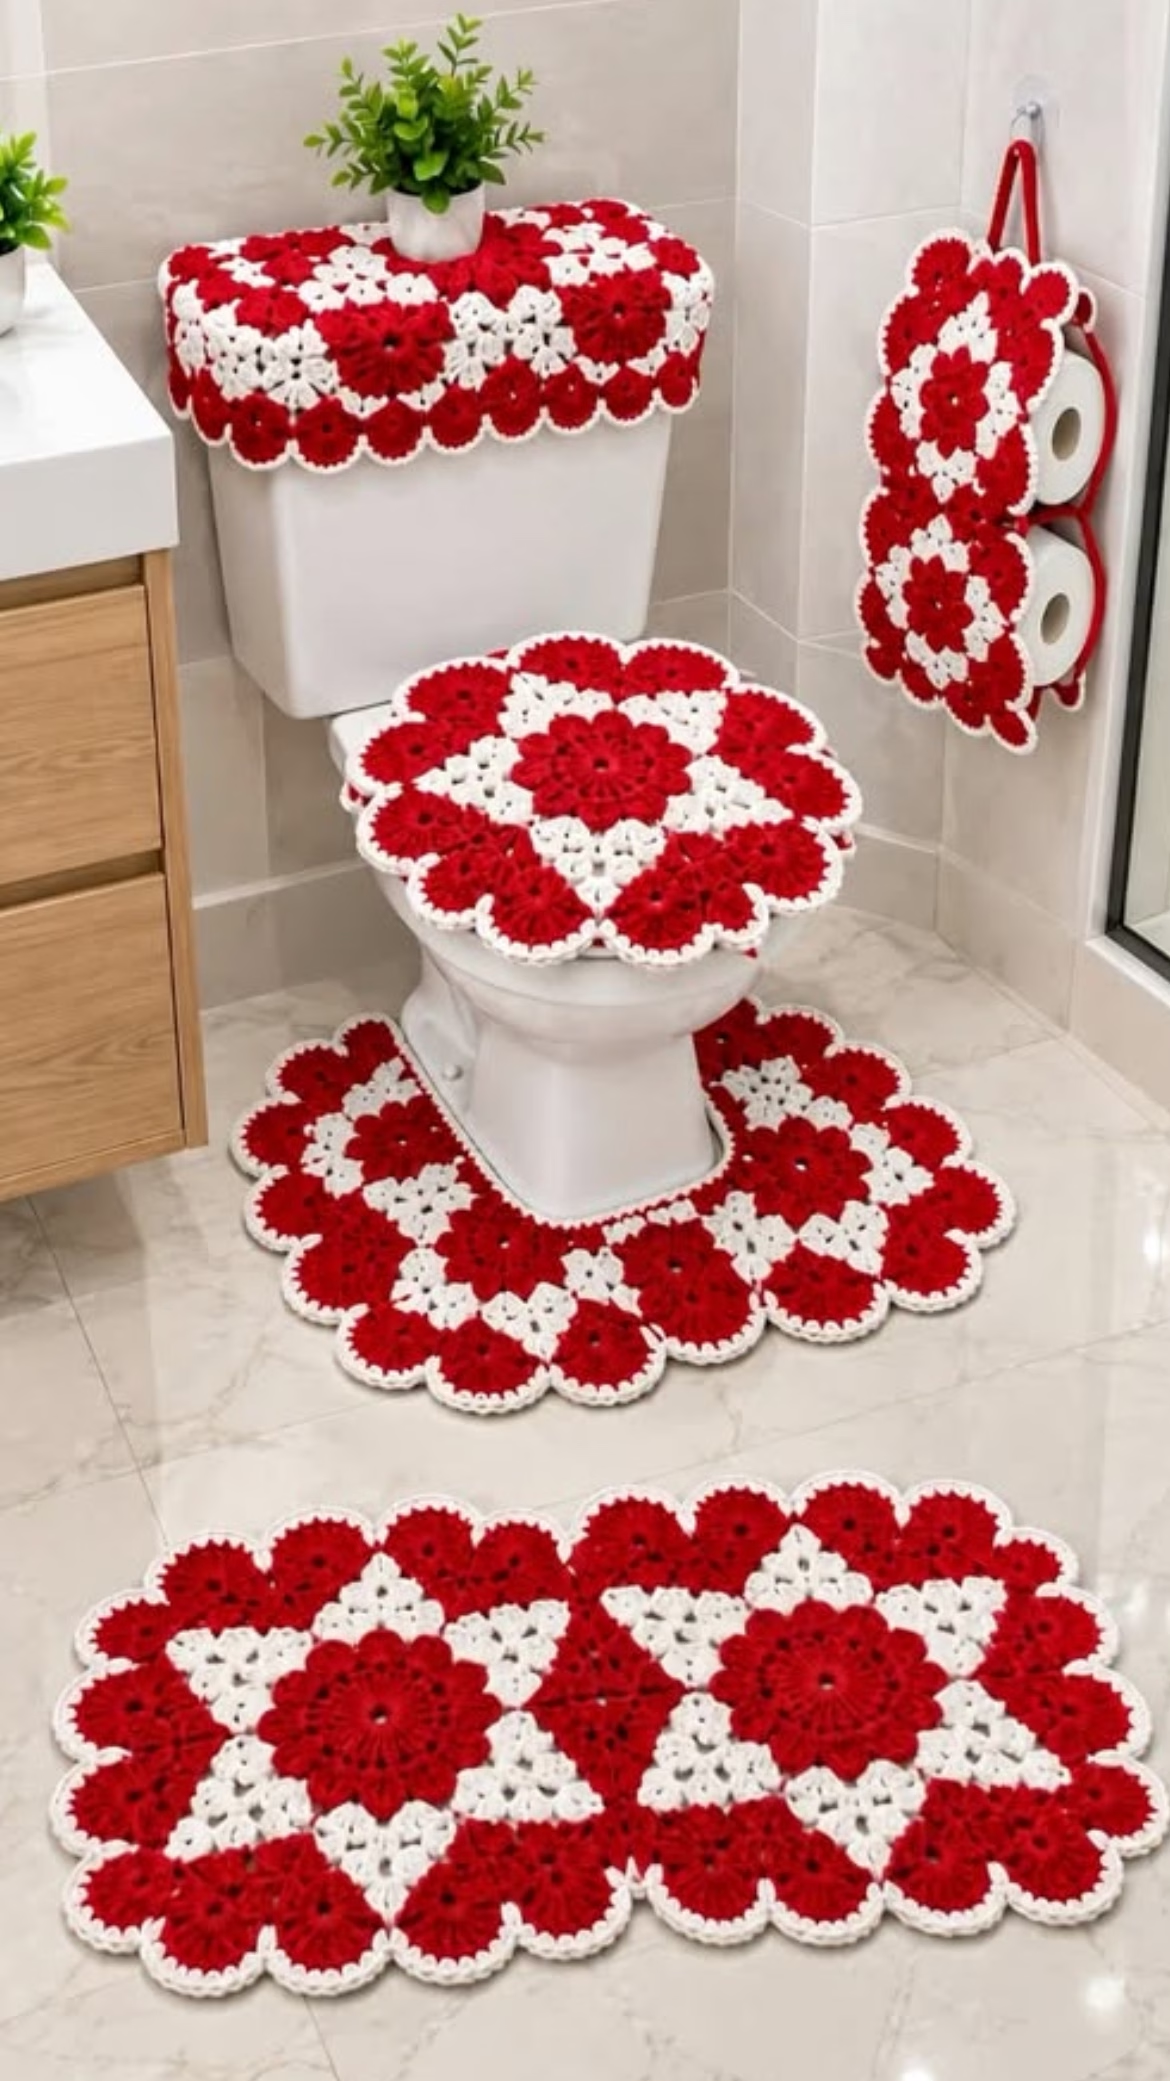
If you’re searching for a bright, beautiful, and practical crochet project that will instantly transform your bathroom, this red and white floral bathroom set is the perfect choice. The set features an eye-catching combination of bold red blooms and crisp white accents, designed using layered flower motifs joined together into classic rectangular and round shapes. Each piece is bordered with a delicate scalloped edge that adds a vintage feel and brings the whole ensemble together. The vibrant colors and dimensional flower motifs not only make a statement, but also add a cozy, handmade touch to everyday décor.
This set includes a main floor rug, a wraparound toilet mat, a tank-topper cover, and a decorative (and handy) wall-mounted toilet roll holder. The unique flower motif construction ensures you’ll have fun every step of the way—whether you’re making the whole set for yourself, as a gift, or looking to use the motifs in other home décor projects. Each piece is as functional as it is beautiful, adding softness underfoot and cheerful design to your bathroom.
With classic shapes and modular construction, this project is as enjoyable to crochet as it is satisfying to assemble. The result: a cohesive set that showcases your skills and brightens up any space!
Project Overview
This bathroom set is made up of separate flower motifs, which are joined as you go or sewn together to form each item. The motif is worked in the round and features textured petals, giving the design its three-dimensional look. After motifs are joined into the required shapes, a scalloped border is added for a finished touch. The rugs are created by arranging motifs in rectangular or semi-circular patterns, the tank cover uses a rectangular motif arrangement, and the toilet roll holder incorporates flower motifs joined vertically with a hanging loop attached. The set is worked using classic joining and border techniques.
Skill Level
Intermediate
This pattern is suited to intermediate crocheters, as it requires working in the round, changing colors, joining motifs, and creating dimensional petal stitches. Some basic sewing or slip stitching for assembly is also required. Confident advanced beginners may enjoy the challenge with careful attention to instructions.
Materials
- Yarn: Worsted weight (Category 4) acrylic yarn; cotton-blend may be substituted for high-traffic bathroom usage
- Colors:
- Color A: Bright Red (approx. 400g for full set)
- Color B: White (approx. 300g for full set)
- Crochet Hook: 4.0 mm (G-6) or size needed for gauge
- Tapestry needle
- Scissors
- Stitch markers (useful for motif joins and keeping track of rounds)
- Measuring tape (for fitting rugs and tank cover)
Finished Size
- Main Rectangle Rug: Approx. 90 x 40 cm (35.5 x 16 in)
- Toilet Mat: Approx. 60 x 55 cm (23.5 x 22 in)
- Tank Cover: Approx. 50 x 35 cm (19.5 x 14 in)
- Toilet Roll Holder: Approx. 45 x 22 cm (17.5 x 8.5 in)
Sizes are easily adjustable by adding or subtracting flower motifs or joining fewer/more motifs per side for each piece.
Gauge
Gauge per motif (after Rnd 4, slightly stretched):
One flower motif = Approx. 11 cm (4.3 in) across
Slight variations will not affect the project much, as long as motif sizes are consistent throughout your set. Adjust hook size accordingly if your motifs are significantly larger or smaller.
Stitches and Abbreviations
- ch – chain
- sl st – slip stitch
- sc – single crochet
- hdc – half double crochet
- dc – double crochet
- tr – treble crochet
- st(s) – stitch(es)
- sp – space
- MR – magic ring
- inc – increase (2 sts in same st)
- dc2tog – double crochet two together (decrease)
Important Pattern Notes
- Chains at the beginning of rounds do count as stitches unless otherwise noted.
- Always join rounds with a slip stitch to first stitch unless working in a spiral (not used here).
- Color changes are made at the end of rounds; fasten off and join new color in any stitch with a sl st unless instructed otherwise.
- Motifs can be joined as-you-go in the final round or sewn together with a tapestry needle.
- Scalloped borders are worked into the outer edge of assembled pieces.
- Keep right sides facing out when joining for a neater finish.
- Weave in all ends securely for durability and a tidy finish.
Detailed Crochet Pattern
Part 1: Flower Motif
Each motif features bold layered petals, worked in two main colors. Make as many motifs as needed for each section using the counts below:
- Main Rug: 14 motifs (arranged 2 by 7)
- Toilet Mat: 13 motifs (1 center, 4 surrounding, 8 outer ring, shaped for cutout)
- Tank Cover: 12 motifs (arranged 3 by 4)
- Roll Holder: 6 motifs (2 by 3), plus border and hanging loops
Make additional motifs if your gauge or final piece requires adjusting.
Basic Flower Motif (Make 45+ total in red and white):
- With Color A (Red), MR.
- Rnd 1: Ch 3 (counts as dc), 11 dc in MR. Join with sl st to top of ch-3. (12 dc)
- Rnd 2: Ch 2 (counts as hdc), hdc in same st, 2 hdc in each st around. Join. Fasten off Color A. (24 hdc)
- Rnd 3 (with Color B/White): Join with sl st to any hdc, ch 3 (counts as dc), dc in same st, sk next st, *2 dc in next st, sk next st*; rep from * to * around. Join. (24 dc; 12 clusters)
- Rnd 4: Ch 1, sc in same st, ch 3, sk next cluster, *sc in next st, ch 3, sk next cluster*; rep from * to * around. Join. (12 sc, 12 ch-3 sps)
- Rnd 5 (petals, with Color A/Red): In any ch-3 sp, join with sl st, (ch 2, 4 dc, ch 2, sl st) in same sp – first petal made. *(Sl st in next ch-3 sp, ch 2, 4 dc, ch 2, sl st)* around. Join, fasten off. (12 petals)
Weave in ends. Each motif should have 12 rounded petals around.
Motif Layouts:
- Rectangle Rug: Arrange in 2 rows of 7, alternating red-and-white centers.
- Toilet Mat: Place 1 motif at center front, 4 around for inner layer, 8 semicircular around to create the curved shape/deep “U” cutout. Adjust as needed for desired fit.
- Tank Cover: Layout of 3 x 4 motifs for a rectangle.
- Roll Holder: Layout of 2 x 3 motif rectangle.
Part 2: Joining Motifs
For each main component, join motifs using the “join-as-you-go” (slip stitching through corresponding petals of adjacent motifs in the final petal round). Or, make all motifs first and whipstitch the petals of adjacent motifs together on the wrong side. Ensure colors align attractively: for a checkerboard look, alternate which motifs have red centers vs. white centers.
Align motifs so that petals meet and scallops create a continuous border. Use stitch markers to plan out shape and positioning before final assembling. For curved edges or toilet mat cut-out, remove or halve motifs to fit the toilet base or tank (see tips below).
Part 3: Adding the Border
When motifs are all joined and major pieces formed, add a scalloped border for a refined finish:
- With Color B (White):
- Attach yarn in any outer ch-2 sp of a motif petal. *(Sc, hdc, 3 dc, hdc, sc) in same sp*, sl st in next petal’s ch-2 sp*, repeat around the entire edge of the assembled piece (rug, mat, tank cover, or holder). Join and fasten off. Weave in ends.
- For extra structure, you can work a round of sc in Color A before the scalloped round.
This creates the signature scalloped look unifying all pieces.
Part 4: Toilet Roll Holder Assembly and Hanging Loop
- Lay out 6 motifs in a 2 x 3 rectangle (2 across, 3 down). Join petals as with other pieces.
- Work the scalloped border all around as above.
- For roll pockets: After motifs are joined, use Color B and, on the wrong side, sew a length of chain (about 24 ch long) horizontally between the motifs to act as a “stopper” so rolls rest in place. Repeat between both motif gaps to hold 2 rolls securely.
- For hanging loop: With Color A, ch 45, sl st to form a loop, fasten off. Attach ends securely to the topmost motif so the holder hangs flat on a hook or knob.
Part 5: Tank Topper/Toilet Mat Fitting
- To help the tank topper (or mat) grip and shape, you can add a row of sc around the edge on the wrong side, then run a length of elastic or chain through and cinch to fit. Secure ends well.
- For the toilet mat’s U-shape, leave out 2-3 motifs from one side of the row for the open cut-out (or halve/split the outermost motifs at the cutout for smoother shaping) and join as usual around the remaining motifs for a smooth curved edge.
Assembly and Finishing
- Sew or crochet all motifs together with right sides facing up, matching petal edges neatly.
- Block each assembled piece gently: pin to finished measurements, spray lightly with water, and allow to dry flat to help even out the motifs and align joins.
- Carefully weave in all ends on the wrong side. Trim excess tail.
- Double-check that tank cover and mats fit your intended toilet. Adjust by adding/subtracting motifs or re-blocking as needed.
- Shaping corners: If any motif seems to curve up too much, steam block or dampen for gentle reshaping.
Customization Ideas
- Color Variations: Try any two-tone color scheme, or pastel flowers with white or cream. Go bold with multiple colors on each motif for a rainbow effect.
- Yarn Choices: Use bulky yarn and a larger hook for a plush look, or sport weight for a lighter effect.
- Modular Uses: Use the motifs for matching coasters, pillow covers, table runners, or even a wall hanging by adjusting the arrangement and total number made.
- Mat Sizing: Expand the mats by adding more motif rows, or scale down for a smaller space by omitting motifs.
- Gift Set: Bundle pieces for a housewarming or holiday gift with matching washcloths using the motif design.
Troubleshooting Tips
- If motifs start to curl, block each one before joining and ensure you’re not pulling joins too tight.
- Wavy or puckered borders usually mean too many/few border stitches — adjust by increasing or decreasing sc between petals as you go.
- If your finished piece is too large or too small, try smaller/larger hooks, or adjust the motif count.
- Keep tension even and be consistent with yarn changes for smooth color transitions. Secure new yarn ends firmly.
- If motifs don’t align perfectly, re-block or use invisible join for neater appearance.
Care Instructions
Machine wash cold on gentle cycle or hand wash. Lay flat or hang to dry to preserve the shape and texture; avoid using bleach. If using acrylic, tumble dry low is usually safe. Reshape or block again after washing if needed.
Final Notes
Carefully count your stitches and motifs as you work to ensure all sections fit neatly. Block motifs for a polished result and even sizing. Adjust your tension if motifs differ in size, and use your layout as a reference guide for color arrangement and assembly. With patience and attention to detail, you’ll create a stunning, coordinated bathroom crochet set to enjoy for years to come!