📖 B. INTRODUCTION
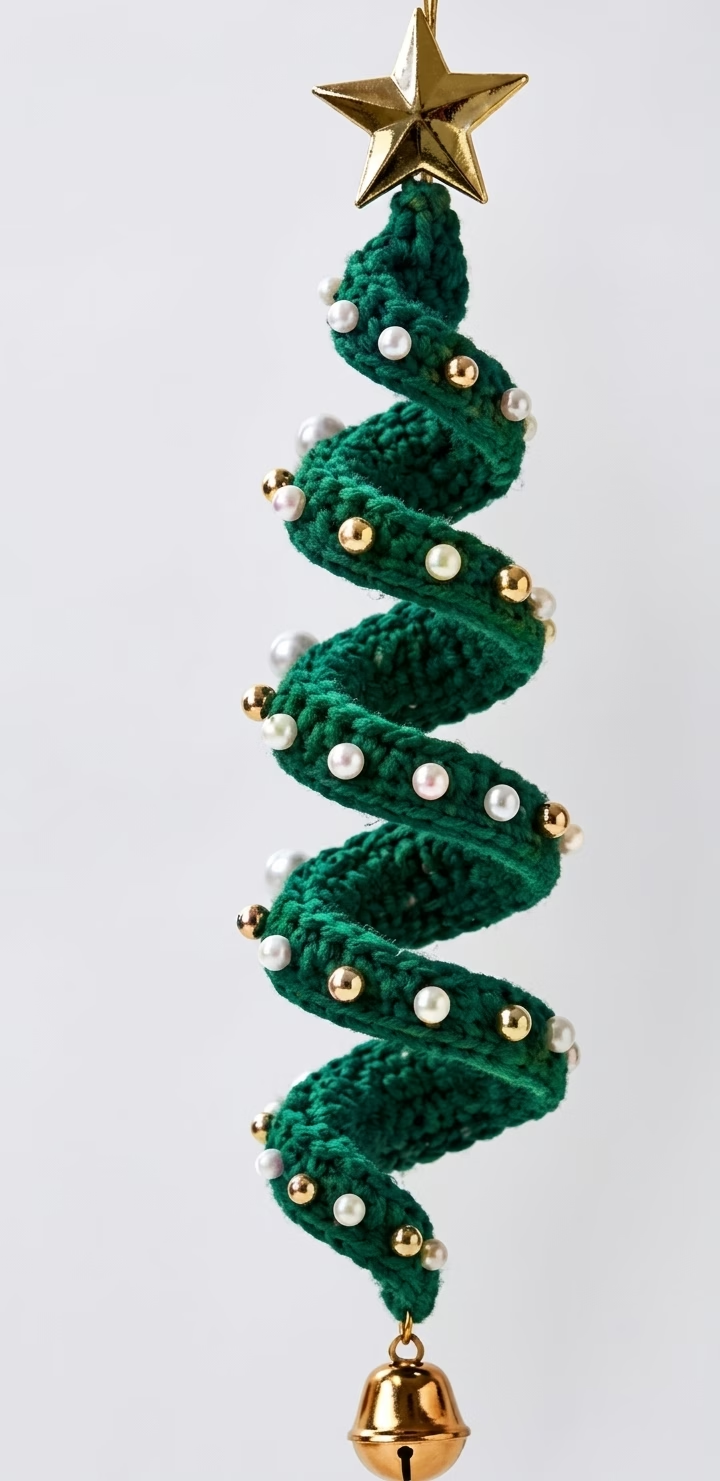
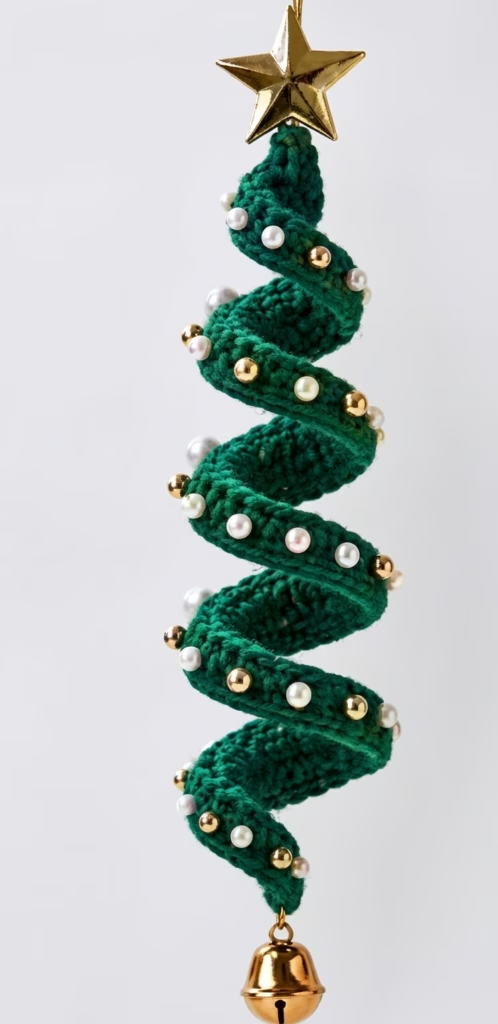
Transform simple yarn into a stunning holiday keepsake with this Elegant Beaded Spiral Christmas Tree Ornament. Featuring a graceful helical silhouette, this design mimics a swirling ribbon of emerald pine cascading downward, beautifully embellished with shimmering pearl beads, polished gold accents, and a classic jingle bell base. Crowned with a brilliant gold star, this piece brings a refined, boutique-quality aesthetic to your festive home decor.
Whether you are crafting handmade gifts for loved ones, building a cohesive set of heirloom Christmas tree decorations, or preparing festive items for holiday craft fairs, this spiral tree hanging is an absolute joy to stitch. The unique corkscrew construction works up surprisingly quickly using basic crochet stitches, making it a gratifying weekend project or last-minute holiday make.
The beauty of this design lies in its incredible versatility and customization potential. You can easily adjust the yarn shade from deep forest pine to icy sage, ivory, or shimmering silver, and tailor the bead selection to match your holiday color palette. Beyond traditional Christmas trees, these spirals look gorgeous suspended in windows, incorporated into festive garlands, or attached as luxurious toppers for wrapped gifts.
This complete guide walks you through every step, from foundation stitching and gradient spiral increases to bead placement, star embellishment, and final shape blocking. Grab your hook, select your favorite lustrous beads, and let’s craft a timeless holiday ornament!
🔍 C. MAIN PATTERN OVERVIEW
The Beaded Spiral Christmas Tree Ornament is constructed using a clever geometric expansion technique. Starting from a long foundation chain, the piece develops into a tapered corkscrew ribbon through strategically placed stitch increases and gradient stitch heights—progressing from short single crochets at the narrow top to sweeping treble crochets at the wider base.
                [⭐ Gold Star Top]
                       ||
                     ( @ )  <- Tight Top Spiral (Single Crochet)
                    (  @  )
                   (   @   ) <- Upper Body (Half Double Crochet)
                  (    @    )
                 (     @     ) <- Mid Body (Double Crochet)
                (      @      )
               (       @       ) <- Lower Base (Treble Crochet)
              (________@________)
                       ||
                [🔔 Jingle Bell]
- 🌲 Tapered Spiral Body: A single continuous ribbon worked in 3 concise rows. The natural curling tension created by multiple stitches worked into each foundation chain produces a self-twisting helical cone.
- ⭐ Top Star Accent: A 5-point metallic star attached at the narrow apex, acting as the structural anchor for the hanging cord.
- 🦪 Pearl & Gold Bead Accents: White pearl beads and gold metallic studs arranged along the outer spiraling ridge to create the look of glowing ornament garlands.
- 🔔 Jingle Bell Base: A shiny gold metal bell attached to the bottom tail, adding charming holiday sound and gentle downward weight to maintain the spiral’s drape.
🎯 D. SKILL LEVEL
Skill Level: Easy to Intermediate (Confident Beginner)
This pattern is ideal for crocheters who are comfortable with basic stitches and want to learn spiral geometry and bead integration.
- 🧶 Techniques Required:
- 🔹 Basic foundation chains (
ch) - 🔹 Single crochet (
sc), Half double crochet (hdc), Double crochet (dc), and Treble crochet (tr) - 🔹 Multi-stitch increases (working 2 or 3 stitches into a single chain)
- 🔹 Slip stitch edging (
sl st) - 🔹 Simple bead embroidery and hardware attachment
- 🔹 Wet blocking or steam shaping
- 🔹 Basic foundation chains (
📏 E. FINISHED SIZE
- 📏 Height (Spiral Body): Approximately 8.5 inches (21.5 cm) from top apex to bottom loop.
- 📏 Total Height (With Star & Bell): Approximately 10.5 inches (26.5 cm).
- 📏 Base Width: Approximately 3.25 inches (8.2 cm) in diameter at the widest lower coil.
- 📏 Top Width: Approximately 1.25 inches (3.2 cm) in diameter at the tightest upper coil.
⚠️ Note on Dimensions: Finished size can vary depending on yarn weight, hook tension, and stiffening method. Using a smaller hook creates a tighter, firmer spiral, while a larger hook yields a softer, longer drape.
🧮 F. GAUGE
- 🧮 Gauge: 22 stitches x 20 rows = 4 inches (10 cm) in single crochet worked flat with a 3.0 mm hook.
💡 Gauge Note: Exact gauge is not critical for this ornamental project. However, maintaining a firm, tight stitch tension is recommended to ensure the crocheted ribbon holds its corkscrew shape crisp and upright without sagging under the weight of the beads.
🧶 G. REQUIRED YARN AMOUNTS
- 🌲 Main Color (Forest Green): 1 skein / 25 grams (approx. 60 yards / 55 meters) of DK weight 100% Mercerized Cotton. Mercerized cotton is highly recommended for its stiffness, sheen, and stitch clarity.
- ⭐ Accent Color (Metallic Gold Thread): 5 grams (approx. 15 yards / 14 meters) of lace-weight metallic gold yarn or embroidery thread for the crocheted star and top trim.
- 🧵 Sewing Thread: Small amount of matching green or clear monofilament nylon thread for securing beads.
🧰 H. MATERIALS
- 🪡 Crochet Hooks:
- 3.0 mm (US C-2 or D-3) for the main tree body.
- 2.5 mm (US B-1) for the small top star.
- 🦪 Faux Pearl Beads: 28 total pieces in assorted sizes (16 x 6mm pearls, 12 x 8mm pearls) in off-white or cream.
- 🪙 Gold Metallic Beads: 22 total pieces (4mm to 6mm smooth gold metal or acrylic beads).
- 🔔 Jingle Bell: 1 piece, 18mm gold metal jingle bell with top loop.
- ⭐ Top Star: 1 metallic gold star pendant/charm (approx. 1 inch / 2.5 cm wide) OR gold yarn to crochet the star.
- ✂️ Tools & Notions:
- Fine beading needle (thin enough to pass through pearl holes).
- Standard tapestry needle for weaving ends.
- Jump ring (6mm gold) and jewelry pliers (for bell attachment).
- Fabric stiffening spray, spray starch, or diluted PVA glue for blocking.
- Scissors and measuring tape.
⚠️ Safety Caution: This ornament contains small beads and metal parts. Keep out of reach of infants, toddlers, and pets to prevent choking hazards.
🔤 I. ABBREVIATIONS – US TERMS
ch= chain stitchsc= single crochethdc= half double crochetdc= double crochettr= treble (triple) crochetsl st= slip stitchinc= increase (work 2 stitches into the same stitch)3-inc= triple increase (work 3 stitches into the same stitch)st(s)= stitch(es)ea= eachrep= repeatFO= fasten offMR= magic ringRS= Right SideWS= Wrong Side
📝 J. NOTES BEFORE YOU BEGIN
- 🌀 Spiral Physics: The spiral curl is generated naturally through stitch expansion. Working 2 to 3 stitches into every foundation stitch forces the outer edge to expand faster than the inner edge, creating a helical twist.
- 📐 Gradient Tapering: The foundation is divided into 5 equal 16-stitch segments. Each segment uses progressively taller stitches (
sc➔hdc➔dc➔tr) to form a true Christmas tree cone shape that narrows toward the top. - 🪡 Bead Method Options: Beads can either be sewn onto the outer edge after crocheting the body (recommended for precise spacing) or pre-strung onto the yarn before stitching Row 3.
- 🧵 Yarn Tails: Leave generous 10-inch (25 cm) yarn tails at the start and end of your work. These tails are crucial for securing the top star, bottom bell, and hanging cord.
🪡 K. COMPLETE PATTERN
🌲 Spiral Tree Body
- Purpose: Main helical corkscrew structure forming the Christmas tree body.
- Yarn/Color: Main Color (Forest Green DK Cotton).
- Hook Size: 3.0 mm.
- Quantity: Make 1.
[Start: Bottom Base] Ch 81 ➔ Row 1: 80 sc ➔ Row 2: 192 sts (Spiral Gradient) ➔ Row 3: 192 sl st [End: Narrow Top]
- Foundation Chain: Ch 81 loosely.
- Row 1 (RS): Starting in the 2nd ch from hook, work 1 sc in ea ch across. Turn.
- (Stitch Count: 80 sc)
- (Stitch Count: 80 sc)
- Row 2 (Spiral Increase Gradient Row): Ch 1 (does not count as st). Working across the 80 stitches in 5 strategic 16-stitch segments from narrow top to wide base:
- 🟢 Segment 1 (Top / Narrow Tip – sts 1 to 16): Work 2 sc in ea of the next 16 sts. (32 sc)
- 🟢 Segment 2 (Upper-Mid Body – sts 17 to 32): Work 2 hdc in ea of the next 16 sts. (32 hdc)
- 🟢 Segment 3 (Center Body – sts 33 to 48): Work 2 dc in ea of the next 16 sts. (32 dc)
- 🟢 Segment 4 (Lower Body – sts 49 to 64): Work 3 dc in ea of the next 16 sts. (48 dc)
- 🟢 Segment 5 (Wide Base – sts 65 to 80): Work 3 tr in ea of the next 16 sts. (48 tr)
- (Total Stitch Count Row 2: 32 + 32 + 32 + 48 + 48 = 192 sts)
- 🟢 Segment 1 (Top / Narrow Tip – sts 1 to 16): Work 2 sc in ea of the next 16 sts. (32 sc)
🌀 Note: As you complete Row 2, the fabric will dramatically curl and twist in your hands. This is expected!
- Row 3 (Outer Ridge Finishing): Ch 1, turn. Work 1 sl st in the outer loop of ea st across all 192 sts to give the tree’s outer edge a crisp, polished border.
- (Total Stitch Count Row 3: 192 sl st)
- (Total Stitch Count Row 3: 192 sl st)
- 🧵 Fasten Off: Fasten off leaving a 12-inch (30 cm) tail for assembly.
⭐ Top Star Accent
- Purpose: Golden star embellishment situated at the apex of the spiral tree.
- Yarn/Color: Accent Color (Metallic Gold Thread).
- Hook Size: 2.5 mm.
- Quantity: Make 1 (or 2 if joining back-to-back for 3D stiffness).
Round 1: MR, 10 sc (10)
Round 2: [Sl st, (hdc, dc, ch 2, sl st in 2nd ch from hook, dc, hdc) in next st] x 5
- Round 1: Into a Magic Ring, ch 1, work 10 sc. Join with sl st to first sc. (10 sc)
- Round 2 (Star Points):
*Sl st in next st. In the next st work:(1 hdc, 1 dc, ch 2, sl st in 2nd ch from hook to form picot point, 1 dc, 1 hdc).- Repeat from
*4 more times. - Join with sl st to base of first sl st. (5 star points formed)
- 🧵 Fasten Off: Fasten off leaving an 8-inch (20 cm) tail for attachment.
💡 Alternative Hardware Note: You may substitute the crocheted star with a 1-inch metal gold star charm or pendant as shown in the visual reference.
🔔 Jingle Bell & Base Attachment
- Purpose: Bottom terminal weight and auditory chime element.
- Materials: 18mm Gold Metal Jingle Bell, 6mm jump ring, tapestry needle.
- Quantity: 1 assembly.
- Attach the 6mm gold jump ring through the top loop of the jingle bell using pliers.
- Thread the bottom yarn tail of the treble-crochet base (Segment 5) through the jump ring.
- Secure tightly with 3 knot passes through the base stitch, weaving the remaining end invisibly inside the stitch bulk.
🦪 Pearl & Gold Bead Layout
- Purpose: Decorative embellishment along the spiraling outer edge.
- Materials: Beading thread, thin needle, 28 pearls, 22 gold beads.
[Narrow Apex] ➔ 4mm Gold Beads & 6mm Pearls (Denser) ➔ 8mm Pearls & 6mm Gold Beads (Wider Base)
- Thread fine beading needle with matching green or clear thread.
- Anchor thread securely at the narrow top of the spiral.
- Upper Spiral (Top 1/3): Sew alternating small 4mm gold beads and 6mm pearls every 3-4 stitches along the outer Row 3 ridge.
- Middle Spiral (Mid 1/3): Sew 6mm pearls and 6mm gold beads every 4-5 stitches.
- Lower Base Spiral (Bottom 1/3): Sew larger 8mm pearls interspersed with gold beads every 5-6 stitches.
- Double-knot thread on the back side of the fabric ribbon after every 4th bead to maintain tension.
➰ Top Hanging Loop
- Purpose: Suspension cord for hanging on Christmas tree branches.
- Yarn/Color: Metallic Gold Thread.
- Quantity: Make 1.
- Attach gold thread to the top center apex of the tree body (or upper ring of the metal star).
- Ch 35 (or desired hanging length, approx. 4 inches / 10 cm folded).
- Sl st back into the base attachment point to form a secure hanging loop.
- Knot firmly and weave in tail.
🎨 L. STYLING / ASSEMBLY / STABILITY / FINAL SHAPING
📐 Head-to-Body Alignment & Assembly
- 📌 Top Connection: Align the narrow apex of the crocheted spiral body directly behind or between the gold star points. Using the gold yarn tail, stitch through the bottom point of the star and the first 2 stitches of the tree apex.
- 📌 Weight Alignment: Ensure the bottom jingle bell hangs freely from the center of the widest treble-crochet turn so that gravity pulls the spiral straight down vertically.
⚖️ Stability & Helical Shaping
Because crochet fabric is naturally soft, achieving a crisp, spring-like corkscrew shape requires manual coaxing and light stiffening:
- Manual Twisting: Hold the star top in one hand and the bell base in the other. Gently twist the spiral clockwise until the gradient turns settle into evenly spaced helical tiers.
- Blocking & Stiffening Procedure:
- Mix a solution of 50% PVA craft glue and 50% water (or use commercial fabric stiffener/spray starch).
- Pin the top star to a blocking board.
- Gently stretch the spiral downward to its full 8.5-inch length and pin the bottom loop so the helix maintains uniform tier spacing.
- Lightly mist or brush the reverse side of the green crochet fabric with the stiffening solution.
- Allow to dry completely for 12–24 hours before unpinning.
🔢 Recommended Assembly Order
1. Crochet Body ➔ 2. Crochet Star ➔ 3. Block & Stiffen Helix ➔ 4. Attach Star & Bell ➔ 5. Sew Beads ➔ 6. Attach Loop
- Step 1: Crochet the main Forest Green Spiral Tree Body.
- Step 2: Crochet the Metallic Gold Star (or prepare hardware star charm).
- Step 3: Perform wet blocking / fabric stiffening on the spiral body to set the helical memory.
- Step 4: Securely attach the bottom jingle bell with the jump ring.
- Step 5: Stitch the Gold Star to the upper apex.
- Step 6: Hand-sew pearl and gold beads along the outer spiral edge.
- Step 7: Attach the top gold hanging loop.
✅ Final Shaping / Finishing Checklist
- ✅ Helical Flow: Does the spiral drape gracefully in a uniform cone without tangling or overlapping?
- ✅ Hardware Security: Are the jingle bell jump ring and top star double-knotted and reinforced?
- ✅ Symmetry: Is the star centered vertically directly above the hanging axis?
- ✅ Bead Balance: Are the pearl and gold beads securely anchored without saggy thread loops?
- ✅ Clean Finish: Are all yarn tails invisibly woven into stitch density?
💡 M. HELPFUL CROCHET TIPS
- 💡 Tip 1 (Yarn Selection): Use 100% mercerized cotton yarn. Cotton has virtually zero stretch and high stitch definition, which prevents the spiral from sagging under bead weight.
- 💡 Tip 2 (Tension Control): Keep your foundation chain slightly loose, but maintain a firm, tight tension on Rows 2 and 3.
- 💡 Tip 3 (Counting Segments): Place stitch markers every 16 stitches on Row 1. This ensures your stitch-height transitions (
sc➔hdc➔dc➔tr) are perfectly symmetrical. - 💡 Tip 4 (Bead Threading): If pre-stringing beads on yarn, use a collapsible eye beading needle to slide beads onto your yarn before starting Row 3.
- 💡 Tip 5 (Twist Coaxing): If your spiral curls inward instead of forming a flat ribbon helix, gently steam it with a garment steamer while guiding the turns around a paper towel tube.
- 💡 Tip 6 (Preventing Tangling): Store the ornament during assembly by wrapping the spiral around a cardboard cone to keep beads from snagging.
- 💡 Tip 7 (Metallic Thread Control): Metallic thread can split easily; hold it together with a fine strand of gold sewing thread to add strength when stitching the star.
🧼 N. CARE INSTRUCTIONS
- 🧼 Cleaning: Spot clean only using a dry microfiber cloth or soft soft-bristled brush to remove dust. Do not submerge in water, as this will dissolve fabric stiffeners and tarnish metal bells.
- ☀️ Storage: Store flat in a dry, temperature-controlled environment. Wrap the ornament gently around a soft tissue paper roll to preserve its 3D helical structure during off-season storage.
- ⚠️ Metal Care: Keep metallic star charms and jingle bells away from moisture to prevent oxidation or rust.
❓ R. FAQ
❓ Can I make this ornament larger or smaller?
Yes! To adjust the height, alter your foundation chain in multiples of 5. For example, a foundation chain of 101 stitches (5 segments of 20 stitches) creates a larger 11-inch ornament, while a chain of 61 stitches creates a mini 6-inch ornament.
❓ Why isn’t my spiral twisting automatically?
Automatic curling relies on stitch density. Ensure you are placing 2 to 3 stitches into every single chain stitch on Row 2. If you miss increases, the ribbon will lie flat instead of forming a corkscrew.
❓ Can I use Acrylic yarn instead of Cotton?
While acrylic yarn works, it is much softer and springier than cotton. If using acrylic, you will definitely need to apply a fabric stiffening spray or PVA glue solution to help the ornament maintain its structured helical shape.
❓ How do I attach the beads without sewing each one individually?
You can pre-string all beads onto your main yarn before starting Row 3. As you work Row 3 slip stitches, simply slide a bead up next to your hook and lock it in place with the slip stitch.
❓ My tree is top-heavy and leans to one side. How do I fix it?
Ensure your bottom jingle bell is centered. The bell acts as a pendulum weight that pulls the spiral straight down. If it still leans, re-block the top star so the hanging loop attaches at the exact center of gravity.
❓ What is the best way to package these as handmade gifts?
Place the spiral ornament flattened or wrapped around a thin holiday card inside a clear pillow box. Include a small note explaining that the recipient can gently pull and twist the bell downward to display its full 3D spiral shape!