Category: Home Decor / Bedspread & Throw Blanket / Geometric Relief Granny Square Skill Level: Intermediate Terminology: US Crochet Terms
📖 B. INTRODUCTION
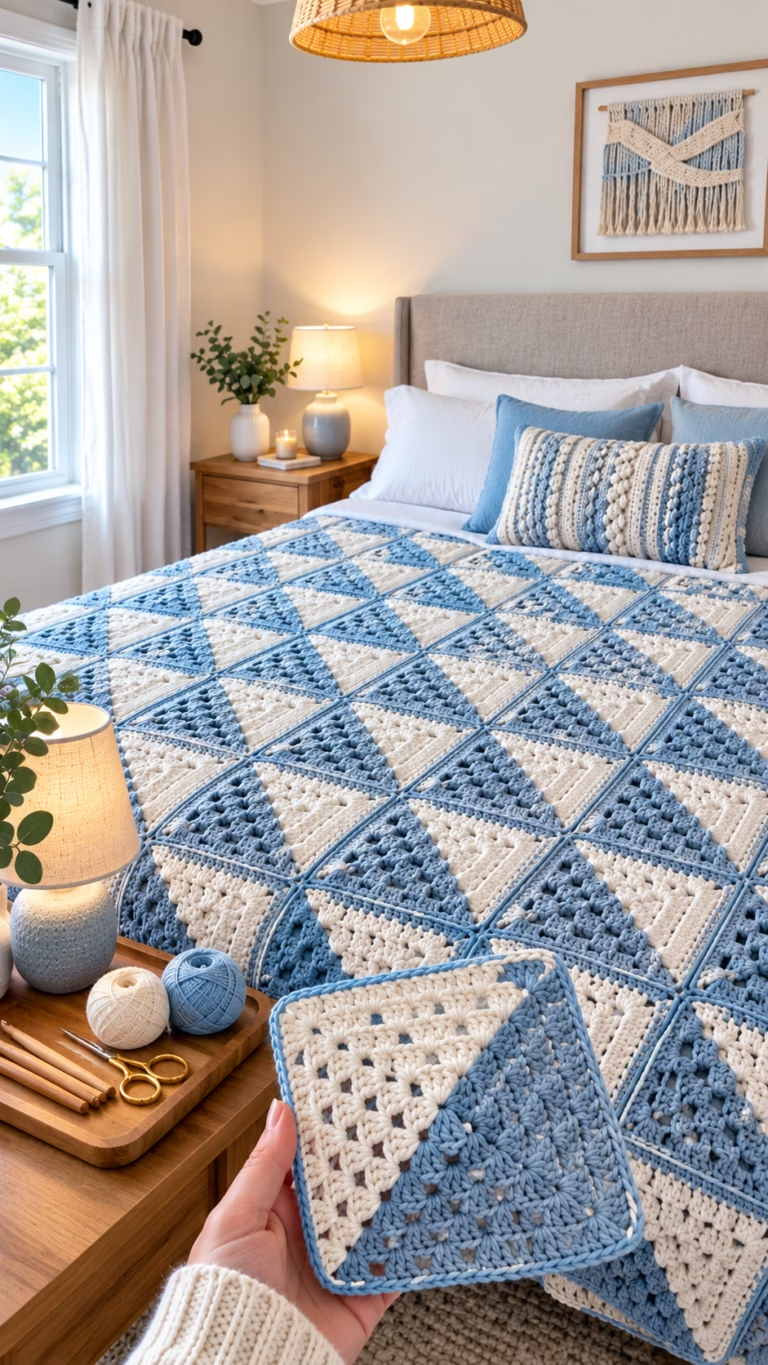
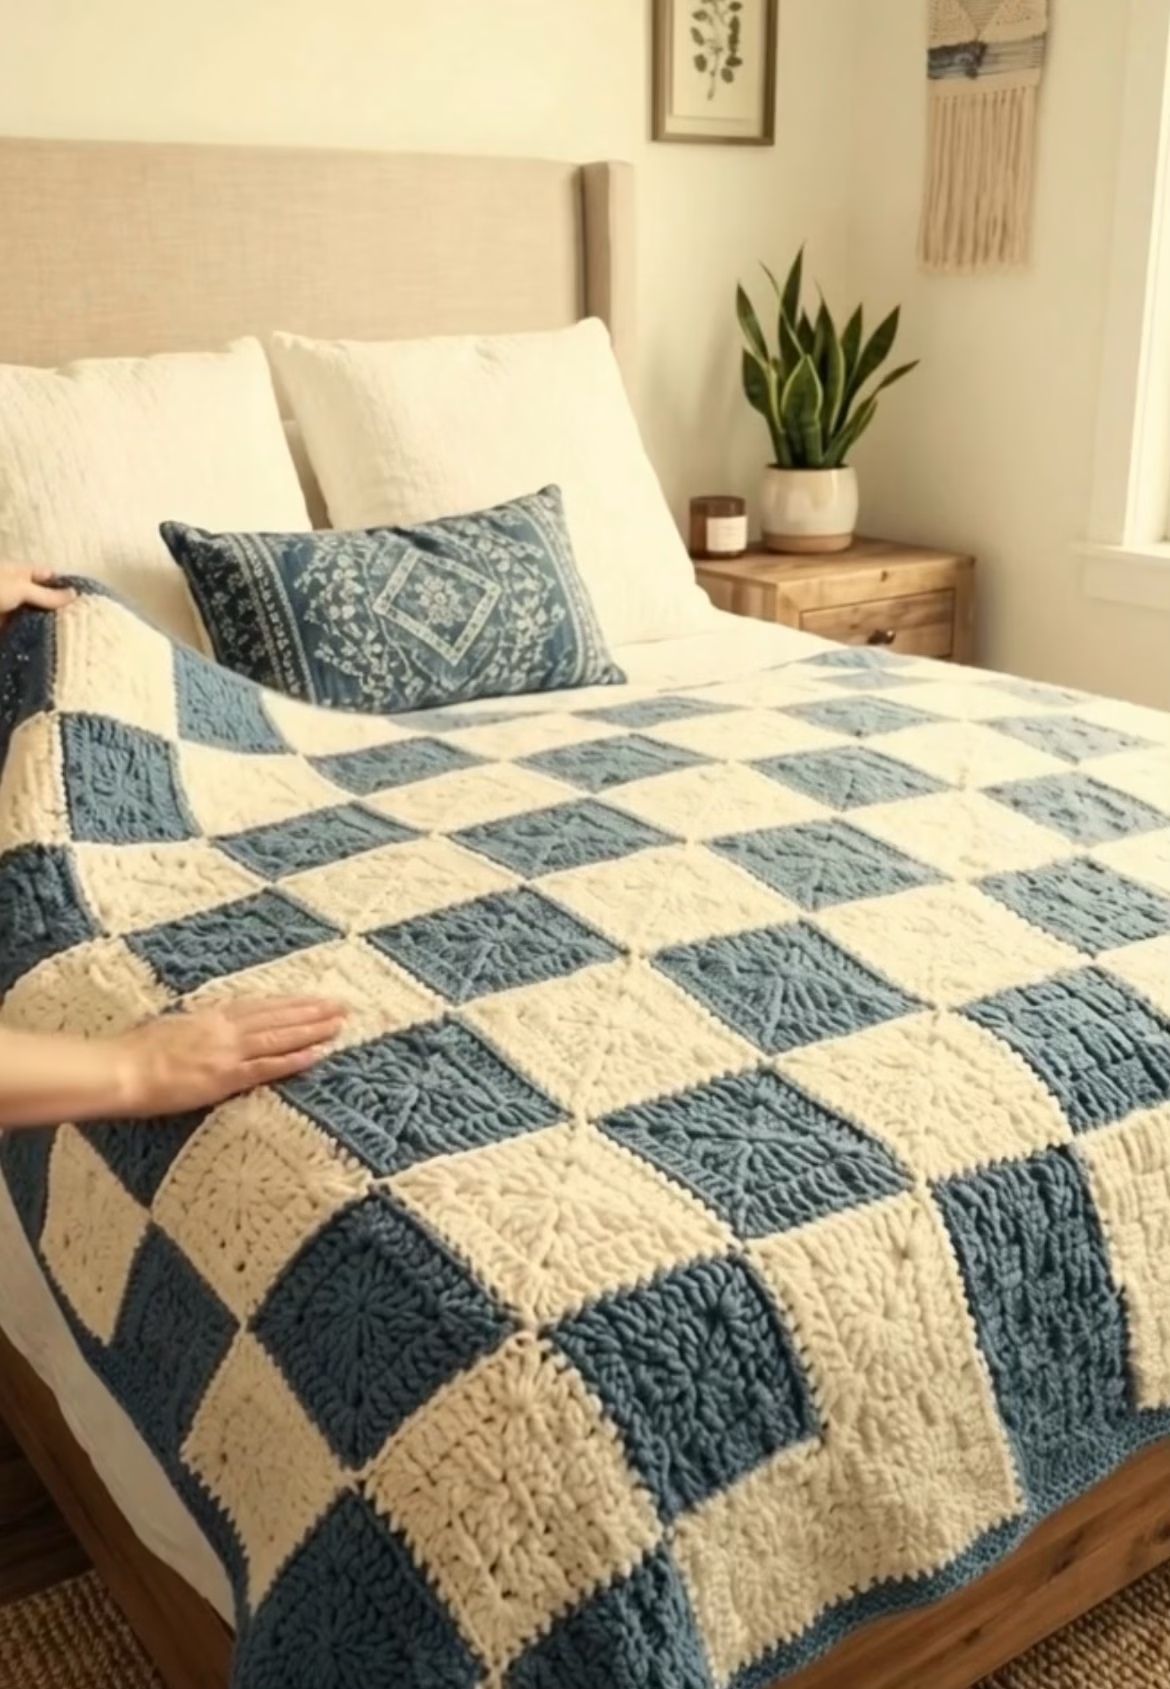
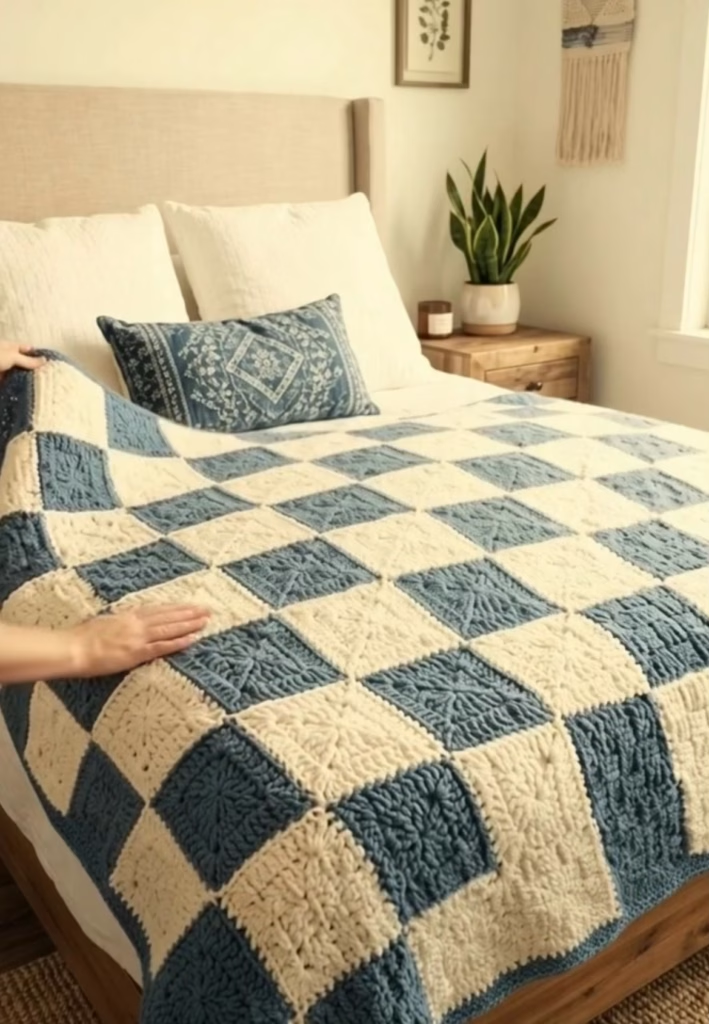
Transform your bedroom or living space with this striking Textured Checkerboard Relief Throw Blanket. Designed with alternating squares of rich slate denim blue and soft ivory cream, this heirloom blanket features an eye-catching geometric relief motif on every individual block. The raised post-stitch central star and ribbed frame create a lush, dimensional texture that feels as satisfying to touch as it is beautiful to look at.
Draped across a queen-sized bed or folded over a favorite armchair, this classic checkered design brings modern rustic warmth to any interior style. The modular square construction makes it an engaging, portable crochet project—you can easily craft individual squares on the go before bringing them all together into a seamless finished blanket.
This comprehensive pattern provides step-by-step instructions for crafting the raised relief squares, executing an invisible flat join, and finishing your blanket with a neat, textured ribbed border. With straightforward stitch repeats and clear arithmetic for every round, you can effortlessly adjust the size from a cozy lap throw to a full bedspread.
Gather your favorite worsted weight yarn and a 5.0 mm hook, and let’s craft a timeless blanket you will cherish for years to come!
🔠C. MAIN PATTERN OVERVIEW
This blanket design is constructed from three integrated modular components:
- 🟦 Slate Blue Relief Squares (Make 24): Solid-colored textured blocks crocheted in deep denim/slate blue yarn, featuring raised front-post stitches that form a central star lattice and raised framing.
- 🤠Cream Ivory Relief Squares (Make 24): Identical textured blocks crocheted in soft off-white/cream yarn.
- ðŸ Checkerboard Assembly & Ribbed Border: A 6 x 8 grid layout joined using a clean flat join, enclosed by a multi-round front-post and back-post ribbed border in slate blue.
🎯 D. SKILL LEVEL
- 🎯 Level: Intermediate
- 🧵 Required Techniques:
- Working in continuous and joined rounds
- Front Post Double Crochet (FPdc) for raised relief texture
- Standard granny square corner turning
- Modular motif joining (Flat Slip Stitch Join or Mattress Stitch)
- Working post-stitch ribbing for borders
📠E. FINISHED SIZE
- 📠Individual Square Size: 17.5 cm x 17.5 cm (7 inches x 7 inches).
- 📠Blanket Layout: 6 columns x 8 rows = 48 squares total.
- 📠Finished Blanket Dimensions (including border): Approx. 115 cm x 150 cm (45 inches x 59 inches).
- 💡 Size Customization: Add or subtract rows/columns of squares to make smaller baby blankets or larger king bedspreads.
🧮 F. GAUGE
- 🧮 Motif Gauge: 1 finished 5-round relief square = 17.5 cm x 17.5 cm (7 inches x 7 inches) using a 5.0 mm hook.
- 🧮 Stitch Gauge: 14 dc x 7.5 rows = 10 cm x 10 cm (4 inches x 4 inches) in standard double crochet.
🧶 G. REQUIRED YARN AMOUNTS
Based on Worsted / Aran Weight (#4 Medium) Cotton-Acrylic or Soft Acrylic Blend yarn (approx. 180 m / 100 g per skein):
- 🟦 Color A (Slate / Denim Blue): approx. 850 grams / 1,530 meters (used for 24 squares + complete outer border).
- 🤠Color B (Cream / Off-White): approx. 700 grams / 1,260 meters (used for 24 squares).
- 🧶 Total Project Estimate: approx. 1,550 grams / 2,790 meters.
🧰 H. MATERIALS
- 🪡 Crochet Hook: 5.0 mm (US H-8).
- 📠Notions: Tapestry/yarn needle, scissors, measuring tape, 8–12 stitch markers.
- 🧼 Blocking Supplies (Optional but recommended): Blocking board/mats, T-pins, steamer or spray bottle.
🔤 I. ABBREVIATIONS – US TERMS
- mr = Magic Ring
- ch = Chain stitch
- sl st = Slip stitch
- sc = Single crochet
- hdc = Half double crochet
- dc = Double crochet
- FPdc = Front Post double crochet (yarn over, insert hook from front to back to front around post of stitch below, complete as dc)
- BPdc = Back Post double crochet (yarn over, insert hook from back to front to back around post of stitch below, complete as dc)
- sp(s) = Space(s)
- st(s) = Stitch(es)
- rnd(s) = Round(s)
- [ ] / ( ) = Repeat instructions within brackets/parentheses indicated number of times
- st-count = Total stitches at the end of the round, shown as (X)
📠J. NOTES BEFORE YOU BEGIN
- 🌀 Joined Rounds: All squares are worked in joined rounds from the center outward. Do not turn work between rounds unless explicitly instructed.
- 🧵 Front Post Relief Stitches: Post stitches are worked around the post of the stitch from the previous round rather than under the top loops. Keep post-stitch tension slightly relaxed so the square stays perfectly flat.
- 📠Ch-3 Starting Chains: Initial ch 3 counts as a double crochet throughout the pattern unless noted.
- 🧼 Blocking Recommendation: Steam blocking each square to exact 17.5 cm dimensions before joining ensures seamless assembly and razor-straight checkerboard grid lines.
🪡 K. COMPLETE PATTERN
🟦 MODULE 1: TEXTURED RELIEF SQUARE (Make 24 Slate Blue, 24 Cream White)
Hook: 5.0 mm | Worked in solid rounds from center outward
( Corner: 3 dc, ch 2, 3 dc )
\ /
FPdc ——> | | <—— FPdc
\ /
( R1: MR 16 dc )
/ \
FPdc ——> | | <—— FPdc
/ \
( Corner: 3 dc, ch 2, 3 dc )
- R1 (Center Base): Start with a mr. Ch 3 (counts as 1 dc), work 15 dc into ring. Join with sl st to top of starting ch-3. (16 dc)
- R2 (Raised Relief Ring): Ch 3 (counts as 1 dc), FPdc around same starting dc below. [1 dc in next st, FPdc around same st] repeat 15 times around. Join with sl st to top of starting ch-3. (32 sts: 16 dc, 16 FPdc)
- R3 (Squaring Round): Sl st into next st.
- First Corner: (Ch 3, 2 dc, ch 2, 3 dc) in same st.
- Side: Skip 2 sts, FPdc around next st, FPdc around next st, skip 2 sts.
- Repeat: [(3 dc, ch 2, 3 dc) in next st to form corner, skip 2 sts, FPdc around next st, FPdc around next st, skip 2 sts] repeat 3 times around.
- Join with sl st to top of starting ch-3. (24 dc, 8 FPdc, 4 corner ch-2 sps)
- R4 (Relief Expansion): Sl st across to first corner ch-2 sp.
- Corner: (Ch 3, 2 dc, ch 2, 3 dc) in corner ch-2 sp.
- Side: FPdc around next 3 dc, ch 1, skip FPdc pair, FPdc around next 3 dc.
- Repeat: [(3 dc, ch 2, 3 dc) in corner sp, FPdc around next 3 dc, ch 1, skip FPdc pair, FPdc around next 3 dc] repeat 3 times around.
- Join with sl st to top of starting ch-3. (24 corner dc, 24 FPdc, 4 ch-1 sps, 4 corner ch-2 sps)
- R5 (Framing Border): Ch 1 (does not count as st), sc in each dc, FPdc, and ch-1 sp across each side, working (2 sc, ch 2, 2 sc) into each corner ch-2 sp around. Join with sl st to 1st sc. (17 sc per side between corner ch-2 sps)
- Fasten off, weave in ends neatly. Repeat until you have 24 Slate Blue squares and 24 Cream White squares.
🧶 MODULE 2: CHECKERBOARD LAYOUT & ASSEMBLY
Color Scheme: Alternating Color A (Blue) and Color B (Cream)
Arrange your 48 finished squares into a 6-column by 8-row grid, alternating colors so no two identical colored squares share a side:
Row 1: [ BLUE ] [ CREAM ] [ BLUE ] [ CREAM ] [ BLUE ] [ CREAM ]
Row 2: [ CREAM ] [ BLUE ] [ CREAM ] [ BLUE ] [ CREAM ] [ BLUE ]
Row 3: [ BLUE ] [ CREAM ] [ BLUE ] [ CREAM ] [ BLUE ] [ CREAM ]
Row 4: [ CREAM ] [ BLUE ] [ CREAM ] [ BLUE ] [ CREAM ] [ BLUE ]
Row 5: [ BLUE ] [ CREAM ] [ BLUE ] [ CREAM ] [ BLUE ] [ CREAM ]
Row 6: [ CREAM ] [ BLUE ] [ CREAM ] [ BLUE ] [ CREAM ] [ BLUE ]
Row 7: [ BLUE ] [ CREAM ] [ BLUE ] [ CREAM ] [ BLUE ] [ CREAM ]
Row 8: [ CREAM ] [ BLUE ] [ CREAM ] [ BLUE ] [ CREAM ] [ BLUE ]
🪡 Joining Method (Flat Slip Stitch Join):
- Place adjacent squares face up side by side.
- Join Slate Blue yarn in outer back loops of corner ch-2 spaces.
- Insert hook through outer back loop of Square 1 and outer back loop of Square 2.
- Yarn over and pull slip stitch through all loops on hook.
- Continue slip stitching down the seam across all matching stitches.
- Join all 8 horizontal rows first, then join the 6 vertical columns.
ðŸ MODULE 3: TEXTURED RIBBED OUTER BORDER
Yarn: Slate Blue | Hook: 5.0 mm | Worked around entire perimeter
- R1 (Base Setup Rnd): Join Slate Blue yarn in any outer corner ch-2 sp of assembled blanket. Ch 1, work (2 sc, ch 2, 2 sc) in corner sp. Work 1 sc in each st along edge, working 1 sc into each seam join between squares. Work (2 sc, ch 2, 2 sc) in each outer corner ch-2 sp. Join with sl st to 1st sc.
- R2 (Foundation Hdc Rnd): Ch 2 (counts as hdc), hdc in each st around, working (2 hdc, ch 2, 2 hdc) into each corner ch-2 sp. Join with sl st to top of starting ch-2.
- R3 (Ribbed Post Rnd): Ch 2, [FPdc around next st, BPdc around next st] repeat across edge to corner. Work (2 dc, ch 2, 2 dc) in corner ch-2 sp. Repeat ribbed pattern across remaining 3 sides. Join with sl st to top of starting ch-2.
- R4 (Finishing Sc Rnd): Ch 1, sc in each st around, working 3 sc in each corner ch-2 sp. Join with sl st, fasten off, and weave in all remaining ends securely.
🎨 L. STYLING / ASSEMBLY / STABILITY / FINAL SHAPING
+———————————————————–+
| Ribbed Outer Border |
| +—————————————————–+ |
| | [BLUE] [CREAM] [BLUE] [CREAM] [BLUE] [CREAM] | |
| | [CREAM] [BLUE] [CREAM] [BLUE] [CREAM] [BLUE] | |
| | [BLUE] [CREAM] [BLUE] [CREAM] [BLUE] [CREAM] | |
| | [CREAM] [BLUE] [CREAM] [BLUE] [CREAM] [BLUE] | |
| | [BLUE] [CREAM] [BLUE] [CREAM] [BLUE] [CREAM] | |
| | [CREAM] [BLUE] [CREAM] [BLUE] [CREAM] [BLUE] | |
| | [BLUE] [CREAM] [BLUE] [CREAM] [BLUE] [CREAM] | |
| | [CREAM] [BLUE] [CREAM] [BLUE] [CREAM] [BLUE] | |
| +—————————————————–+ |
| Ribbed Outer Border |
+———————————————————–+
📠Step-By-Step Assembly Sequence
- Individual Square Blocking: Pin each of the 48 squares onto blocking mats to measure exactly 17.5 cm x 17.5 cm. Lightly steam or wet block and leave to dry completely before joining.
- Grid Alignment: Lay out all 48 squares on a flat surface following the checkerboard grid diagram above to verify color placement.
- Horizontal Joining: Slip stitch all horizontal rows together using Slate Blue yarn.
- Vertical Joining: Slip stitch all vertical columns together, ensuring intersections lie flat.
- Border Execution: Work Border Rounds 1 to 4 around the full perimeter.
- Final Steam & Shape: Lay finished blanket flat and give the border a final steam press.
💡 M. HELPFUL CROCHET TIPS
- 💡 Tip 1: Use matching dye lots for both main colors so shade transitions remain seamless across all 48 squares.
- 💡 Tip 2: Maintain relaxed tension on all Front Post Double Crochets (FPdc) to prevent individual squares from pulling inward or puckering.
- 💡 Tip 3: Weave in tail ends on every square as you complete it rather than leaving all 96 ends until blanket assembly.
- 💡 Tip 4: Use locking stitch markers at seam intersections during assembly to keep corners aligned.
- 💡 Tip 5: A cotton-acrylic blend yarn provides optimal stitch definition for post stitches while keeping the overall blanket lightweight and soft.
- 💡 Tip 6: Steam block each square before joining—this speeds up assembly and creates razor-straight joining seams.
🧼 N. CARE INSTRUCTIONS
- 🧼 Washing: Machine wash on gentle/delicate cycle in cold water using a mild laundry detergent.
- 🧼 Drying: Tumble dry on low heat or lay flat to dry on clean towels. Do not hang damp blanket from clotheslines, as wet weight can stretch post stitches.
- âš ï¸ Ironing Caution: Do not apply a hot iron directly to acrylic fibers; use steam only held 3–5 cm away.
â“ R. FAQ
â“ Q: Can I make this blanket larger to fit a King size bed?
A: Yes! Simply expand your layout grid to 10 columns by 12 rows (120 squares total). This will result in a finished bedspread measuring approximately 185 cm x 220 cm (73 inches x 87 inches).
â“ Q: What yarn weight works best for this pattern?
A: Worsted weight (#4) or Aran weight yarn works best. DK (#3) weight yarn can also be used with a 4.0 mm hook for a lighter throw blanket.
â“ Q: Why are my squares curling up at the edges?
A: Curling usually happens if Front Post Double Crochets (FPdc) are worked too tightly. Try pulling up slightly longer loops when executing post stitches, or switch to a 5.5 mm hook for Round 3 and Round 4.
â“ Q: Can I use a needle to sew the squares together instead of slip stitching?
A: Absolutely! You can use a tapestry needle and mattress stitch worked through back loops only for an equally invisible flat seam.
â“ Q: How many total skeins of yarn will I need?
A: Using standard 100 g / 180 m worsted weight skeins, you will need 9 skeins of Slate Blue and 7 skeins of Cream Ivory.